Off and on over the past couple of years I have been fiddling around trying to come up with an Instrument Panel Helm design that I liked. The first 4 attempt went into the "Burn Pile".....no big loss.... thanks to Luan and Hot Glue! !
The old original Bertram design was adequate but only functional at best. Seemed that no matter how hard I tried to seal the area water always leaked into the Head and soaked the toilet paper! ! ! ..... and also got into the ignition switches.
So anyway take a look at the finished product.
Last edited by Harry Babb on Nov 17th, '17, 20:44, edited 9 times in total.
Thats a job I always considered starting then decided maybe I should do something else instead.
The layout, the wiring...maybe this should go here, or maybe it's better there...
Good to hear from you.. sounds like the Bertram gears in your head are turning again. Wish I could see the pics!! (need to update my photobucket account) I'm certain you have created something I need to use on mine.
Scot
1969 Bertram 25 "Roly Poly"
she'll float one of these days.. no really it will :-0
Thanks guys.....Its actually feeling pretty good to think soon I will be back on the water! !
Scot....its not your Photobucket account....its mine. Lot's has changed since I was active here in the "Sandbox"....photobucket being one of the changes....it was once free.
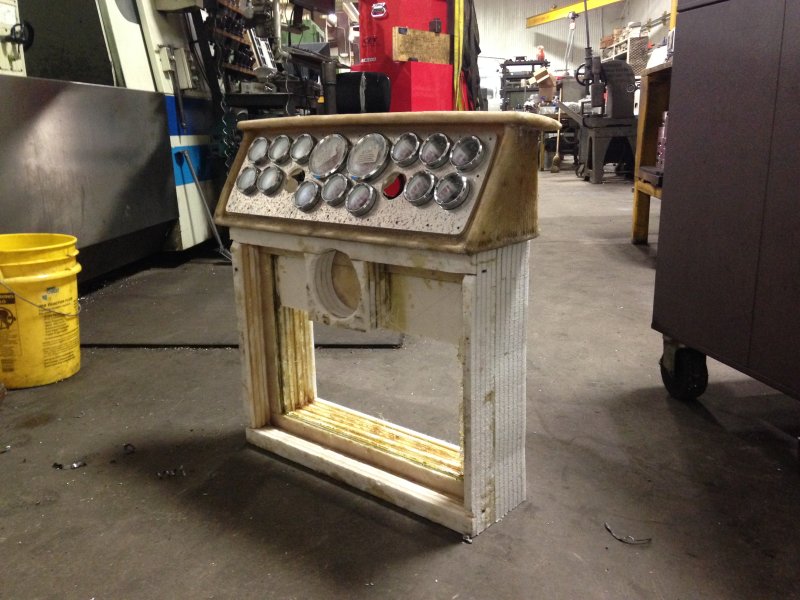
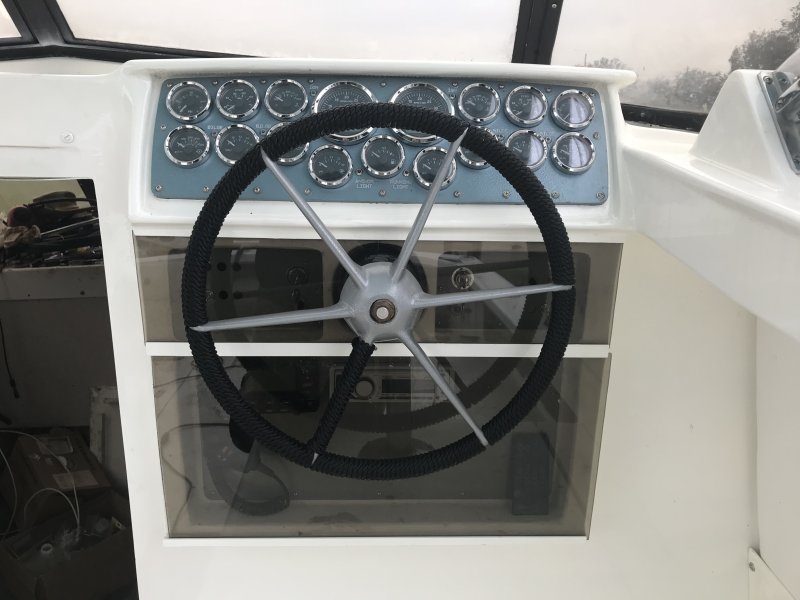
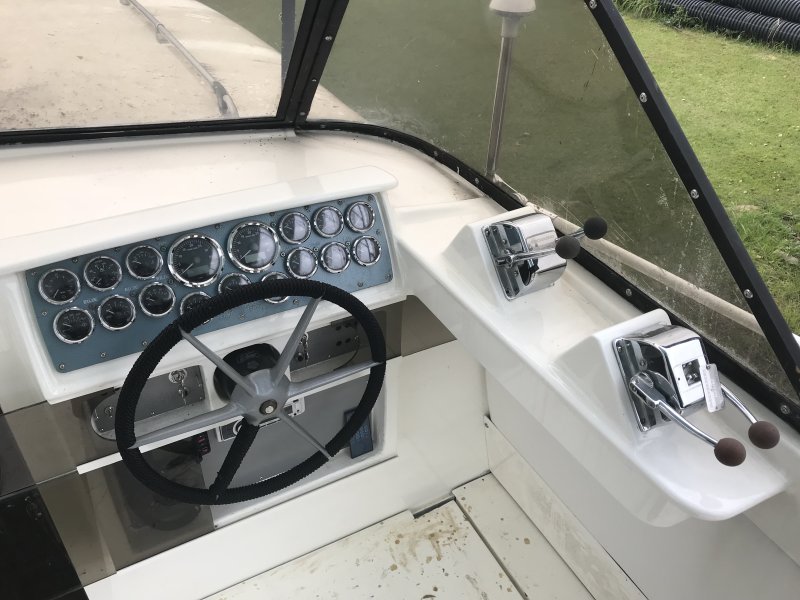
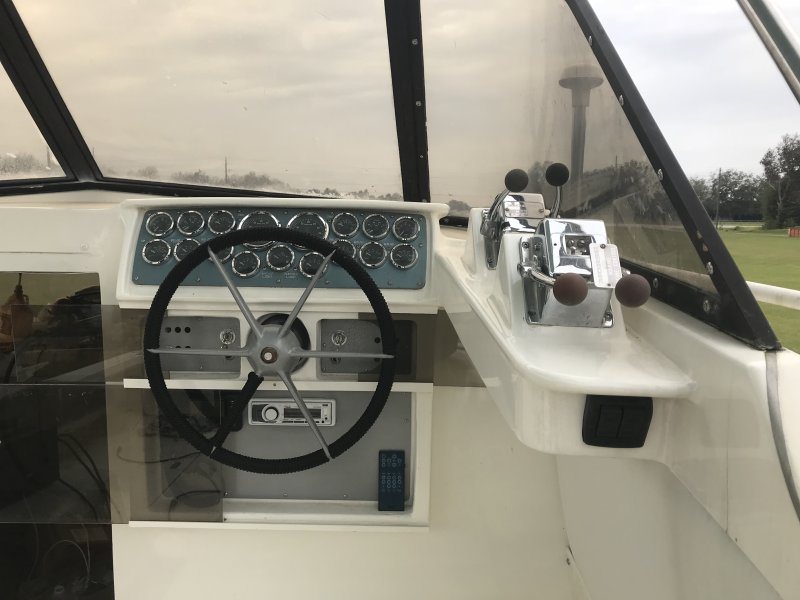
The basic structure is "Foam Board" (cannot remember the name of the material) and Fiber Glass......then installed and tabbed in with Epoxy and Glass. The instrument panel is completely glassed in...no penetrations....at all! ! The panel is aluminum painted with Hammerite to give it the Hammered look. The Wheel is the original Bertram Wheel, wrapped with 1/4" Twisted Black nylon.
And.....yuppppp! ! ! ...... there are 6 "Bilge Pumps"..... ya think I am a little spooked about excessive bilge water?????.... oh yeah! ! !
As soon as I can decide how to work around or with Photobucket I will repost the three pics above as well as more pics.
The instrument panel has been a fun project.....I'm very happy with the results
I think Harry may have posted before PhotoBucket updated his account ths deleting the link/free service. Too bad, real nice pics that you guys are missing out on...
Harry- Here's a quick and EZ if you have a Dropbox account, place pics you want to post in there, Click the pic and choose share link, then copy to the post. Down side is the picture is not shown in the post it needs to be clicked...but it is EZ.
Stephan
Having unlimited access to CNC Machines makes the lettering painless. The entire panel was drawn to size in AutoCad. After printing a full scale template and deciding that everything fit as I intended, we moved to the "Mill" and bored for each gage, drilled for each light and added lettering. The lettering is actually machined into the aluminum panel with a 1/32" Ø Endmill.....the lettering is 1/16" deep. Then the panel was prepped and painted with Hammerite from a spray bomb. After painting I filled each letter with white paint.
The attached pic is actually looking at the backside of the aluminum panel......we were boring for the gages and cutting an O'Ring groove in the backside.....guess I did not get a pic of the lettering operation.
Harry-
That is amazing to me. Reminds me of aircraft panels and faceplates for aircraft radios. That Aluminum looks thick!
Did you run the wiring to in De Nada to a large terminal block and then bundle pigtails for the leads to each gauge?
Also, how do you keep the tinted Lexan pieces from sliding when underway? My B31 rolls a little occasionally...
Best,
Stephan
That is amazing to me. Reminds me of aircraft panels and faceplates for aircraft radios. That Aluminum looks thick!
Did you run the wiring to in De Nada to a large terminal block and then bundle pigtails for the leads to each gauge?
Also, how do you keep the tinted Lexan pieces from sliding when underway? My B31 rolls a little occasionally...
The aluminum IS pretty thick for an instrument panel....its 1/4" thick. It's just what I had around the shop.
I did not run instrument wires to a terminal block. The gages I bought (I will not buy the Onyx model again) are VDO Onyx. Each gage has a "Wiring Harness" that actual plugs into the back of each gage. Each gage has 8 wires (now you know why I will not buy them again). As I remember I only used 4 of the 8 wires...Ign, Sender, Ground and Illumination. To remove the gage it's as simple as unplugging wire connector and then remove the gage from the panel. I think the other 4 wires are intended for use on equipment that has the need to receive data from the gages....only a guess.
As far as the Lexan sliding....I intend to install some sort of magnetic "Keeper"....I've not addressed that issue yet.