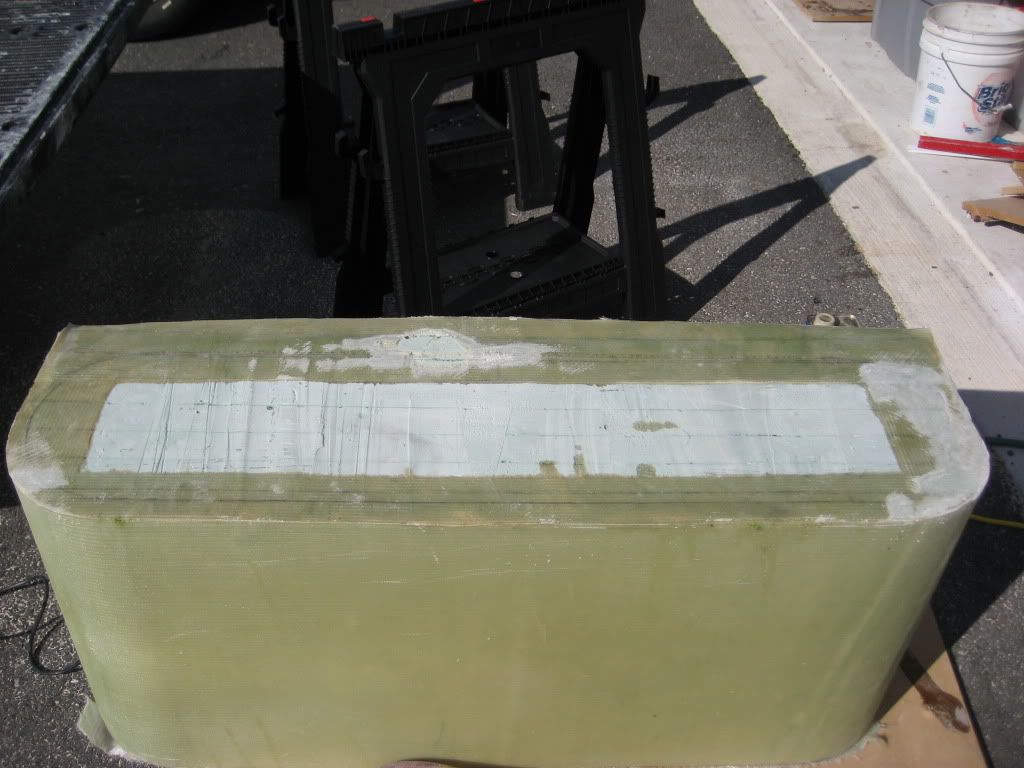
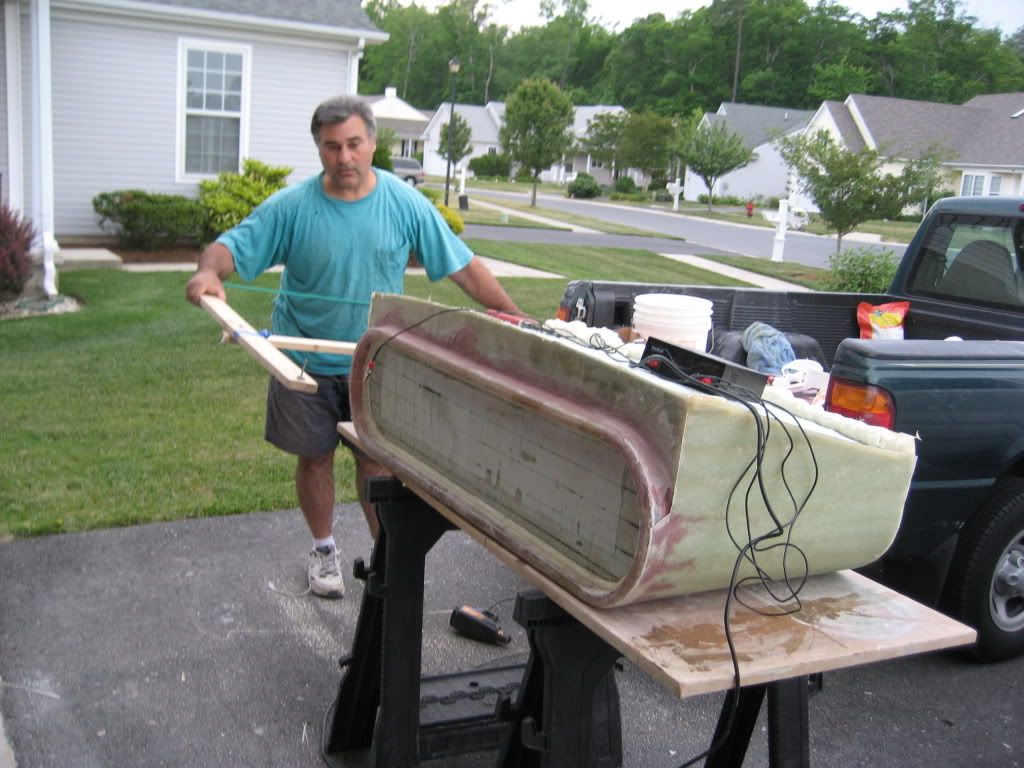
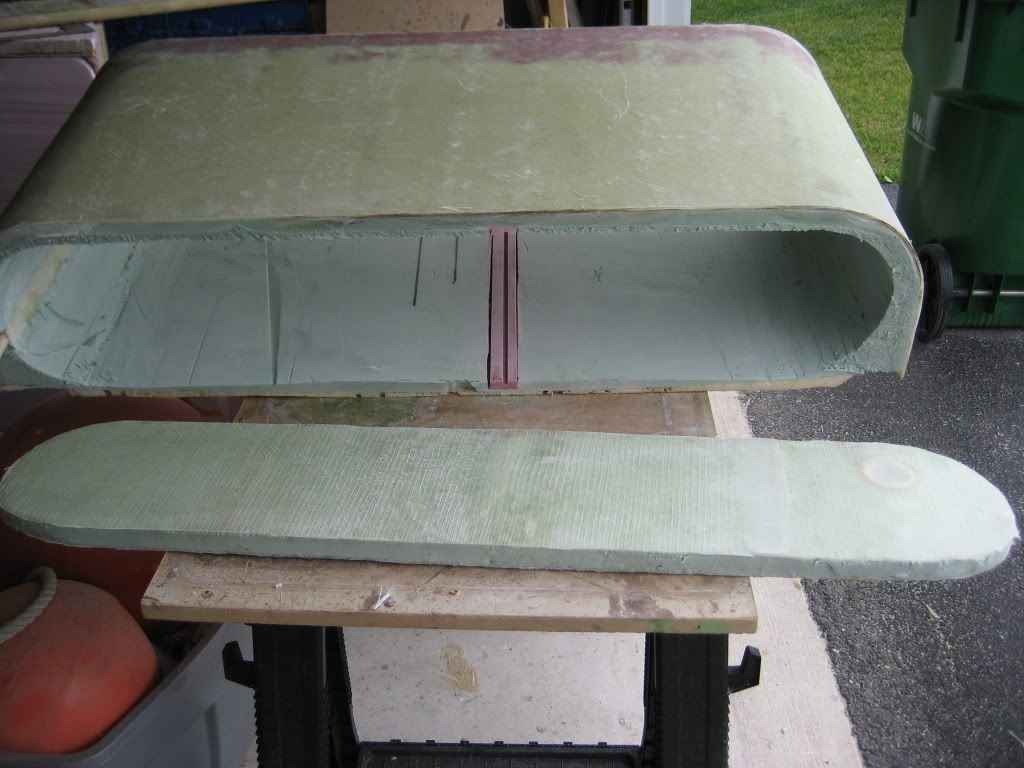
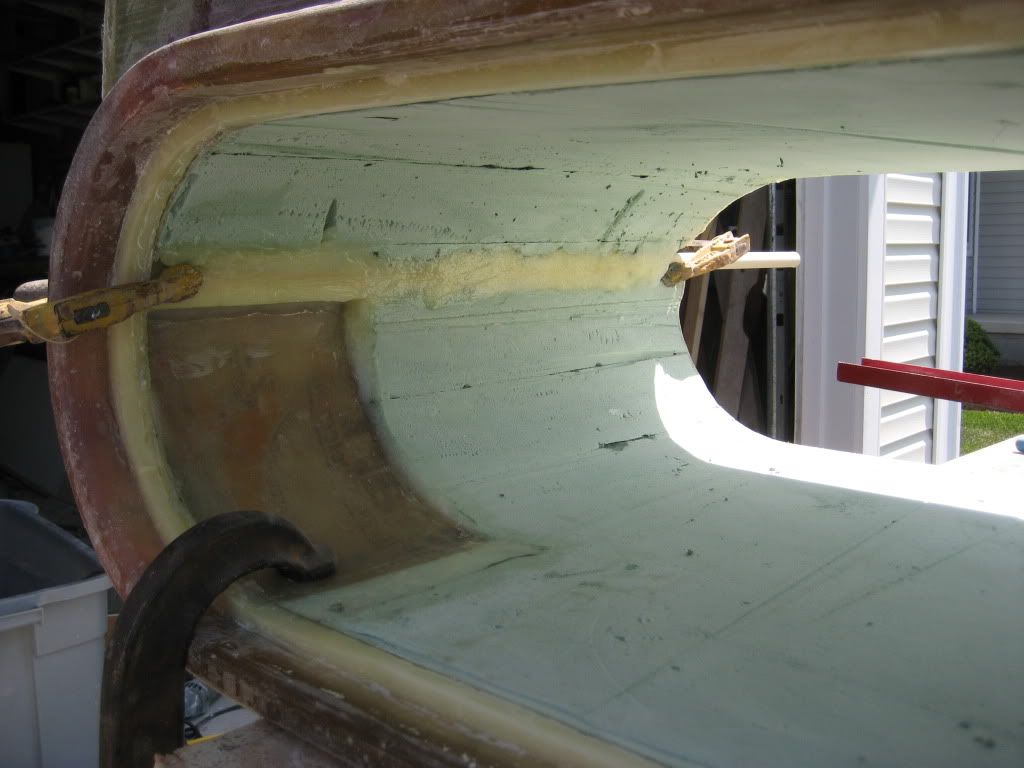
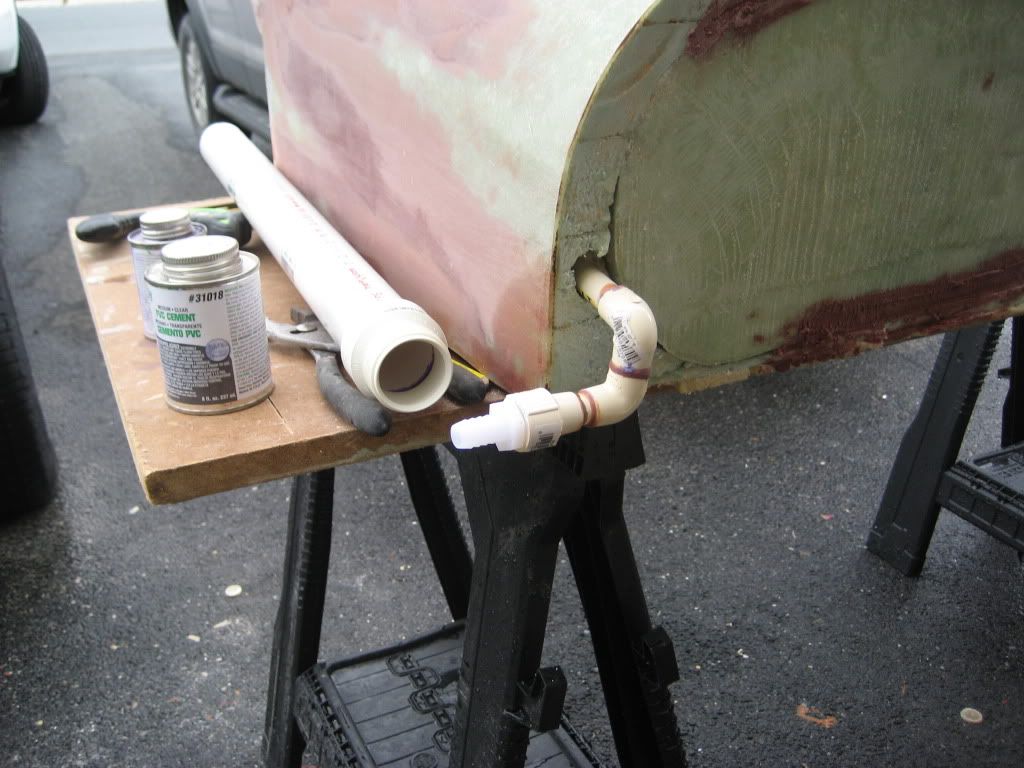
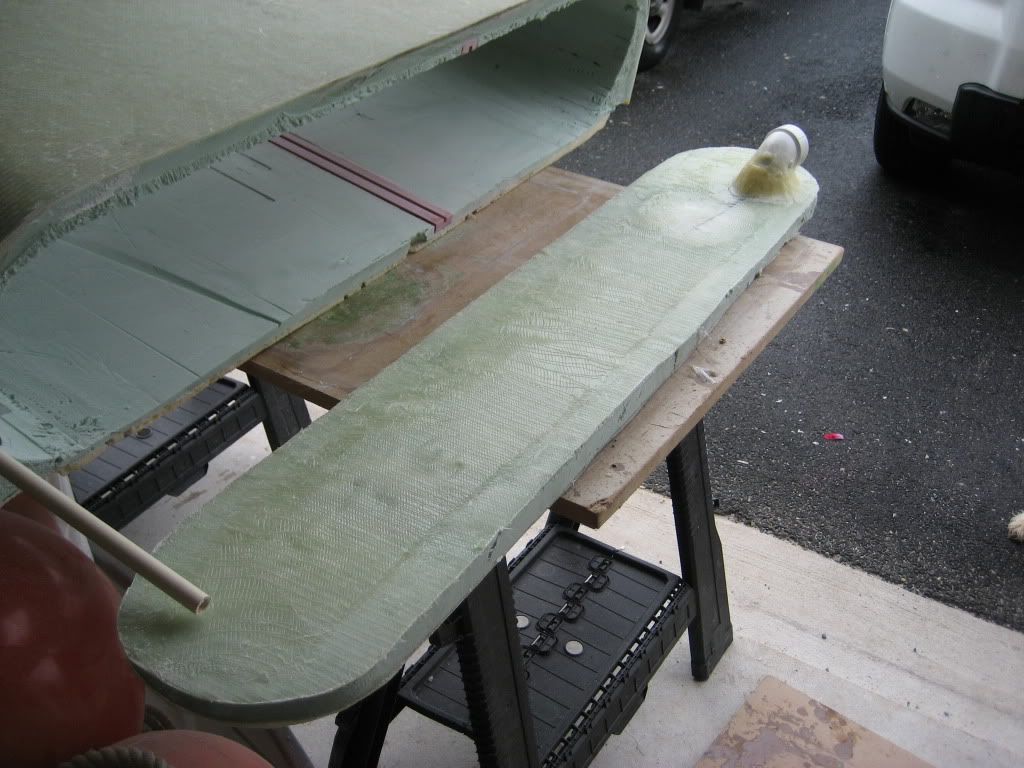
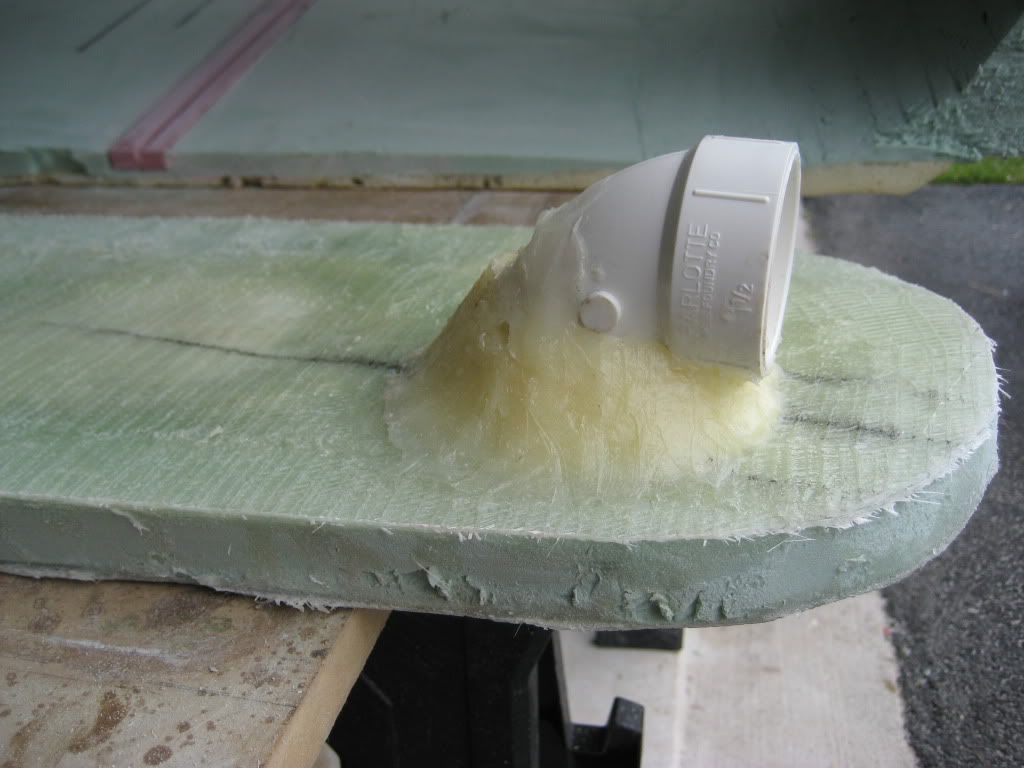
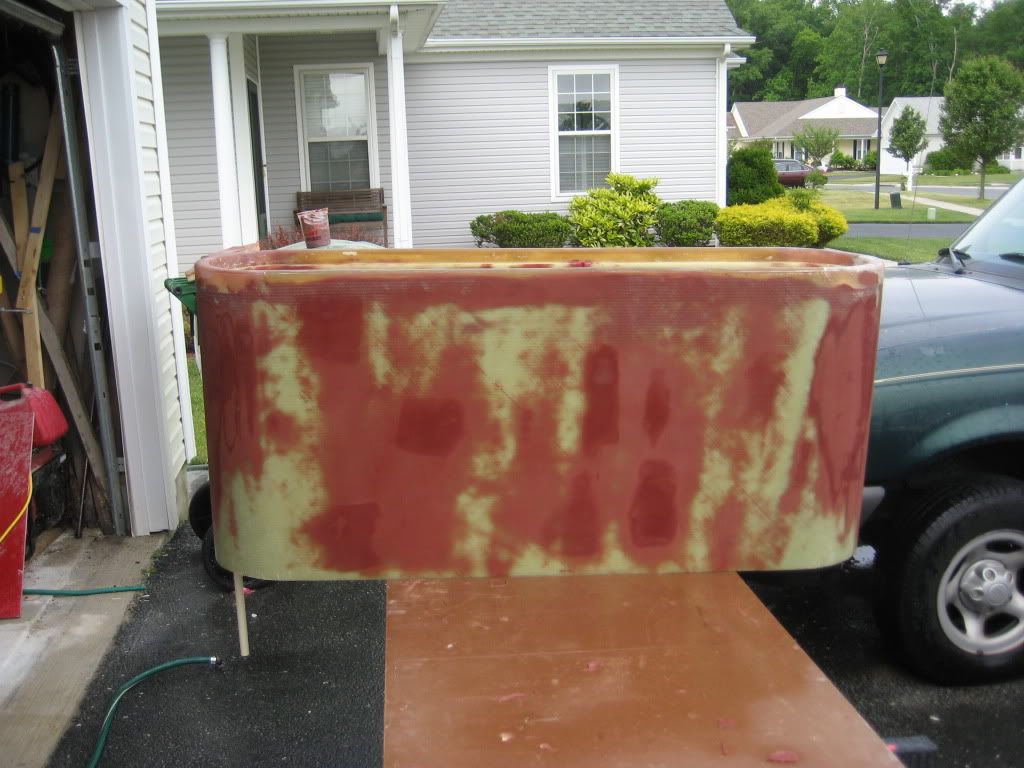
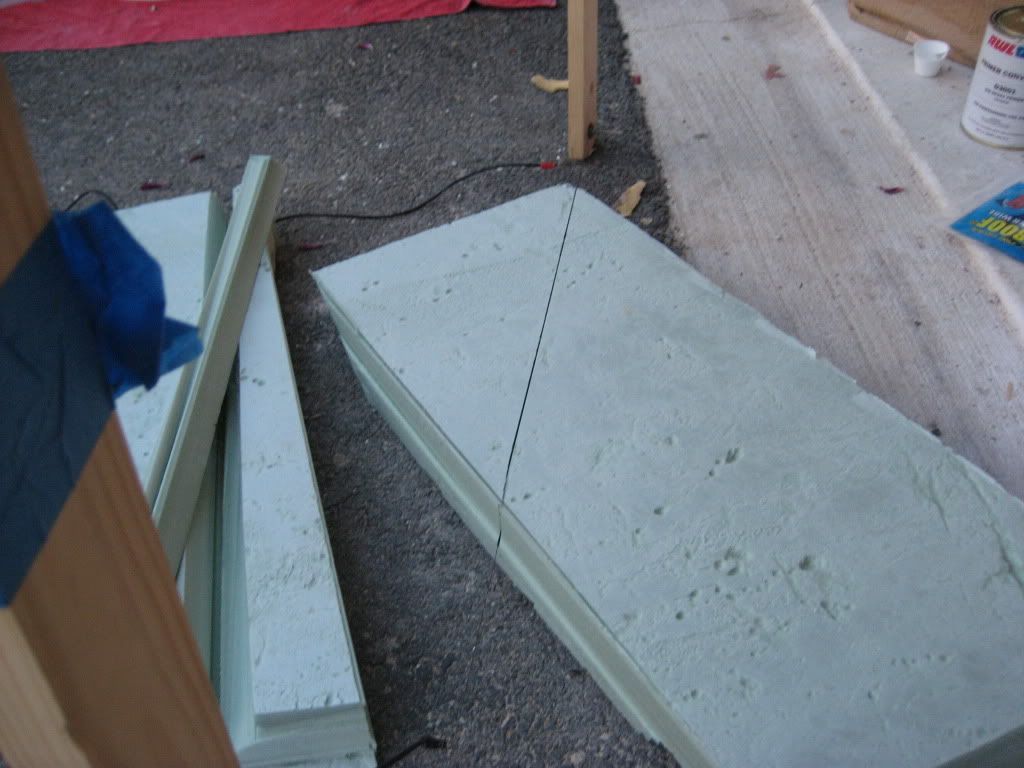
“Imitation is the sincerest form of flattery†or something like that. I wanted to build a livewell/fishbox and I borrowed most of your design concepts. However, I went about the construction with a whole different approach. Instead of making molds and foaming later, I started with a solid piece of foam and hollowed out to make the shape. It’s probably harder to describe than to show so I’ve included a bunch of pictures. I don’t have pictures of the very start where I combined seven (7) 24â€x48â€x2†pieces of insulating foam (from Home Depot) into one block of foam. I used spray adhesive to glue the foam together, no epoxy. I then shaped and scribed that block of foam to match the transom. After I was happy with the fit, size, etc. I glassed the outside of the block using all epoxy and three layers of 1708 biaxial. After the outside was glassed, I cut out the center section with a hot wire cutter. I used to be into RC airplanes when I was younger and used to make foam wings. I borrowed the technology. After adding the plumbing and the baffle slot, the inside was glassed. It’s been a lot of work, but I like the outcome. I can’t wait to mount it.
Block of foam shaped and fiberglassed
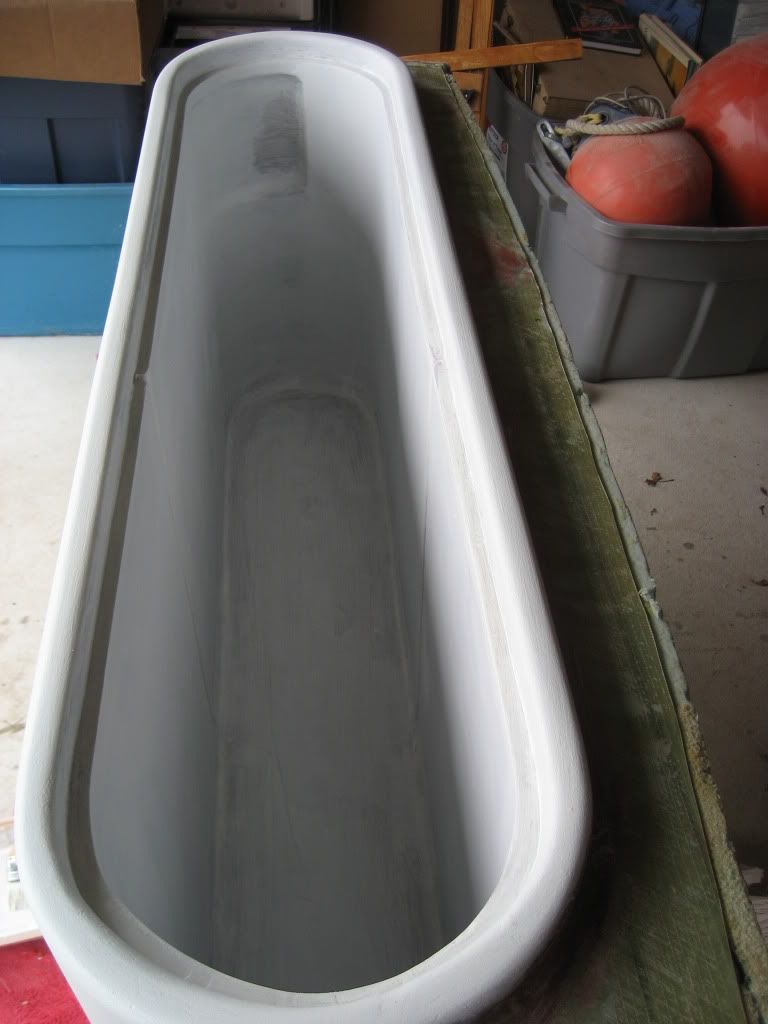
Molded Lid and Rim
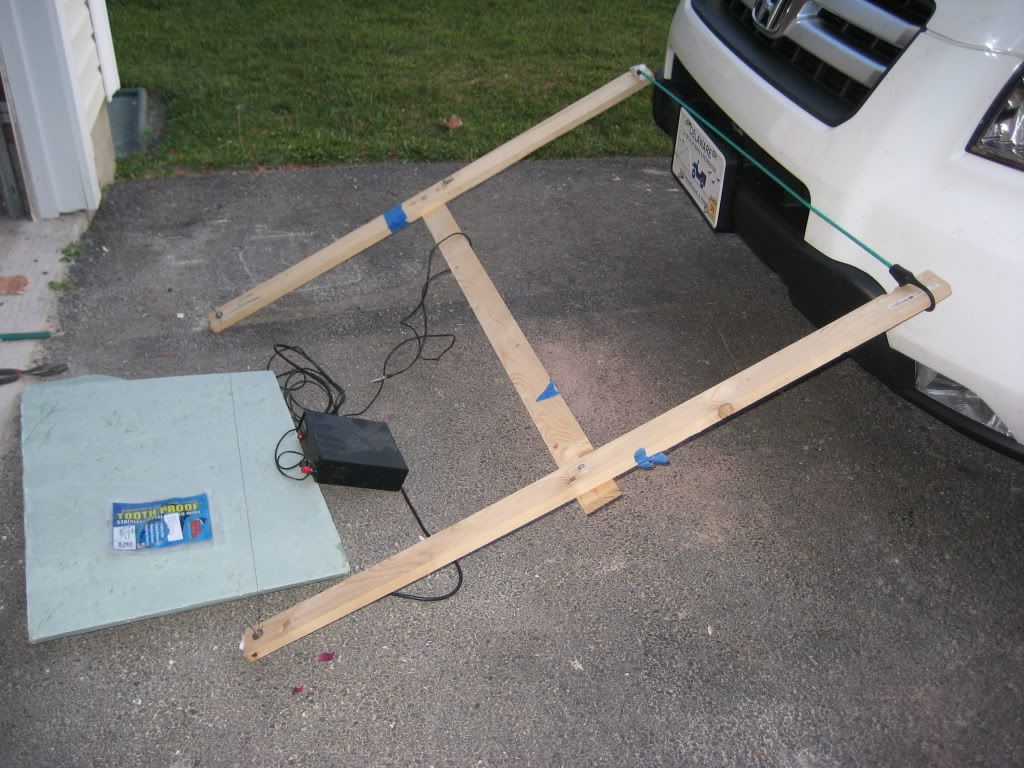
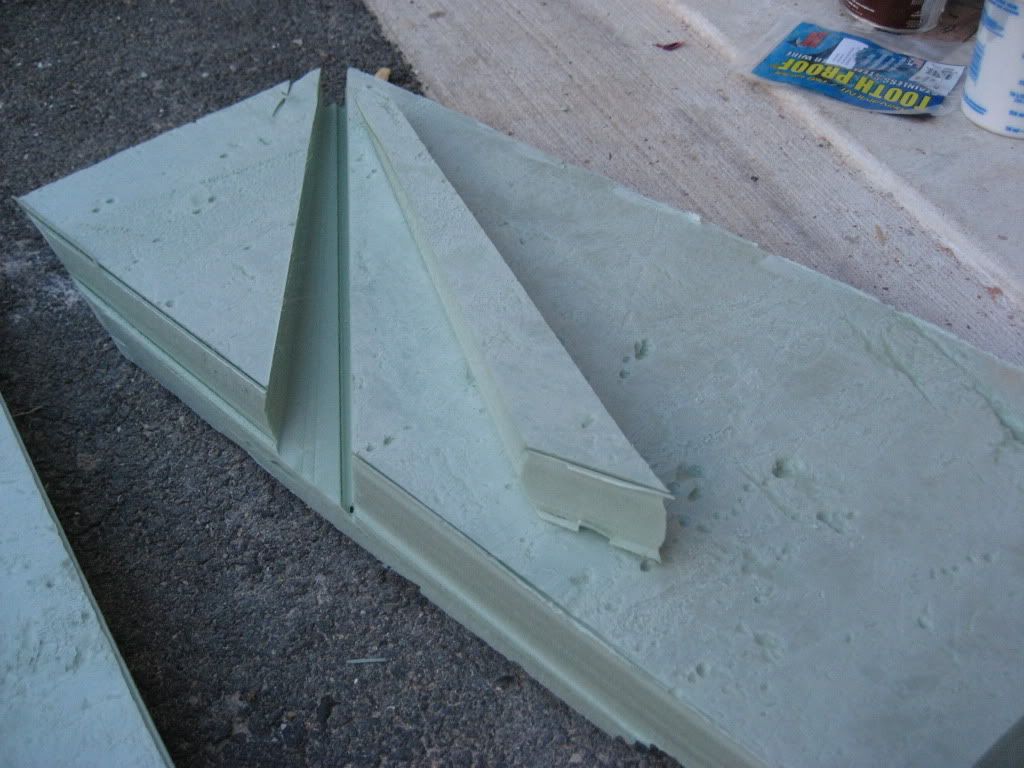
Hot Wire Foam Cutter
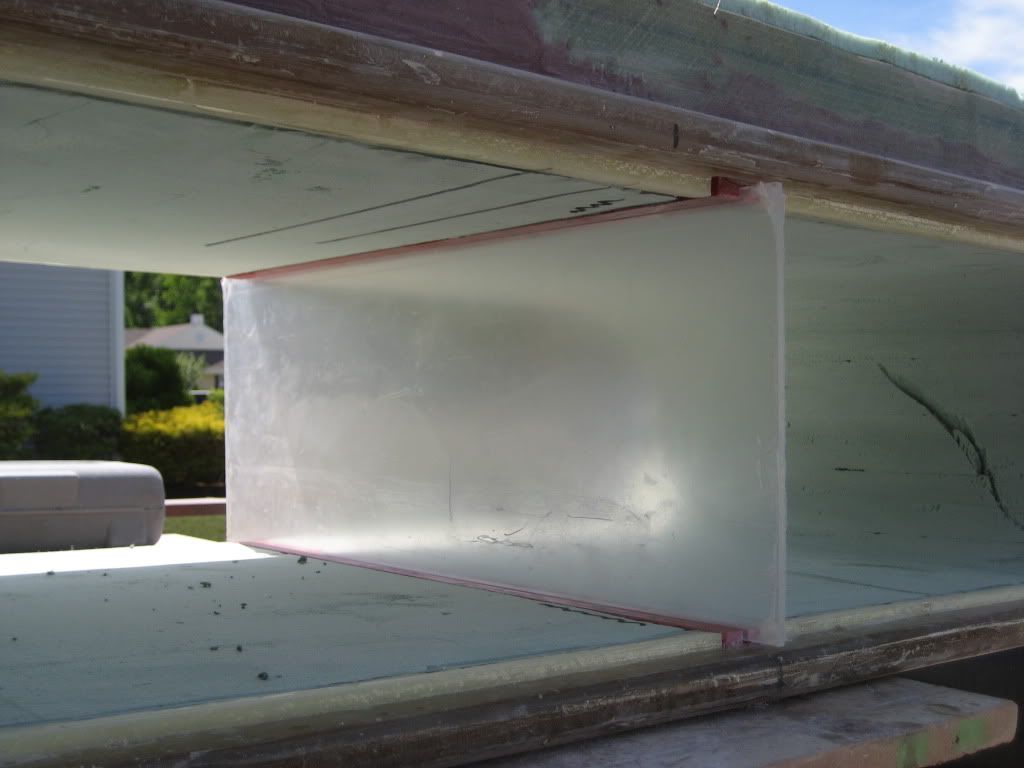
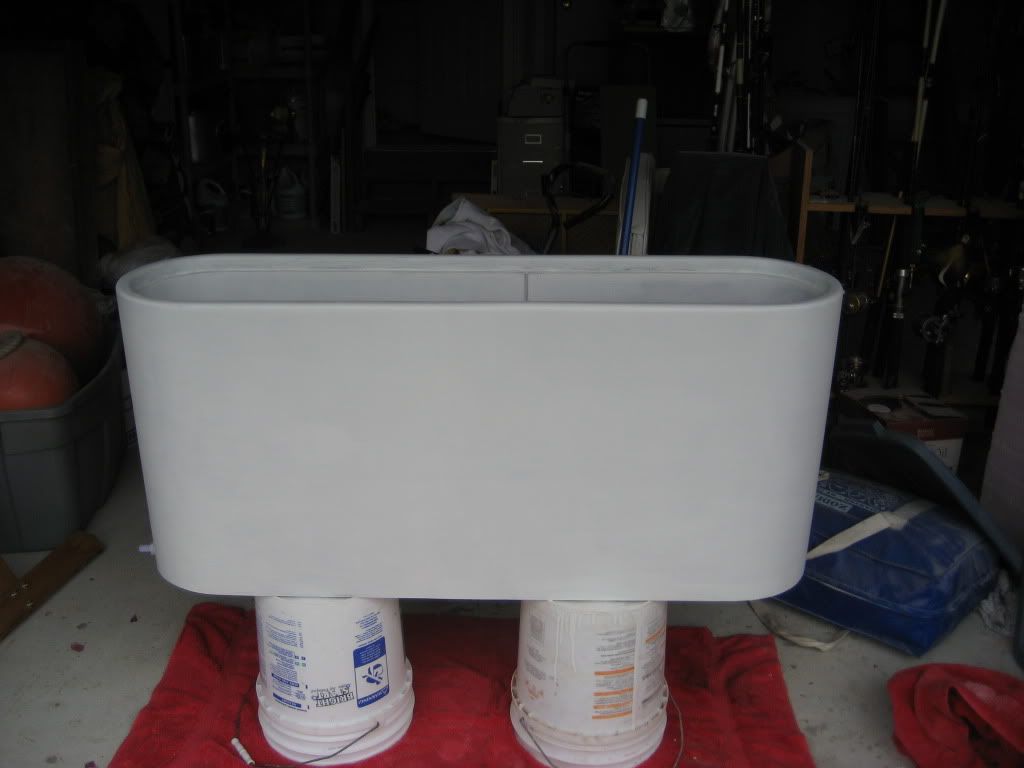
After Cutting (Note inset routed piece of solid fiberglass for baffle)
Great job Vince....simple and sweet...who cares how long it takes...give each of us the same task and most of us would find different paths to the same place...gotta love this site...BH
1966 31 Bahia Mar #316-512....8 years later..Resolute is now a reality..Builder to Boater..285 hours on the clocks..enjoying every minute..how many days till spring?
Thanks guys for the compliments. No problem Capt Patrick. I'll post some pictures of the hot wire cutter tomorrow. It's pretty simple. Search the RC model airplane sites and you'll find tons of info.
Brewster, the weight is as follows:
Inside dimensions = 45"x22"x10"= 9,900 cu. in.
9,900 cu.in. x 1 cu.ft./1728 cu. in. = 5.73 cu. ft.
62.4 lb/cu.ft x 5.73 cu. ft. = 357 lb
Not too bad. That's just a little more than some of my crew members! I'll definately post some pics after installed.
super nice work and my mind is turning because this job with a little twist can be used as under cockpit floor kill box and with the insulation ,the box will be so much better. please give us novice a little insigh on the wire cutting process.
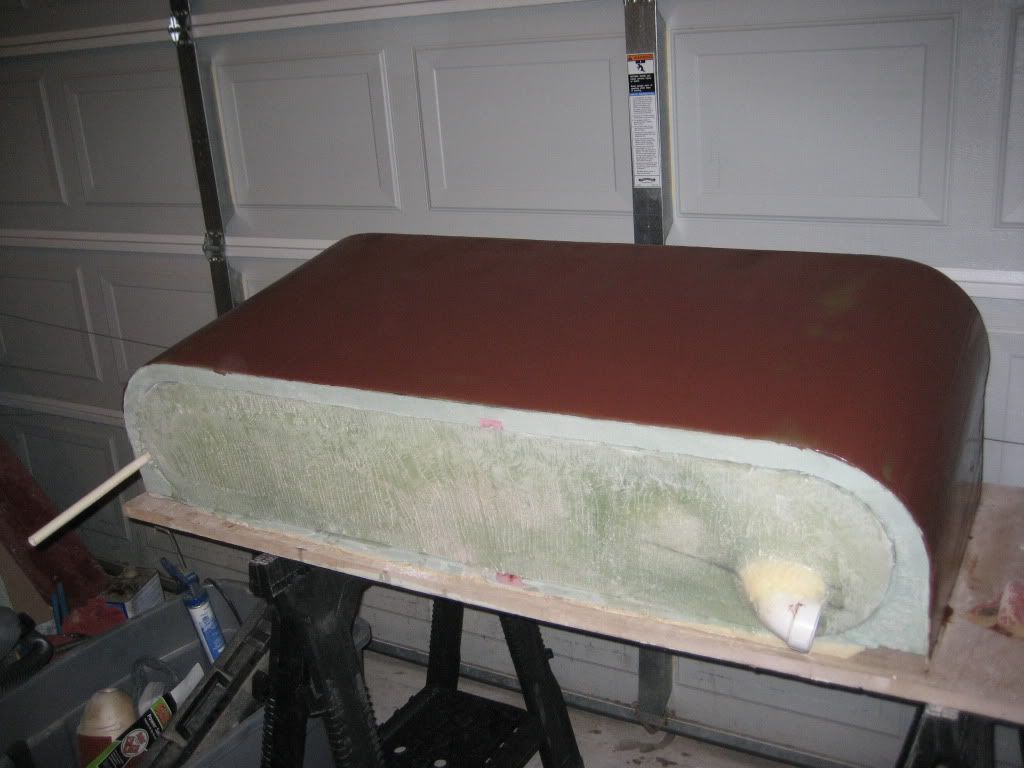
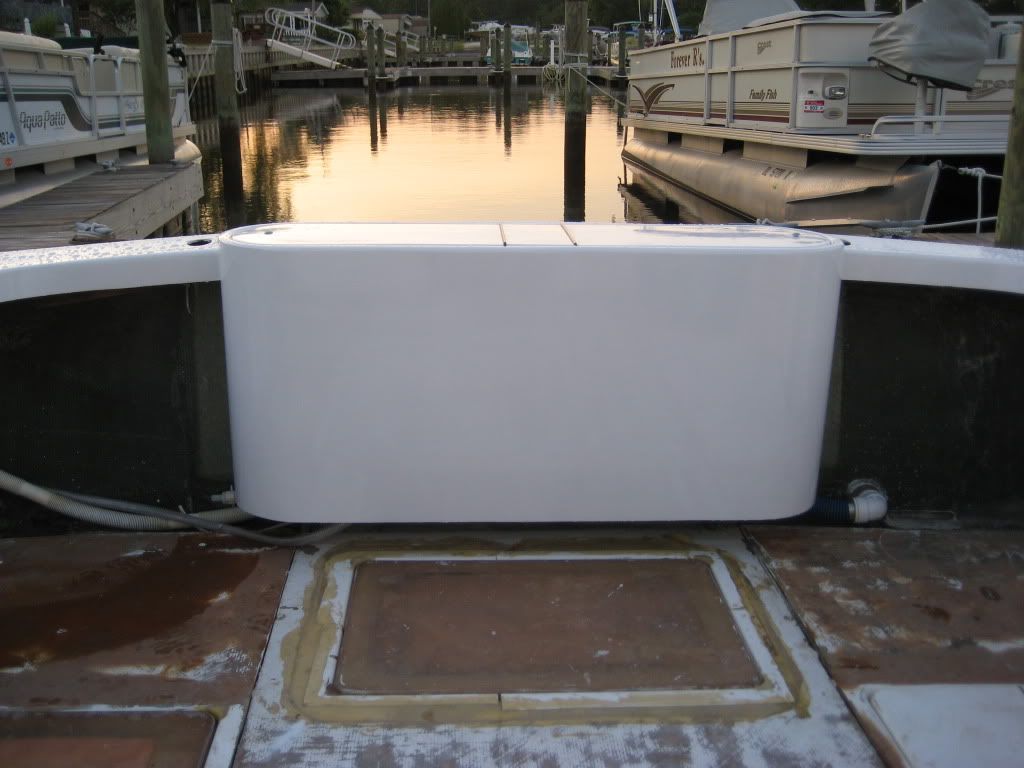
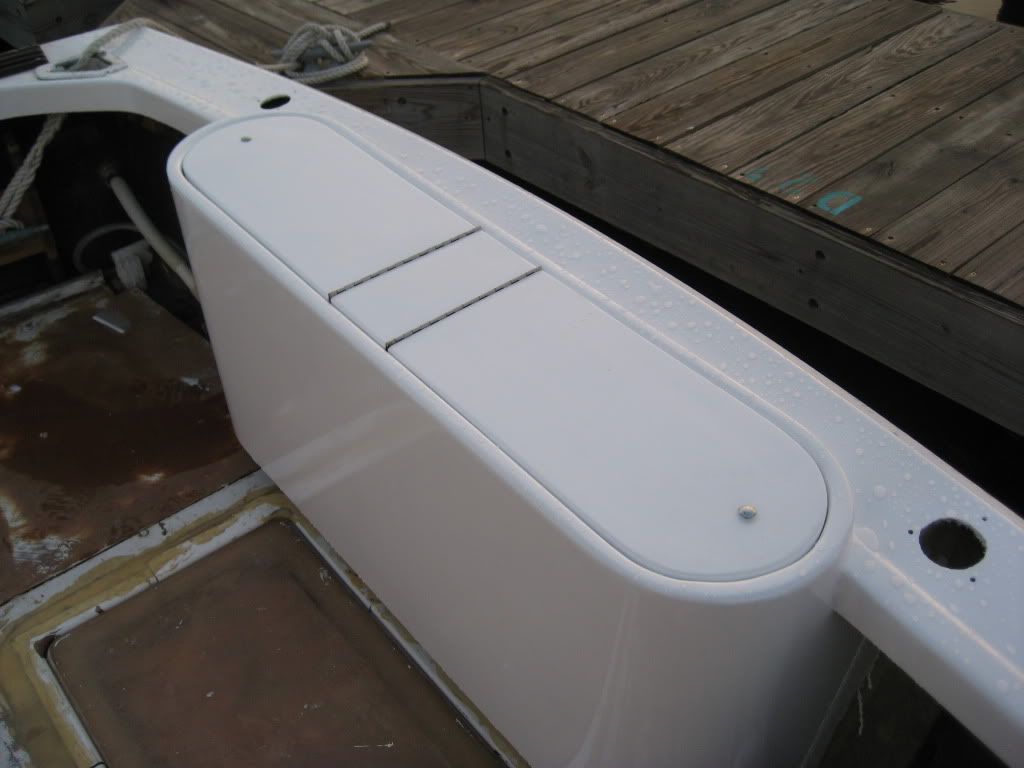
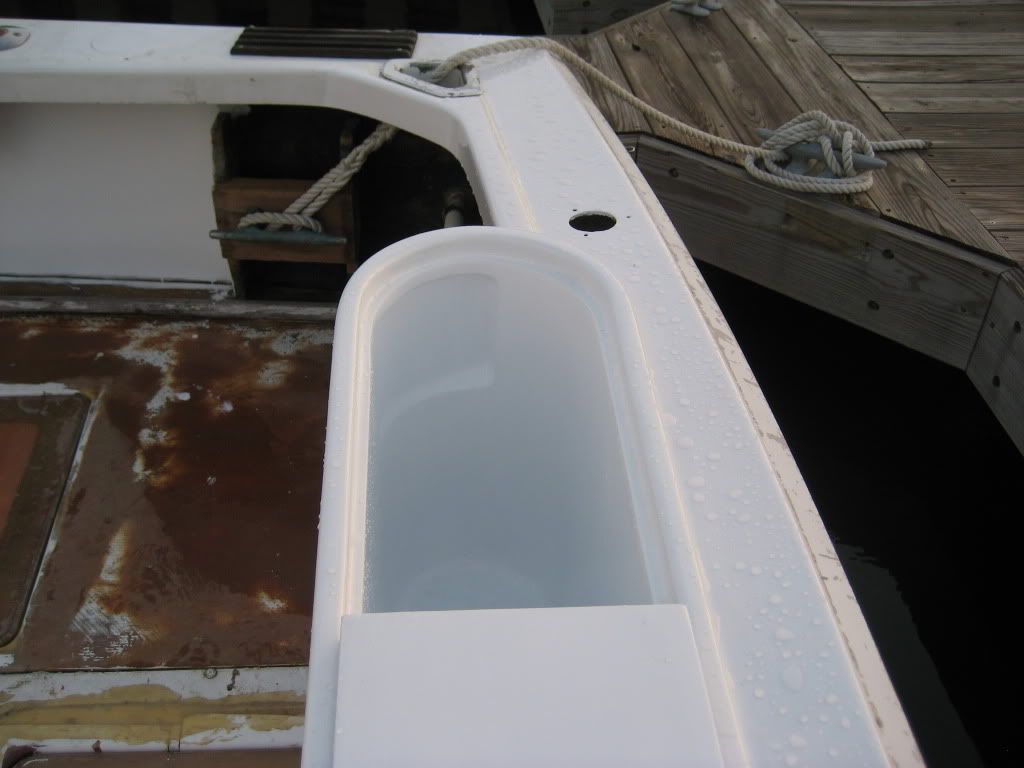
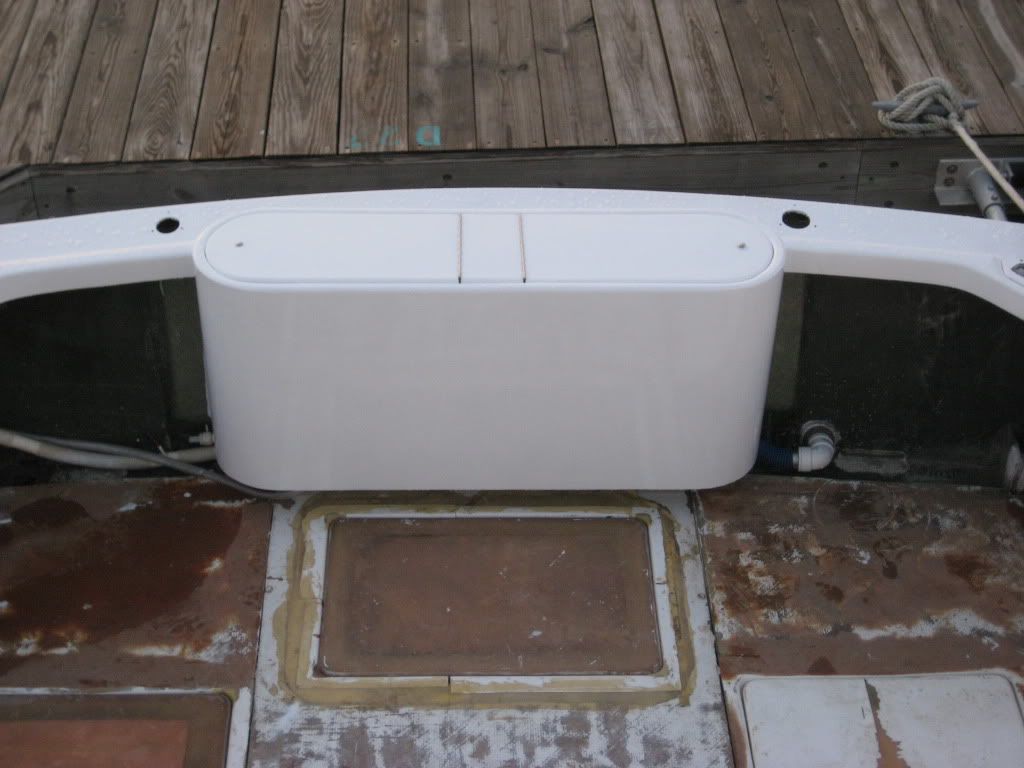
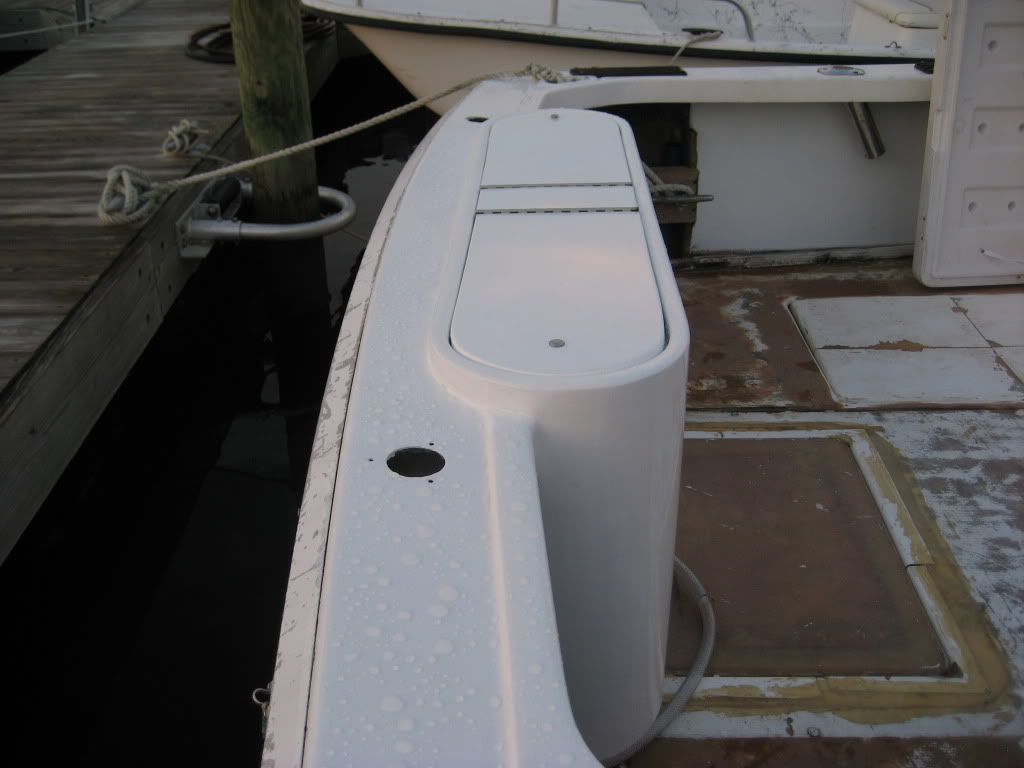
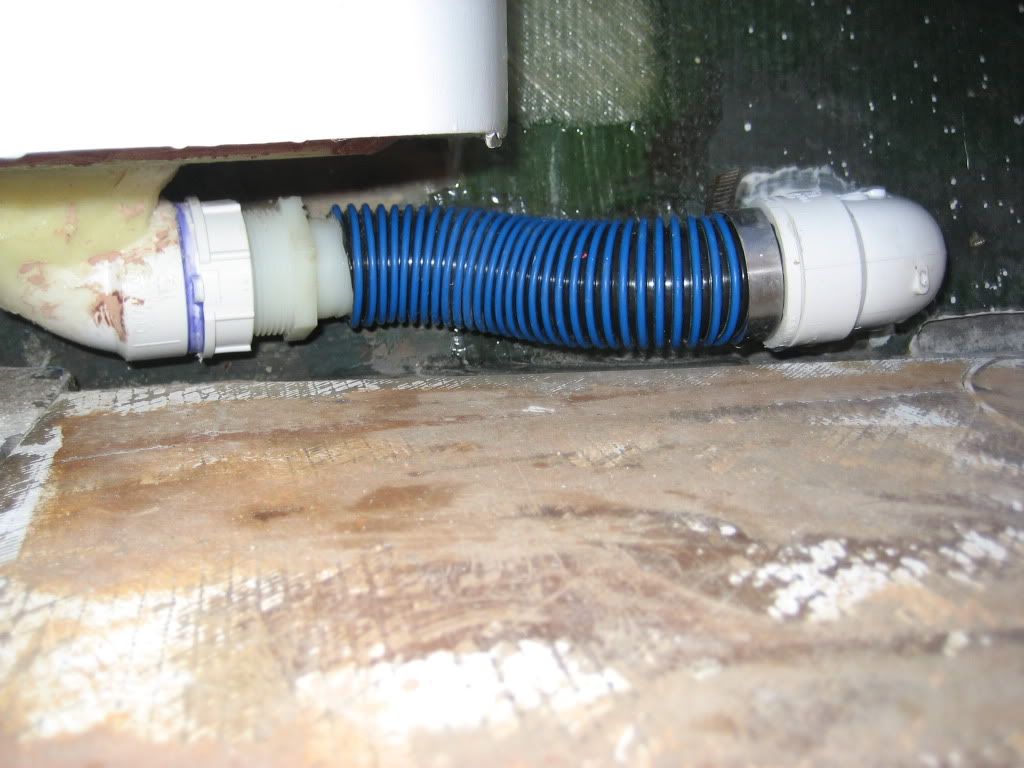
I finally have some installation pictures for you. I could use one more coat of paint. The paint is Interlux Perfection Snow White brush applied with roll and tip method. I’m still trying to figure out my method of holding down the lid. I like the idea of having a removable lid. I might have to steal Capt Pat’s stainless pins and bolt design. You may have noticed that I offset the baffle so that it could be removed if I decide to mount the center lid more permanently.
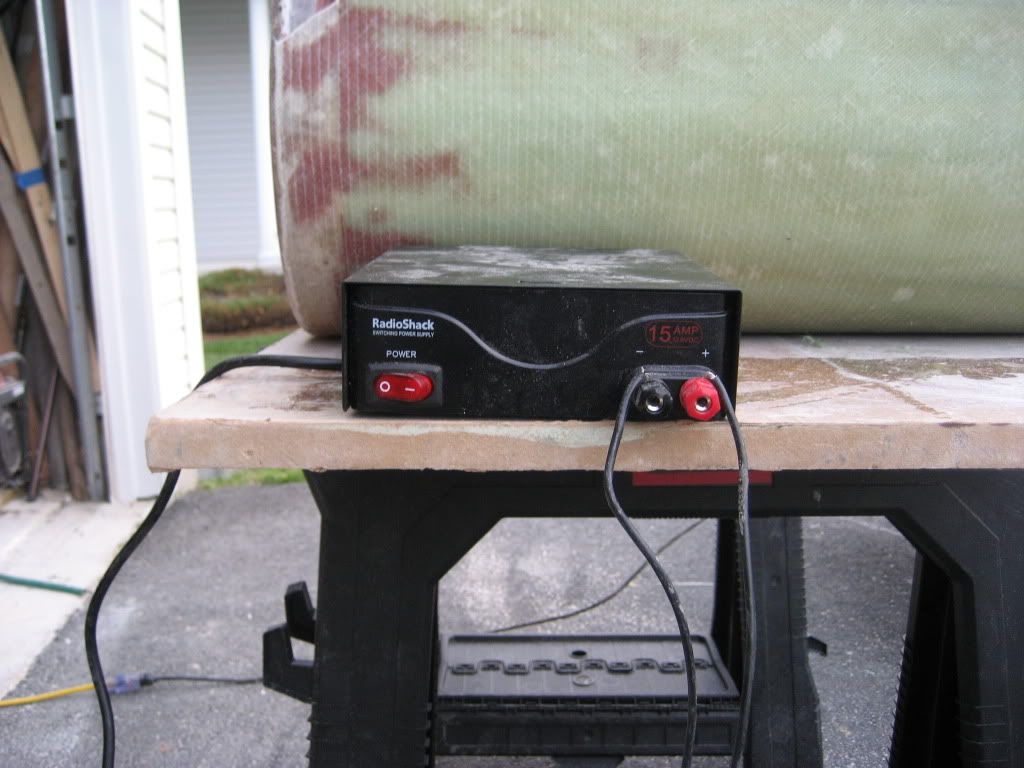
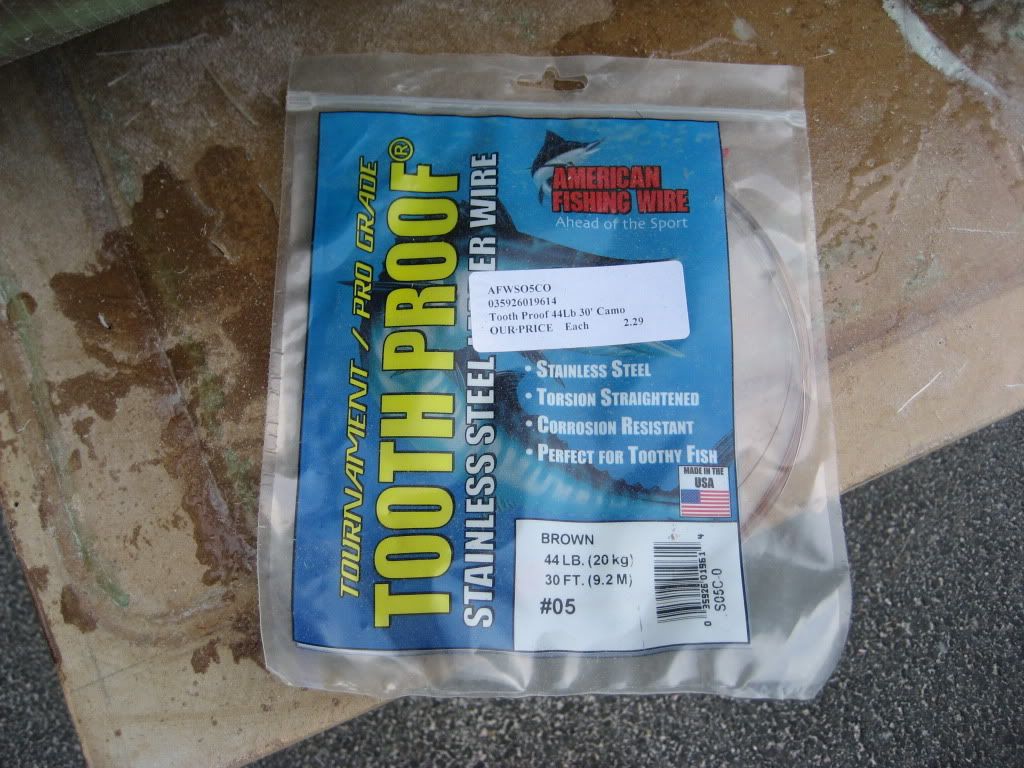
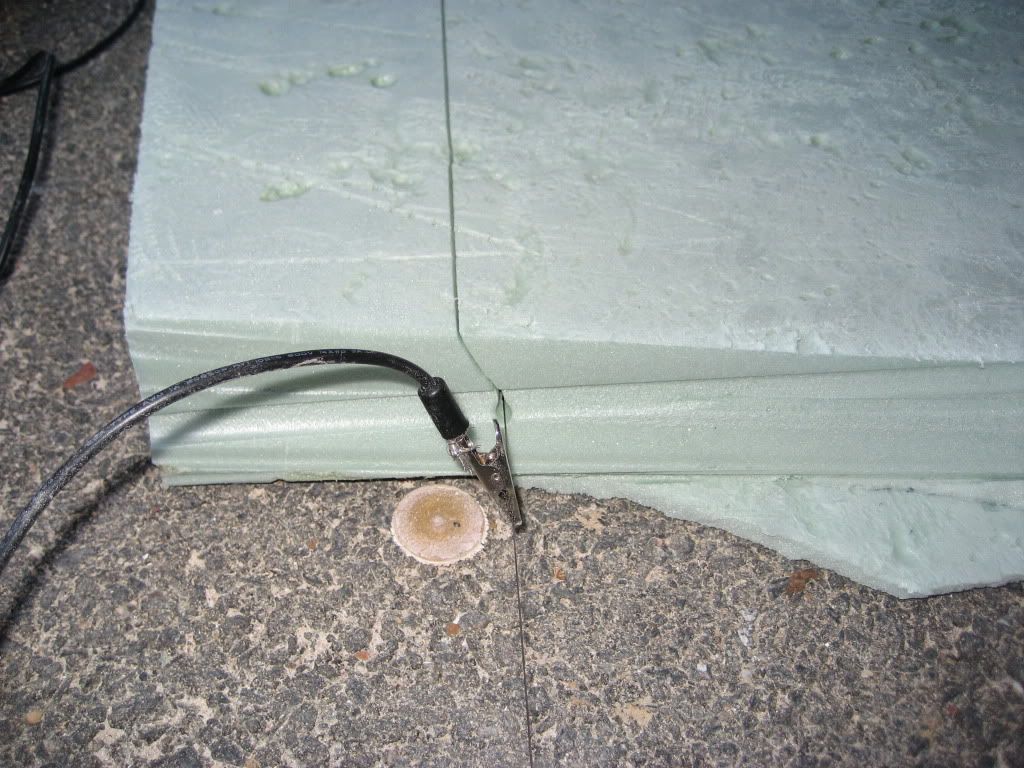
Some of you had asked for some details on the hot wire foam cutter. I apologize for taking so long in getting back to you but I’ve been a little busy lately. The hot wire cutter is really pretty simple. You can see I made a simple frame with 1X3’s (I think). The wire is stainless wire that you get in any tackle shop. I use smaller diameters for the longer cuts and larger diameters for shorter cuts. You can see from some of the earlier pics I used 44lb test. The power supply that I used is a 12V power supply from Radio Shack. I had that around in my shop. I’ve heard that battery chargers can work as well as doorbell transformers with dimmer switches for power control. I’ve included a long link that has way more info than you are probably interested in. But, it does provide many designs for the cutter. The power is applied to the wire with alligator clips. I try to keep them as close together as possible to get the maximum heat when I'm making longer cuts. If you get them too close the wire will burn up. You have to play around with the gauge of the wire if your power supply is constant (like mine was). If you have a variable control power supply you can simple play around with the power settting. The bungee cord keeps the wire tight. When you apply the power to the wire it heats up and makes a nice clean cut. If you run the wire across a form you can cut any shape you want. When I cut the livewell, I made a top and bottom form from MDF and offset the top form from the bottom form to get the angle of the transom. (if you look at the second picture of my first thread you can see one of my forms laying on the ground under the livewell). I scribed the curvature of the transom onto the same MDF forms. I’m sorry I don’t have any pictures of that.
Thanks again for the compliments. All of you guys have inspired me with your projects. By the way, the deck is a work in progress as I have been installing fishboxes below deck this year. That’s for another post. I'd be happy to answer any questions on the hot wire cutter.
Very nice work Vince, it came out very nice indeed. I have a power supply, but didn't realize that I had a wire cutter, thanks for info on the building the foam cutter.
Scot
1969 Bertram 25 "Roly Poly"
she'll float one of these days.. no really it will :-0
Use some wide velcro strips under the smaller central panel (both surfaces) and it will hold it down under the worst of conditions, yet you can remove the whole thing manually at the dock if you want to. Beautiful job. Walter
I used awlgrip 545 primer, no high build. I did the major smoothing with epoxy and microballons. I didn't have any compatibility problems between the awlgrip primer and the interlux perfection. I had done it before (awlgrip primer and interlux top paint) so I knew it would be OK. Hand sanding with a longboard is the key to getting a good paint job.
Walter, I love your velcro idea! That's just what I was looking for, something easy but will work. Thanks guys!