|
bertram31.com  Mechanical Section Feature Articles |
Bruce is Owner and Senior Mechanic of Southeast Marine Services, Inc. in the Palm Beach, Florida area. His extensive background, in Marine Mechanical Systems, encompasses both gasoline and diesel engines, air conditioning, and electrical and hydraulic systems.
"Bruce is one of the most 'In Demand' Systems Technicians we have in our area. His expertise is exceptional!"
(Capt Patrick McCrary, webmaster)
|
Repowering Gas to Diesel
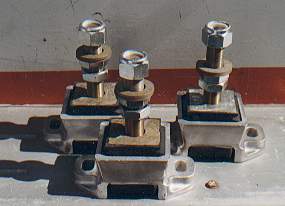
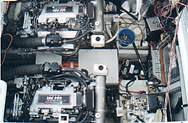
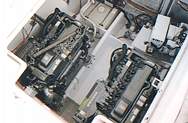
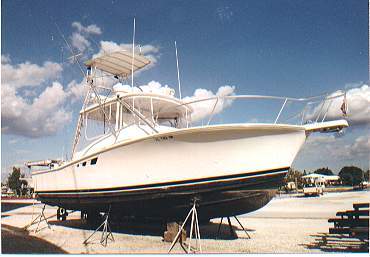
This article is not intended to be a step by step procedure on how to re-power from gas to diesel. But hopefully we will give you enough information to be able to make intelligent decisions when considering or attempting this type of re-power. This information will cover two boats, a 31' Bertram and a 32' Luhrs open. The engine used for these re-powers were the Yanmar 6LP-STE 300HP version. It is an overhead cam, 4-valve per cylinder, 3800-rpm engine. It weighs the same as a 7.4L big block with a narrower width and slightly longer. The gears used were Hurth/ZF 600A, 2:1. The reason I chose these engines over Cummins was weight, size, sound level, and that I have been working on them for over 25 years, and am impressed with the longevity. Don't get me wrong Cummins are good engines. I just prefer Yanmar. Before we get into the specifics, there are some generalizations that will apply to any gas to diesel re-power. 1. Can I afford it? On to more specifics... I will try to combine aspects from both re-powers into the following: Removing the old engines from the Bertram is easy. The hatches come off and there're open to an easy crane service. The Luhrs is not so easy. The engine hatch is under the hard top with about 7' of clearance. The hatch normally comes up 3 feet, but needs to come up vertical to remove the engines. Unfortunately the helm hits the cabin structure when more than 60 degrees so it has to be removed. This involves disconnecting the steering, all electrical and controls cables, unbolting and removing. Once off, the hatch support cylinders can be removed and the hatch open vertical. Removing the engines requires a skillful crane operator and a mechanic that knows the proper hand signals to signal the crane operator. Trying to shout directions back and forth will lead to problems and possible injury. Once the engines are out remove all the old wiring and plumbing that will not be reused. This is a good time to thoroughly clean and degreases the engine room. Painting is an option, but makes for a complete installation. The owner of the Bertram cleaned the engine beds and had them painted gray. Patrick Awlgriped the engine room and the water tanks white. It turned out beautiful. 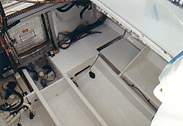 (click for larger image) At this point the engines should be ready to go in. It's best to install the exhaust system changes if needed within a couple of feet of the engine and any other equipment that might be hard to get to once the engines are in. Both the Luhrs and the Bertram needed no change to the exhaust system. 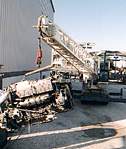 (click for larger image) The Yanmar has 4" exhaust, as did the Bertram. The only thing was the connection to the outlet with which a few fiberglass elbows took care off. The Luhrs has 5" out the back. The mufflers were removed, as they were not needed. One important note about exhaust systems. You must ensure that the flow of water out the outlet of the engine is on a constant down angle to prevent water from backing up into the engine. If the outlet on the engine is below the waterline, you will have to use either a special elbow to lift the outlet above the waterline or use a lift type muffler. The engine bed on the Bertram had to be modified. The width was okay but the height of the engine had to come down. The mounts on the transmission had to be moved to the middle position on the Yanmar. There are 3 mount points on each side. When you tuck the gears back under the deck to meet the shaft there are no stringers to use the gear mount. Approx.. 2" in stringer height had to be cut to bring the coupling into line with the gear flange. The stringers could be capped with aluminum but the owner opted to epoxy over the fresh cut wood and the mounts were lag bolted down. The stringers in this Bertram had been replaced and reinforced with cross bolting so I had no problem in doing this. Otherwise I would have preferred to use an aluminum cap over the stringers. 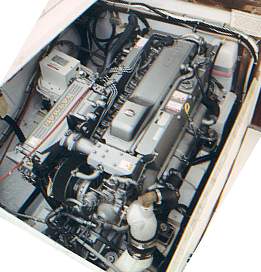 The Luhrs was easier. The same model gear was used so the aft brackets were already in place. The forward mount brackets had to be moved slightly forward. This allowed the engine mounts to sit square on the brackets.
Engine alignment is critical so this is where you should take your time. If you need new struts, the engines will have to be in place within a 1/2" of final bolt down. You will need to know what diameter props you will be using. The best way to accomplish what angle and length changes you will need to make is to make a pattern of the strut out of PVC foam board. Leave off the cutlass circle and extend the vertical part a few inches. Remove the strut you make the pattern of and bolt the pattern in place. Take a string and attach to the center of the output shaft on the gear and put out through the stuffing box. This will represent the shaft. Right behind the strut pattern where the prop would be take the needed prop diameter and divide in half. Measure from the bottom of the hull this measurement and add at least 10% of the diameter for clearance. Take the string to this height and mark the strut pattern fore and aft. This will be your new angle. Make sure the string is coming out the stuffing box hole in the center. If the struts have a dead rise to them, your fabrication shop can just reverse the pattern for the opposite side. When the new struts are done, bolt in place and run the shaft through up to the gear and install the coupling. The shaft should be coming through the stuffing box in the center. If not the struts may need to be shimmed. 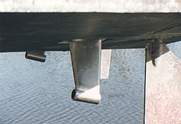 (click for larger image) Once everything is dry fit and determined to be correct. Disassemble and use 5200 to caulk the struts and bolt down tight. Once bolted down, reinstall the shafts and coupling. Align the engines between .005 and .003. This will ensure trouble free operation. After the engines are bolted down, the alignment should be checked again to see if it moved and it should also be done again once the boat is in the water to make sure none of the stringers were twisted on the stands. 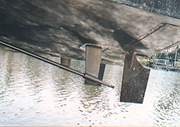 (click for larger image) Once the engines are bolted tight you can start hooking up electrical, controls and plumbing. When hooking up the controls, open and close the throttles making sure the wide-open throttle is reached. I was called to a boat to replace the control cables about a year after a re-power. On sea trial we were turning 300 rpm's more than it had been. The owner wanted to know why, I said because the throttle was never reaching the WOT position before. Needless to say he had to have the props re-worked to accommodate the increase in rpm. Make sure you run hoses and wires away from hot items and fasten securely. If you need a sharp bend in a hose, use the wire reinforced or the corrugated hose. At this point you should be about done. Check all fluids and prime the fuel system. Make sure the batteries are charged. Once back in the water, you should check for any water leaks. Once the engines are started, let them warm up and check for any leaks. Once all systems are checked for proper operation, try the gear controls to make sure it goes in and out of gear before leaving the dock. Don't laugh. Once under way, continue to check for any leaks and noises. When checking for proper engine rpm, ease the throttles up. If they are above or below limits, record this reading and give to your prop shop to tweak them. Then sit back and enjoy your new engines. The final prop size on the Bertram was 20X24 with a number 1-cup. The reported final cruise speed was 31knots with a top speed of 33. I did not verify this information as the owner had the props tweaked and sea trialed a second time, but I have no reason to doubt him. The first time we were not turning rated rpm and I did not take any data. The Luhrs was a different story. We have complete data including fuel burn as I had installed a FloScan fuel flow system. The Luhrs 32 open weights 18,000lbs according to the factory. It had full water tanks and 270 gallons of fuel. Final prop size was 20X23 with a number 1-cup. The Bertram, because it weighs 3 tons less, can swing a bigger prop and go faster. All in all, the owners of both boats were very happy with the results. Mr. Len Rivkin, owner of the Luhrs is already planning a trip to Mexico next spring. If I've missed something or you have questions, let us know on the forum. Thanks, Bruce Creamer |
Mechanical Feature Articles Mechanical Equipment Reviews Mechanical Service
|| Southeast Marine Sales & Services, Inc. ||
mechanical section / Saturday, February 21, 1998
bertram31.com© 1997,1998 webmaster@bertram31.com Home Page: www.bertram31.com
