Tag Lines - Rigging and Fishing

Most trolling baits and lures are fished from the standard adjustable outrigger lines, but when fishing larger lures and trolling at higher speeds, the use of tag lines become a necessity. The following diagrams and text will lead you through one of the more popular methods of tag line rigging and use. 
Tag Lines vs. Rigger Lines: While both tag lines and rigger lines do essentially the same job; spreading trolling baits deployed from out riggers, the principle differences are:

Rigging a tag line: Tag lines are more static in relation to rigger lines and are connected directly to the outriggers rather than the closed loop system of the rigger lines. Elevation adjustment is limited and must be integrated with the rigger lines to allow the maximum amount of flexibility when in use. The diagram above shows how the tag line is routed through the lower bale of the release clip so that it can be lowered and raised easily. When raised to the optimum level, the tag line should present a nearly straight line from the rigger connection through to the lure. Length of the tag line must be pre determined. As a general starting point, the distance between the rigger connection and the center of the boat's transom can be used. Longer lengths will develop lower angles and less drop back when a fish strikes. This increases the likelihood of a good hookup, but long tag lines also increase the possibility of line twist at the point where the fishing line is secured to the tag line. The use of a ball bearing swivel will help to keep the tag line from rolling the rod end of the fishing line over the Dacron. A weighted tubular slide is employed to automatically return the tag line to the base of the rigger line once the rubber band is broken. The return slide is lead through the rigger line below the release clip and the tag line is lead through from top to bottom. Once deployed, the force of the lure drag will effectively up-ends the slide leaving very little deflection in the line. The diagram below shows how the tag line is attached to the trolling line. The stop ball will prevent the tag line from coming out of the return slide once the rubber band has broken. The rubber band is wound tightly around the fishing line 5 or 6 times and the Dacron line is passed through the two resulting loops and stopped off with a looped slip knot. It is imperative to stretch and keep the rubber band wound as tightly as possible around the fishing line so that no slippage is allowed. 
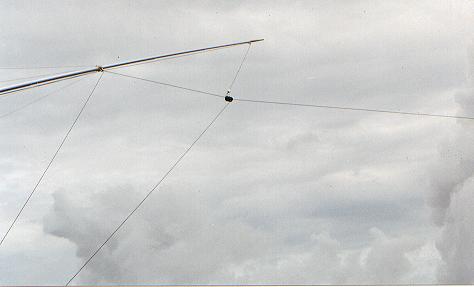
Here's what it looks like deployed:
The business end of the tag line is illustrated below. Begin your setup by running your lure back to the position it will be fished. Once you attach the fishing line to the tag line and get it deployed, you will gain several feet of distance, so you'll want to compensate by leaving the initial distance several feet short. Trial and error will lead you to become accustomed to how much allowance must be made for future setups. There are several reasons for using the Dacron line at the end of the tag line. Foremost is safety. Some anglers like to use a large metal or plastic clip in place of the Dacron. The problem with this is that when the rubber band breaks away the tag line is under considerable stain and will come flying back like a rocket. Should someone be unlucky enough to be in the path of this whip, any hardware, even plastic, has the potential to inflict severe injury. Even the stop ball should be kept as light and as small as possible. The slotted, hollow practice golf balls are a great choice as a stop ball, since most of the kinetic energy in the recoil is absorbed very quickly. Tying the rubber band to the tag line with a looped slip knot allows you to easily and quickly release the connection when bringing in the lure. Hold the rubber band tightly between thumb and index finger, leaving about two thirds of it exposed. Wind, tightly 1/3 around the trolling line and pass the Dacron through both loops of the rubber band. Try to keep both loops close to the same size. Double the Dacron back in a simple overhand knot, pulling a loop up through. Slip it snug and you're ready to adjust the tag line. The size of the rubber band is important. A # 32 is appropriate for 30 to 50 pound test, and a # 64 should be used for 80 to 130 pound test. 
Remember, the longer the tag lines are, the less the slack in the system. However, the longer the tag lines, the more chance there is of them twisting in the line, and the more trouble you have when turning the boat as the slack line additionally often tangles in rod tips. For sharper turns, the cockpit mate should be ready to adjust the slack in or out as needed. The captain should apprise the cockpit mate when he's preparing to make sharp course changes. Few things are more heart breaking than to have a blue marlin gobble down a lure when the line and Dacron are twisted together. ** PING! ** There goes your lure and the fish... Unfortunantly, not connected to your rod and reel. Tight Lines!! Capt Patrick McCrary Bertram31.com Have fun! Feel free to download and print these drawings, but please don't use it on a website without linking it to Bertram31.com. 834 Scott Dr., LLANO, TX 78643 Telephone 325.248.0809 Web site questions or comments to: bertram31@bertram31.com |