Repower has begun

The Main Sand Box for bertram31.com

Moderators: CaptPatrick, mike ohlstein, Bruce

Post Reply
User avatar
Harry Babb
Senior Member
Posts: 2354
Joined: Jun 30th, '06, 21:45
Location: Fairhope Al
Contact:

Repower has begun

Post by Harry Babb »

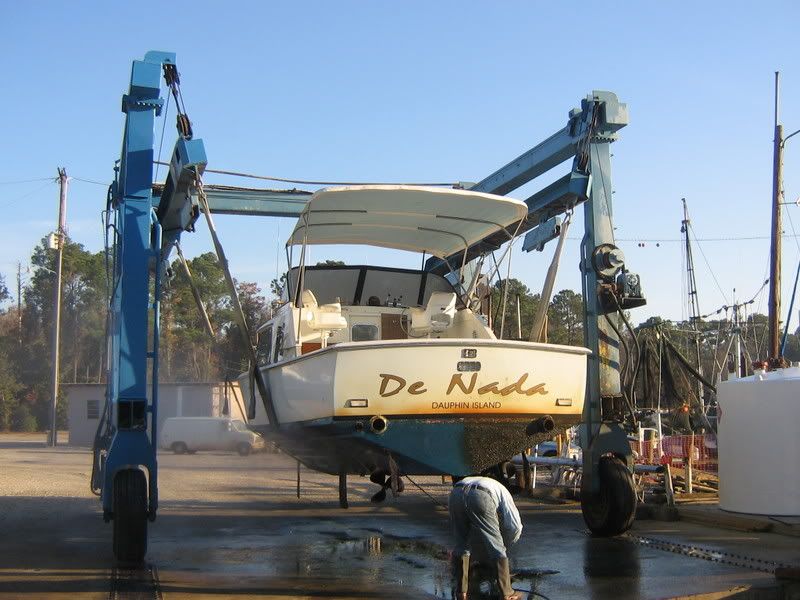
Just as planned I ran DeNada to Fly Creek in Fairhope to be loaded onto a trailer and brought to my shop for repower last Friday.

Checkout this guys trailer........the entire trip and off loading process was absolutely painless. As usual, with the proper equipment everything is easy.

She is now blocked and chocked and the destruction phase of repower is well underway.

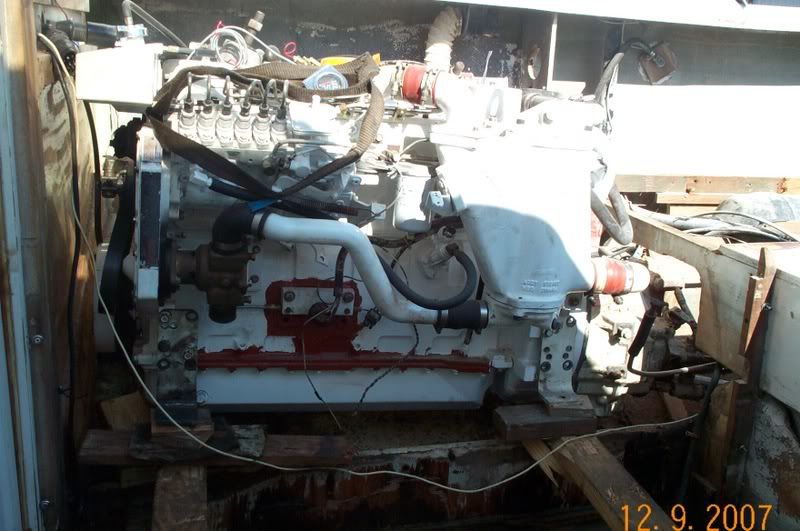
Tonight the engines are out, the sister stringers have been removed,the entire engine compartment has been gutted and what was a good running boat just 3 days ago is now in total disarray and looks horrible.

Image
[/img]Image
Image
[/img]Image
Image

Harry[/img]
hb
User avatar
Rocket
Senior Member
Posts: 427
Joined: Jul 2nd, '06, 19:30
Location: Vancouver, BC Canada
Contact:

Post by Rocket »

Harry, you move quickly, go get 'er!
User avatar
AndreF
Senior Member
Posts: 711
Joined: Jun 29th, '06, 09:53
Location: Baton Rouge, Louisiana
Contact:

Post by AndreF »

This is going to be good..........................
Thanks for sharing, Harry.
I'm not sure but indecision may or may not be my problem.

"People sleep peaceably in their beds at night only because rough men stand ready to do violence on their behalf." - George Orwell

1981 FBC BERG1883M81E
User avatar
Mikey
Senior Member
Posts: 1476
Joined: Jun 29th, '06, 10:12
Location: White Stone, VA

Post by Mikey »

Harry, When you're done love to see a picture like the first one, profile in the water, to see where your waterline is with the new engines. How much fuel was on board at the time of the pictures? Are you adding a larger tank?
Still trying to get a realistic sense of where my waterline will be.
Damn, that express is a fine looking profile.
Mikey
3/18/1963 - -31-327 factory hardtop express, the only one left.
The difference between genius and stupidity is that genius has its limits.
-Albert Einstein
User avatar
Harry Babb
Senior Member
Posts: 2354
Joined: Jun 30th, '06, 21:45
Location: Fairhope Al
Contact:

Post by Harry Babb »

Mikey
My Express is a 1966 model and I think it holds about 175 gallons. If my estimate is correct she had about 100 gallon aboard when the picture was taken. I do know that when she is full of fuel the chine at the transom is just barely in the water.

No I am not going to install a larger tank on during this work session. I may add a couple of saddle tanks if I have the time.

My major goal right now is to repower, plug a dozen old unused holes in the bottom (from old transducers), strip and repaint the bottom, build a nice small tower and get back in the water this spring. Several friends have offered to help me but I still intend to keep the project to a managable size so as not to over tax my friends and still get back in the water this spring.

Harry
hb
User avatar
Skipper Dick
Senior Member
Posts: 330
Joined: Jun 29th, '06, 08:22
Location: Cape Coral, Florida
Contact:

Post by Skipper Dick »

Harry,

How do you intend to "build a nice small tower"? I have a 28 that is screaming for me to get rid of the rag top and get a half tower.

Dick
1983 Bertram 28 FBC w/300 Merc Horizon
User avatar
Capt. DQ
Senior Member
Posts: 1025
Joined: Jun 29th, '06, 11:18
Location: P'cola, FL

Post by Capt. DQ »

Hey Harry...looks like you're off to a good start, at this pace you will be up & running by spring easy. You got to have that B31 running by Venice time next year.

DQ
1967 Hull #315-605 FBC ---<*)((((><(
"IN GOD WE TRUST"
'Life may be the party we hoped for...but while we are here we might as well fish'!
User avatar
Carl
Senior Member
Posts: 6082
Joined: Jul 5th, '06, 06:45
Location: Staten Island NY

Post by Carl »

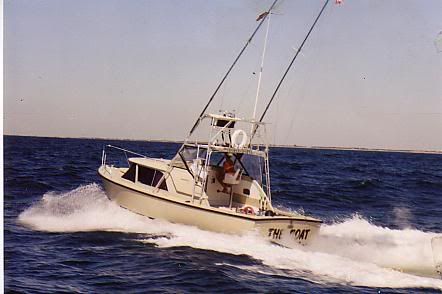
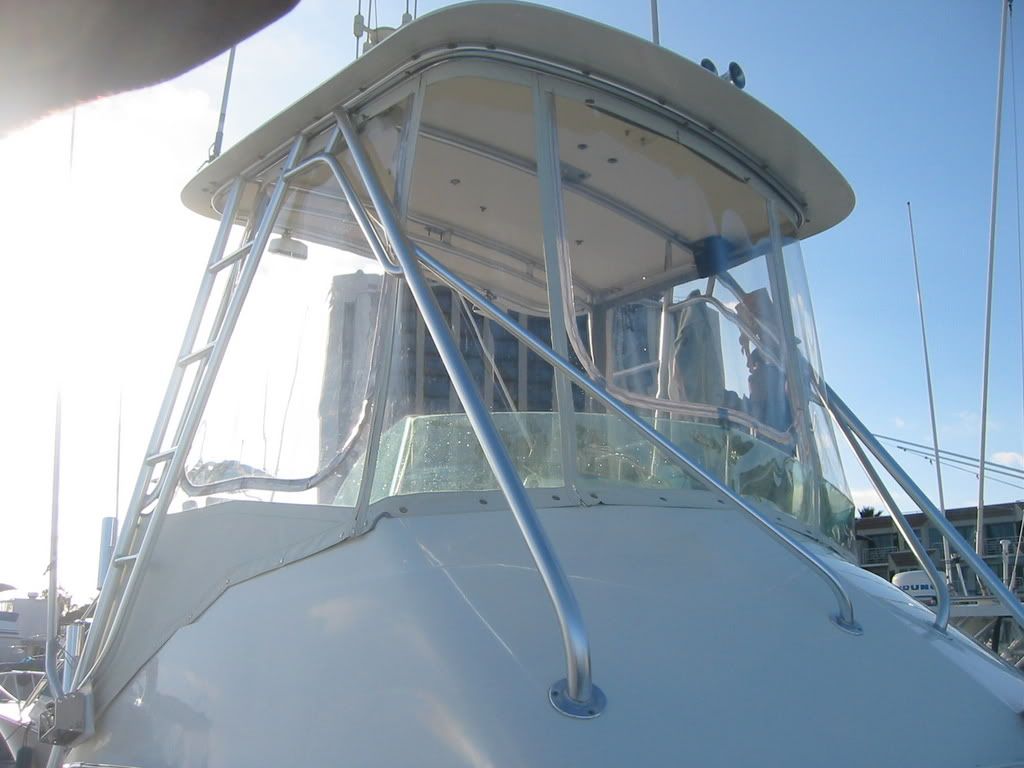
You can make a short tower like this...


Okay I just modified the tower from a 25' Mako, but it was so close to my design I couldn't pass it up, it just needed a few feet more in the middle, all the hard work was done.[/img]Image
User avatar
JP Dalik
Senior Member
Posts: 1317
Joined: Jun 30th, '06, 21:03
Location: Pt. Pleasant NJ
Contact:

Post by JP Dalik »

Go get em Harry,
just remember the only way the pain will end is if you "just keep going"

Keep it simple.
KR


JP
1977 RLDT "CHIMERA"
User avatar
In Memory of Vicroy
Senior Member
Posts: 2340
Joined: Jun 29th, '06, 09:19
Location: Baton Rouge, LA

Post by In Memory of Vicroy »

Like that "little tower" on the Express, just right.

UV
User avatar
Harry Babb
Senior Member
Posts: 2354
Joined: Jun 30th, '06, 21:45
Location: Fairhope Al
Contact:

Post by Harry Babb »

Sim I like your top....... its size seems to match the boat size. I once built a top to fit my old Chaparral 244 that actually looks similar to your top.

I do not have all of the fine details yet but pretty much I am going to try to keep the front support legs inside of the windshield and the rear support legs will pass thru the gunnel and anchor to the hull down below somewhere. All of the vertical members will be at an angle nearly equal to the angle of the windshield...........pretty much everything will angle from the bow towards the stern.

Its to dad blame cold to work on DeNada tonight......north wind blowing and its going down into the upper 30's tonight.

Harry
hb
User avatar
Carl
Senior Member
Posts: 6082
Joined: Jul 5th, '06, 06:45
Location: Staten Island NY

Post by Carl »

Thanks UV and Harry.

Angle on the front of tower match the windshield fairly close. I wasn't so sure how stable the house top was when designing the tower so I opted to mount to gunnels. I also was not crazy how a tower looked directly over the windshield or in front of it. Mine is back several inches and I had the canvas windows follow the windshield line up to the tower. Also it was an easy way to eliminate running gauges up top as I just glance down and read the lower helm gauges and sync. Just a pair of idiot alarms for temp and oil pressure had to be run.

I would think mounting on the gunnels would be stronger then to the hull directly as the gunnels have those rolled over angles and contours giving strenght. The hull sides being large flat panels seem to have lots of flex. Or where you going to kick the mounts over and go into the bottom? Maybe I'm wrong, never really thought about it much.

Harry, the tower was probly the single best thing I ever did to the boat it really makes driving in sloppy seas a whole lots better. The only person I met that did not care for it was my 6'+ father in-law, tower is just 6' over the engine box's.
User avatar
Harry Babb
Senior Member
Posts: 2354
Joined: Jun 30th, '06, 21:45
Location: Fairhope Al
Contact:

Post by Harry Babb »

Sim
On my old Chaparral I mounted the rear feet on the gunnel. There was way to much flex on the gunnel. The width of the gunnel was much narrower than on the Bertram. On the Chaparral I had to add another brace (Hand Holder) that paralleled the rear leg and went all the way to the floor.

I am thinking of a foot that goes from the hull bottom to the underside of the gunnel with a flange and the rear support leg will sit on top of the gunnel with a matching flange and the two will be bolted together.

UV can always use me as an example when he refers to his quote "The Enemy of Good is Better" ..........I am generally known for over building things but the only thing I usually have to apologize for is weight and material cost.

Tonight I unbolted the shaft logs from the hull (unbolted with a grinder, hammer and punch) and got bogged down trying to remove the starboard coupling...........I gave her a good dose of CX and came home for supper.....tomorrow I am expecting to see the coupling laying on the floor when I get there LOL

Harry
hb
User avatar
Carl
Senior Member
Posts: 6082
Joined: Jul 5th, '06, 06:45
Location: Staten Island NY

Post by Carl »

Harry,
Well it will be strong that way, especially for a short tower. Could always mount it completely inside like on the Orca Yachts.

Curious to see how the CX works, I usually just cut the coupling off with a wiz wheel on a 4" grinder if it becomes real stubborn.
User avatar
Harv
Senior Member
Posts: 1184
Joined: Jun 30th, '06, 23:59
Location: Brooklyn,NY
Contact:

Post by Harv »

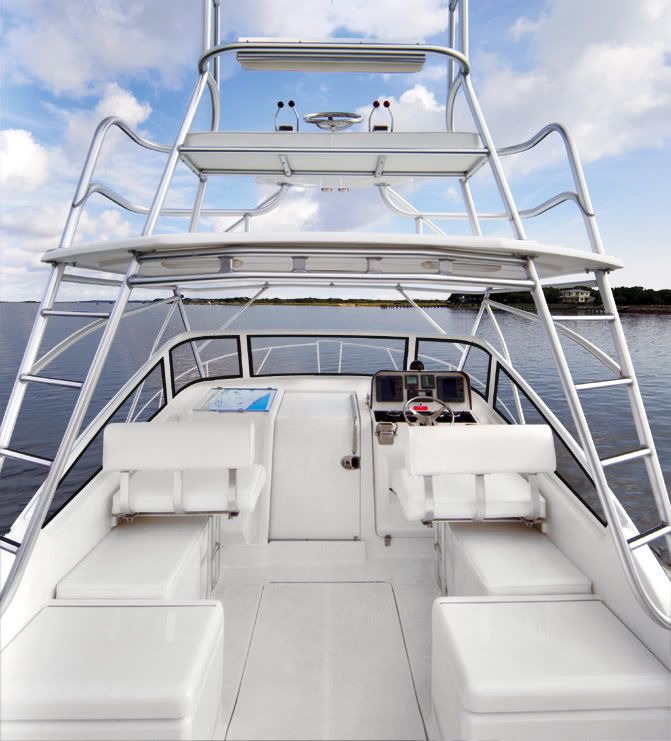
Hopefully, when all is said and done with my repower, I would like to add a small tower on Windstar as well. As most of you know, Windstar is a Bahia Mar. I have looked at different designs and find that the nicest tower lines are the towers being used on the Luhrs, Henriques, and Albamarle expresses. Below is a picture of what Luhrs calls a "bridge tower". It has easy access and a bench seat for at least 2 people. I especially like the easy access with no bars to climb under.
Image
Harv
User avatar
Carl
Senior Member
Posts: 6082
Joined: Jul 5th, '06, 06:45
Location: Staten Island NY

Post by Carl »

Harv, that could be made into a real nice looking tower for our boats.

I wonder what a "one off" like that would run. I'd guess a little north of 20, as what I wanted was pretty much as it is shown and I had estimates of 12-15 ten years ago.
User avatar
Harry Babb
Senior Member
Posts: 2354
Joined: Jun 30th, '06, 21:45
Location: Fairhope Al
Contact:

Post by Harry Babb »

Harv
That's a very good looking tower/top..........I've not seen one like that before.......is it made by Luhrs or is it by a custom builder in the area.

I particularly like the idea of not having to crouch down to go under bars or having to climb over bars........as you know in rolling seas you could get a goose egg on your head or be ripped of your manhood trying to get up or down.

I have taken pictures of DeNada and printed them on regular paper, from that I will be sketching my ideas...........I will be using the open bar feature for sure

Thanks

Harry
hb
User avatar
Capt. DQ
Senior Member
Posts: 1025
Joined: Jun 29th, '06, 11:18
Location: P'cola, FL

Post by Capt. DQ »

Hey Harry & Harv you can make you a mach-up tower from white pvc water pipe for cheap money to design your look that you want on your boat.

DQ
1967 Hull #315-605 FBC ---<*)((((><(
"IN GOD WE TRUST"
'Life may be the party we hoped for...but while we are here we might as well fish'!
User avatar
Harry Babb
Senior Member
Posts: 2354
Joined: Jun 30th, '06, 21:45
Location: Fairhope Al
Contact:

Post by Harry Babb »

Hummmmmmmmmm........never thought of that......excellent idea......can probably use small tube for a prototype......

Doug what is the pitch and dia of your DJX wheels?????

I am going to make a serious attempt of decreasing my shaft angle.....I think that all I need is 12-1/2" from shaft centerline to the hull bottom when measured square with the shaft in the prop location area.

Got a lot different projects on my mind right now.....this weekend I intend to dryfit the engines.........the Top/Tower project will come to life sometime in January

Harry
hb
User avatar
Capt. DQ
Senior Member
Posts: 1025
Joined: Jun 29th, '06, 11:18
Location: P'cola, FL

Post by Capt. DQ »

Harry,

3/4" is probaly about as small as you want to go with the pvc.

My DJX'S are 21" x 20" and your probaly going want to leasve that angle along. I took my tabs off and with the Cummins 250's you don't need them. My 31 trims out very nice.

Richard Kidd @ Bertram 20 years ago told me that 31's did not need them and really becomes personal choice, with the diesels and the 21" wheels I in total agreement.

DQ
1967 Hull #315-605 FBC ---<*)((((><(
"IN GOD WE TRUST"
'Life may be the party we hoped for...but while we are here we might as well fish'!
User avatar
Harv
Senior Member
Posts: 1184
Joined: Jun 30th, '06, 23:59
Location: Brooklyn,NY
Contact:

Post by Harv »

Harry,

I originally saw this type of tower on the Luhrs expresses about 7 years ago. I beleive it was a standard design for them, as it was on each express from the 29 to the 40 footer. Last year at the Atlantic City show, I saw the same design on the Henriques express and the Albamarle express.....or was it a Rampage? In any case, I believe Luhrs had them first and the idea of the bars wrapping around the bench and the ease of accessability has caught on with other boat makers. It is a smart design for sure.
Harv
User avatar
Rawleigh
Senior Member
Posts: 3444
Joined: Jun 29th, '06, 08:30
Location: Irvington, VA

Post by Rawleigh »

Just add a fireman's pole for quick egress and it would be great!!
Rawleigh
1966 FBC 31
User avatar
Harry Babb
Senior Member
Posts: 2354
Joined: Jun 30th, '06, 21:45
Location: Fairhope Al
Contact:

Post by Harry Babb »

Hi Rawleigh
Coming down is generally easy..........gravity takes care of that.....just watch the landing it might get a little bumpy

How about an elevator to get my fat ass up there.......LOL

Harry
hb
Bill Fuller
Posts: 88
Joined: Jun 29th, '06, 08:29
Location: San Diego

Post by Bill Fuller »

Skipper Dick

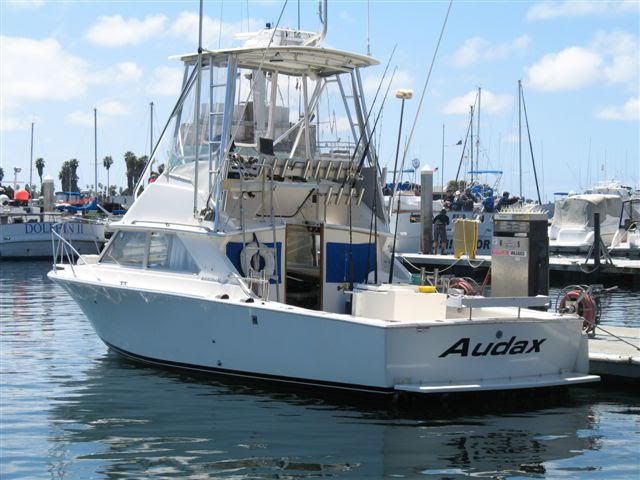
Is this waht you had in mind for a half tower for your B28?

<a href="http://photobucket.com" target="_blank"><img></a>

<a href="http://photobucket.com" target="_blank"><img></a>

Bill
Bill Fuller
Posts: 88
Joined: Jun 29th, '06, 08:29
Location: San Diego

Post by Bill Fuller »

Well that did not work. Sorry. I am new to this picture posting using photobucket and I'm not sure what I did wrong. I was successful on the B28 site.

Dick if you would like some pices of my half tower, I could email them to you.

Bill
User avatar
Harv
Senior Member
Posts: 1184
Joined: Jun 30th, '06, 23:59
Location: Brooklyn,NY
Contact:

Post by Harv »

Bill,

If you want to post a picture click the img tab below the subject box so this appears [img]
After that copy the url address of the hosting page with the photo.
Photobucket usually has 4 boxes under the picture. I usually use the 2nd from top and that usually does the trick.
Photobucket is easy to use as it only needs 1 left click on the box and it tells you address copied when you do it.
Then click close tags and this will appear [/img]
When done it should look like this
[img]your%20image%20at%20wherever.com[/img]
Make sure there are no spaces between the tags.
And then the photo should be available for everyone to see.
I know I am curious how it looks.

If you still have trouble, email to me and I will post it for you.
Harv
Bill Fuller
Posts: 88
Joined: Jun 29th, '06, 08:29
Location: San Diego

Post by Bill Fuller »

Image

Image
Bill Fuller
Posts: 88
Joined: Jun 29th, '06, 08:29
Location: San Diego

Post by Bill Fuller »

I'm a bit slow but I finally got it

Bill
User avatar
Skipper Dick
Senior Member
Posts: 330
Joined: Jun 29th, '06, 08:22
Location: Cape Coral, Florida
Contact:

Post by Skipper Dick »

Bill,

That would be outstanding. My email is rpambrun@comcast.net. Thanks so much.

Dick
1983 Bertram 28 FBC w/300 Merc Horizon
User avatar
Skipper Dick
Senior Member
Posts: 330
Joined: Jun 29th, '06, 08:22
Location: Cape Coral, Florida
Contact:

Post by Skipper Dick »

Bill,

You got it and that's what I'm looking for except I'm not looking for one off the manufacturers floor, but something that has been in a wreck or salvage that I can remake or repair. I'm pretty good with glassing and finishing so that way I can get my own sweat equity in it. Besides, when ever I make something or repair a part of the hull, I always feel much better about it.

Nice looking vessel.

Dick
1983 Bertram 28 FBC w/300 Merc Horizon
User avatar
Harv
Senior Member
Posts: 1184
Joined: Jun 30th, '06, 23:59
Location: Brooklyn,NY
Contact:

Post by Harv »

Dick,

There was a full tower sitting in Treasure Island Marina last time I was there. It came off a 31 Bahia Mar. It's a little worn looking but might be right up your alley if interested. If yes, I can call or pass by and see if it is still available. Only problem is logistics, as it is located in Long Island, NY.
Harv
User avatar
Skipper Dick
Senior Member
Posts: 330
Joined: Jun 29th, '06, 08:22
Location: Cape Coral, Florida
Contact:

Post by Skipper Dick »

Harv,

Thanks for the info. What I'm thinking of doing is right after the holidays, I'll head on over to Fort Liquirdale and the East coast to a couple of salvage yards I've heard of and see if I can find one in a yard and get it before they chew it up. They still hae a number of places trying to get rid of hurricane damaged boats and parts there. Once I get it home I can make it new again.

Dick
1983 Bertram 28 FBC w/300 Merc Horizon
User avatar
Mikey
Senior Member
Posts: 1476
Joined: Jun 29th, '06, 10:12
Location: White Stone, VA

Post by Mikey »

Harv, Harry,
May be getting in this game a little late, but have been designing and installing the struts for the hardtop (same as tower). To get it to look right, and save money I did the whole thing in PVC. Once complete and taped in place I called the maker and he came, made notations, and cut and tacked the parts. I took them to the boat, installed them and he came back to check all out. He then returned them to his shop, completed the welding and I installed them. Looks great, installed perfectly the first time and since he wasn't making several round trips to the boat, I saved bunches.
PVC bends very easily with a heat gun and can be "welded" in place with PVC glue. Don't stress it a lot and it will hold.
Just a thought.
Mikey
3/18/1963 - -31-327 factory hardtop express, the only one left.
The difference between genius and stupidity is that genius has its limits.
-Albert Einstein
User avatar
Pete Fallon
Senior Member
Posts: 1318
Joined: Jun 29th, '06, 23:10
Location: Stuart Fl. and Salem, Ma.

Repower has begun

Post by Pete Fallon »

Harry,
I sent you a private message on shaft angles.

Pete Fallon
User avatar
Harry Babb
Senior Member
Posts: 2354
Joined: Jun 30th, '06, 21:45
Location: Fairhope Al
Contact:

Post by Harry Babb »

Good morning Mikey
Thanks for the suggestion.........sounds like a good idea to me......Doug made the same suggestion...........obviously PVC is cheaper and easier than metal

Yesterday I sat the Starboard engine in DeNada......just sitting on wood blocks........today I will remove the strut and get the shaft set where I want it......the bilge is still a mess...........for now I am in the Destroy and Dry Fit stage..........I will try to post pics tonight.

I intend to start my Top/Tower in February once I get everything under the hood buckled up..........its impossible to have someone working on the tower and in the cabin while repowering.

Tonight I will try to post pics of a tower that I built on my Chaparrel several years ago......

I am looking forward to seeing some pics of your Tower progress...........can you post them this evening?????

Gotta go beat on an old Bertram for now........thanks for the suggestion

Harry
hb
User avatar
CaptPatrick
Founder/Admin
Posts: 4161
Joined: Jun 7th, '06, 14:25
Location: 834 Scott Dr., LLANO, TX 78643 - 325.248.0809 bertram31@bertram31.com

Post by CaptPatrick »

Harry,

Some tips on shaft alignment & angle:

1 Leave the stock 15º shaft angle alone...
2 Remove the struts & remove any wedges or pads between the strut & hull
3 Decide if you want to change the strut angle slightly outboard to allow shafts to be removed without dropping rudders. (Relocation of Struts)
4 Re-install struts, without any wedges or pads. (Dry fit only at this point, but tighten them down fully.)
5 Align the engines & shafts to the struts, not vise versa.

While you have the struts down, that's the perfect time to deal with new inside backing plates as described in the Tips Section (Classic Bertram Strut Problem)

You'll also be upgrading to 1 1/2" shafts which will be a very close fit through the bronze shaft alleys, so it would also be a good time to re-configure to the fiberglass shaft tubes. (Building Fiberglass Shaft Logs)

And, while you're at it.... Keep in mind that your new air boxes will consume some of your height requirement necessary for an outboard mounted generator, so build in the new shelf to be absolutely as low to the hull bottom as possible.

And you thought it was just going to be a matter of swapping blocks... ;^))

Br,

Patrick
User avatar
Harry Babb
Senior Member
Posts: 2354
Joined: Jun 30th, '06, 21:45
Location: Fairhope Al
Contact:

Post by Harry Babb »

Mikey
These are pics of my old Chaparrel. I built the top in 1987.........its been thru hell in handbasket and held up well.

[img][img]http://i147.photobucket.com/albums/r289 ... P_3032.jpg[/img][/img]
[img][img]http://i147.photobucket.com/albums/r289 ... P_3038.jpg[/img]

Harry Babb
hb
User avatar
Harry Babb
Senior Member
Posts: 2354
Joined: Jun 30th, '06, 21:45
Location: Fairhope Al
Contact:

Post by Harry Babb »

Pat
Today I actually removed the strut, made a dummy coupling that bolts to the gear then inserted a shaft to use for roughing in the engine placement and alignment. I see more about how it all works now and I will not be changing the shaft angle..........in fact it looks to me like you cannot decrease the shaft angle and be able to put a 20" wheel under my 31.

Last Thursday I ordered the necessary tube from Lewis Marine that I need to glass in a new shaft log.

The strut had a pretty thick wedge between the flange and the hull.

Now I am focusing on the strut, once I get it worked out and the engine anchored down I will glass in the shaft tube and move on to the port side.

I have read, reread and read again all of the boat building tips related to my repower.........I will be sticking right to tried and proven methods that you have laid out for us

Thanks

Image
[/img]Image

Harry
hb
User avatar
CaptPatrick
Founder/Admin
Posts: 4161
Joined: Jun 7th, '06, 14:25
Location: 834 Scott Dr., LLANO, TX 78643 - 325.248.0809 bertram31@bertram31.com

Post by CaptPatrick »

Hell, Buddy, once you remove that slab of a pad between the strut & hull, you'll effectively reduce the shaft angle by probably 3º just coming back to the stock 15º...

Br,

Patrick
User avatar
Mikey
Senior Member
Posts: 1476
Joined: Jun 29th, '06, 10:12
Location: White Stone, VA

Post by Mikey »

Harry,
Sweet.
You understand the game. Bueno!
Mikey
3/18/1963 - -31-327 factory hardtop express, the only one left.
The difference between genius and stupidity is that genius has its limits.
-Albert Einstein
Post Reply

Who is online

Users browsing this forum: Bing [Bot] and 230 guests