Bertram 25 - Advice needed on changes.
Posted: Apr 26th, '13, 18:42
I’m looking for some advice on changes/upgrades that should be made on my 69 Bert 25 convert and hope to be doing the work in the next 6 weeks starting this weekend - hampered by the fact that I’m in upstate NY most of the time and the boat is on Long Island. I have just read Kieth Poe’s “Opinions Please “ thread, and it has raised numerous concerns as to how well the boat is setup for heavy weather and dealing with the water that inevitably gets in. Now is the time to plan and make changes - hopefully based on your recommendations. ( long lead up to some specific questions below )
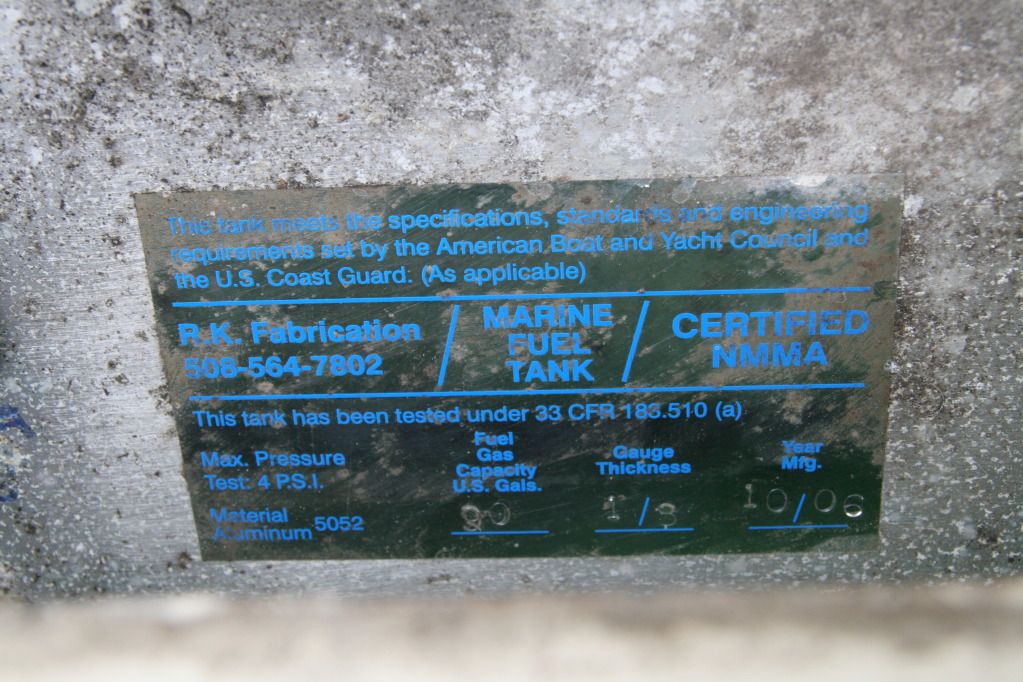
I purchased the boat in August 2011 from a PO owner on Cape Cod who in theory had it professionally serviced and cared for each year - including replacement in 2006 of the original fiberglass tanks with an aluminum 90 gallon replacement. One of the reasons for purchasing the boat was the conclusion that the tank issue had been taken care of and it was otherwise in good shape. It was in the water, had been used every year, and so was in theory in good seaworthy condition - ready to use without a lot of work. At least it was in good enough condition to make it the 100 miles from Cape Cod to to Sag Harbor on Long Island in partly stormy conditions.
There have been some issues with the engines Mercruiser 3.7 L 4s and Alpha I sterndrives - but nothing serious. The props which appear to be the original ones that came with the engines and sterndrives when installed in the 80s were at least 4 inches off in pitch. The fact that two owners could run the boat for 25 years with props that far off started me looking for what else might be wrong
I started to find out last summer. I did some minor repairs. Figured out most of the electrical wiring with help from Walter K - and got the navigation lights and other electrics working after having not been used in many years. By the first day of my vacation in August I thought I was ready to take a trip. The tank was full, the weather was good. The dog and wife were on board, and then I found fuel in the bilge. So the rest of the vacation was taken up with getting the boat out of the water, draining and removing the tank and dropping it off for repairs. I had planned a quick fix and replace in order get it back in the water before the end of the boating season, until I discovered the amount of wood rot and poor design underneath. Not to mention having to let it air and dry out for a good bit before it was safe work on.
The tank was repaired in Greenport based on a recommendation by White Bear - and the new rear panel is 3/16 “ compared to the otherwise 1/8 “ tank. Probably should have followed Cam’s advice on the Bert 25 forum and done a whole new tank, but by the time I connected with him the repair process had already started. Its been etched and epoxy coated and is reported to be real clean on the inside.
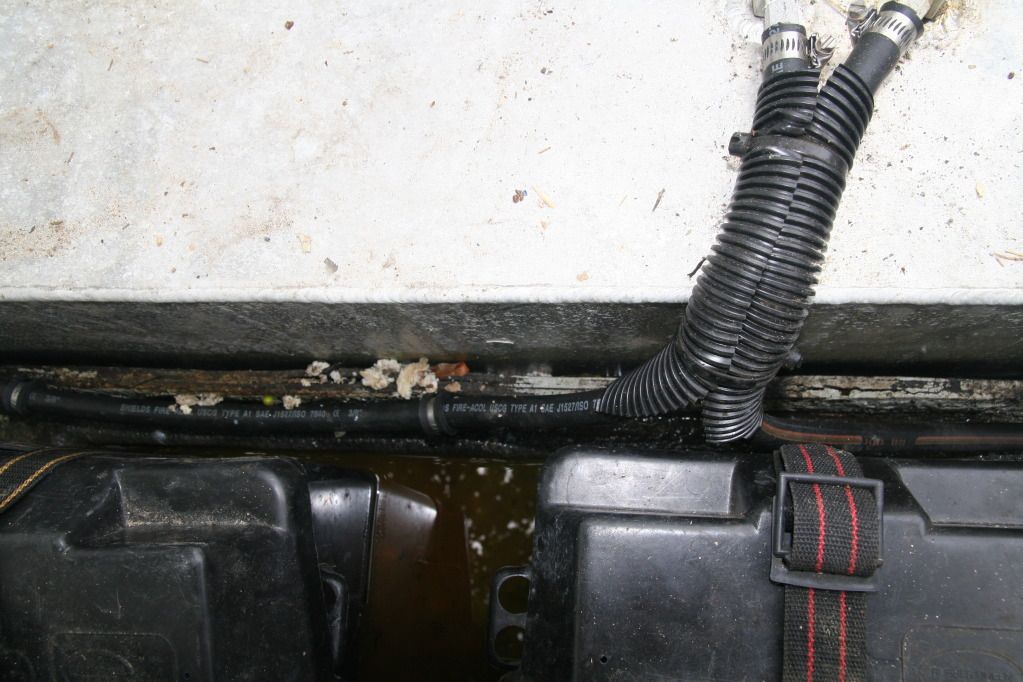
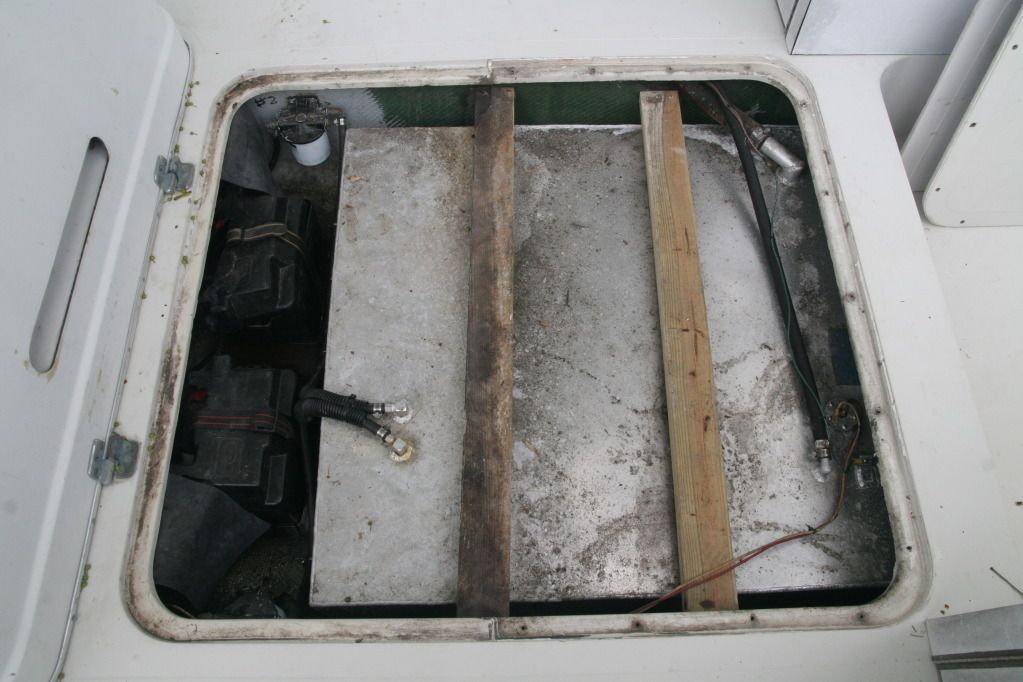
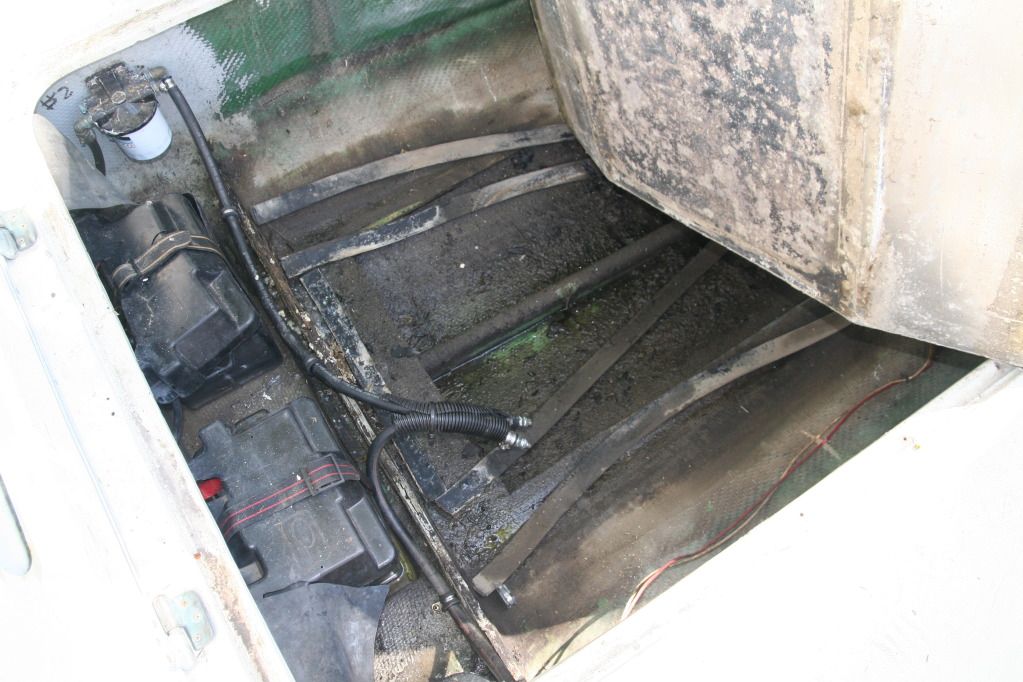
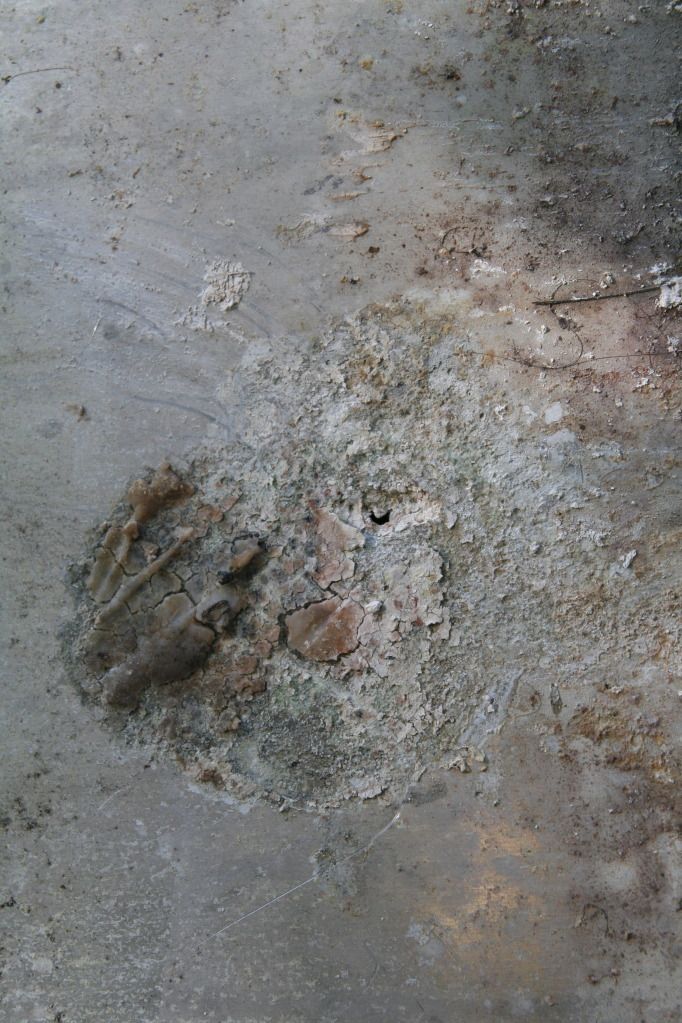
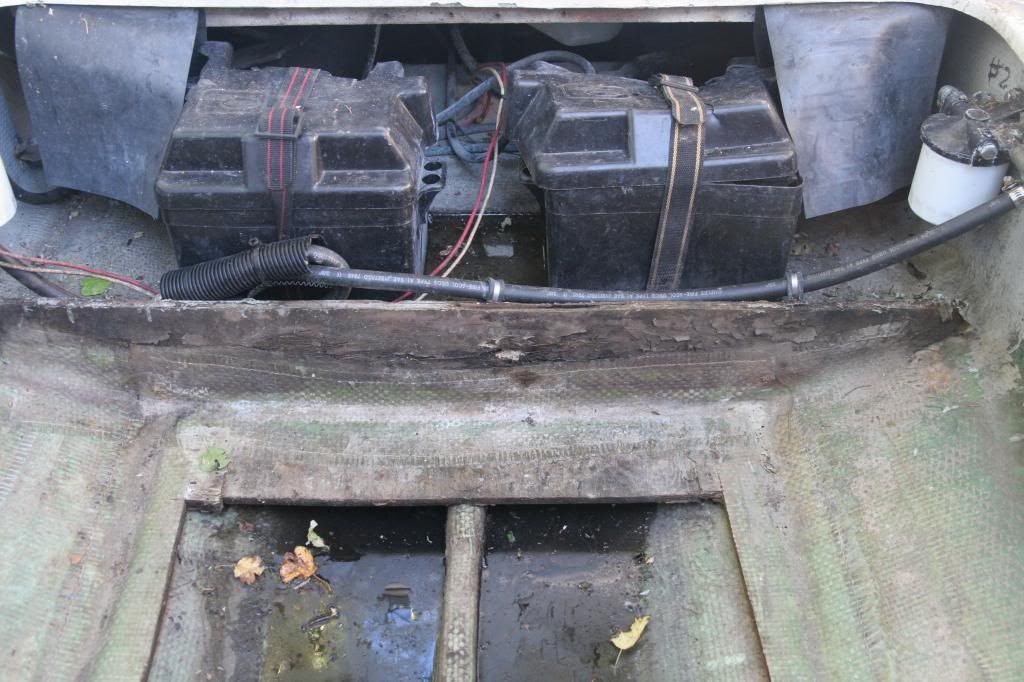
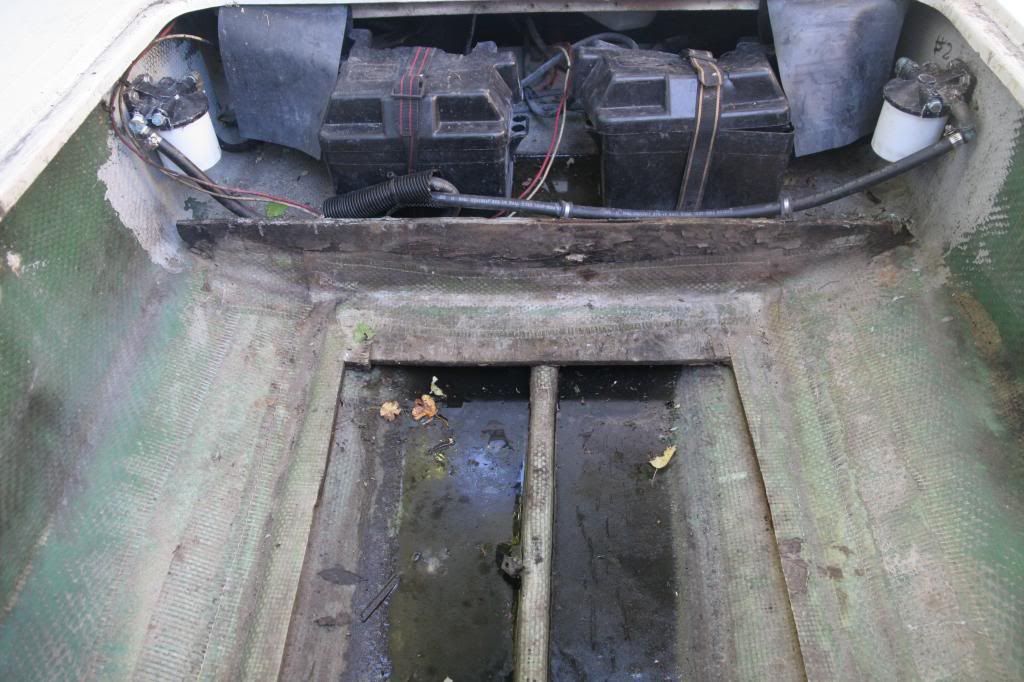
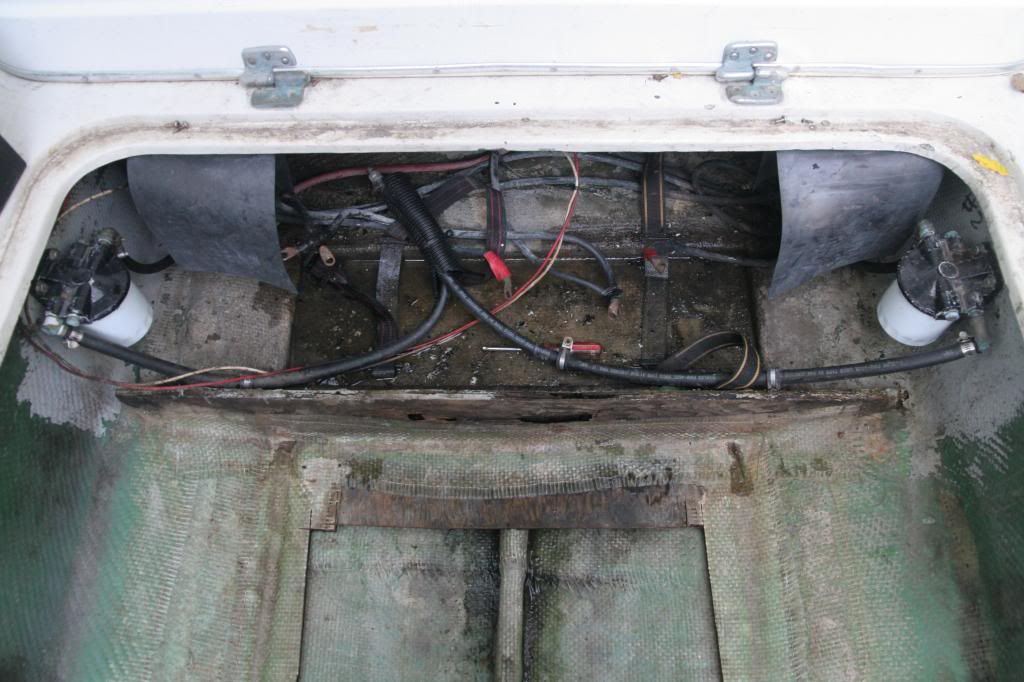
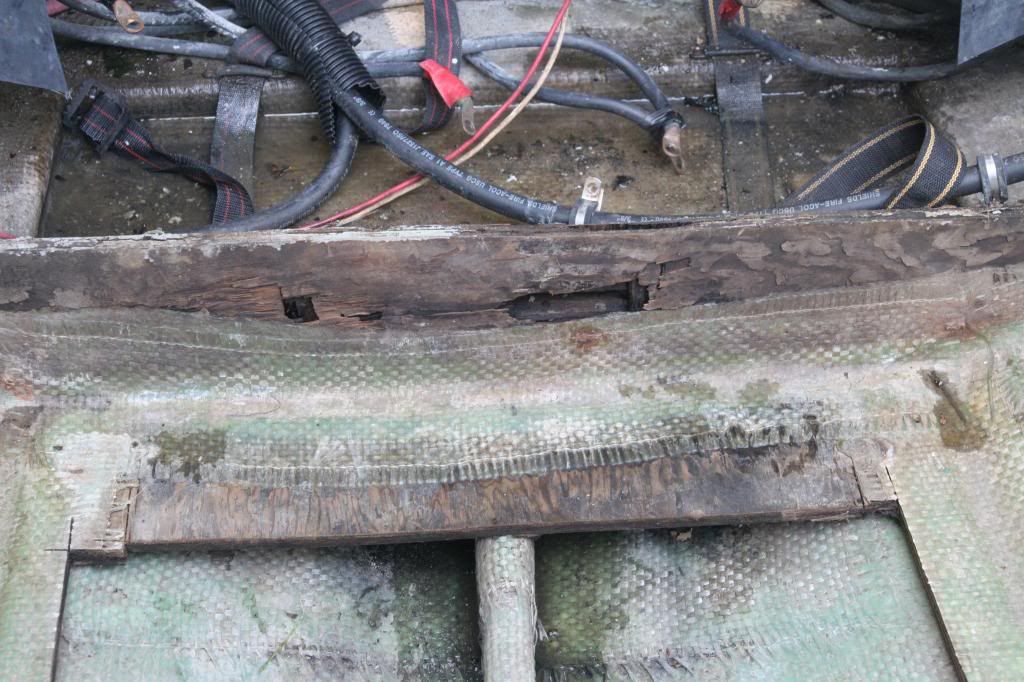
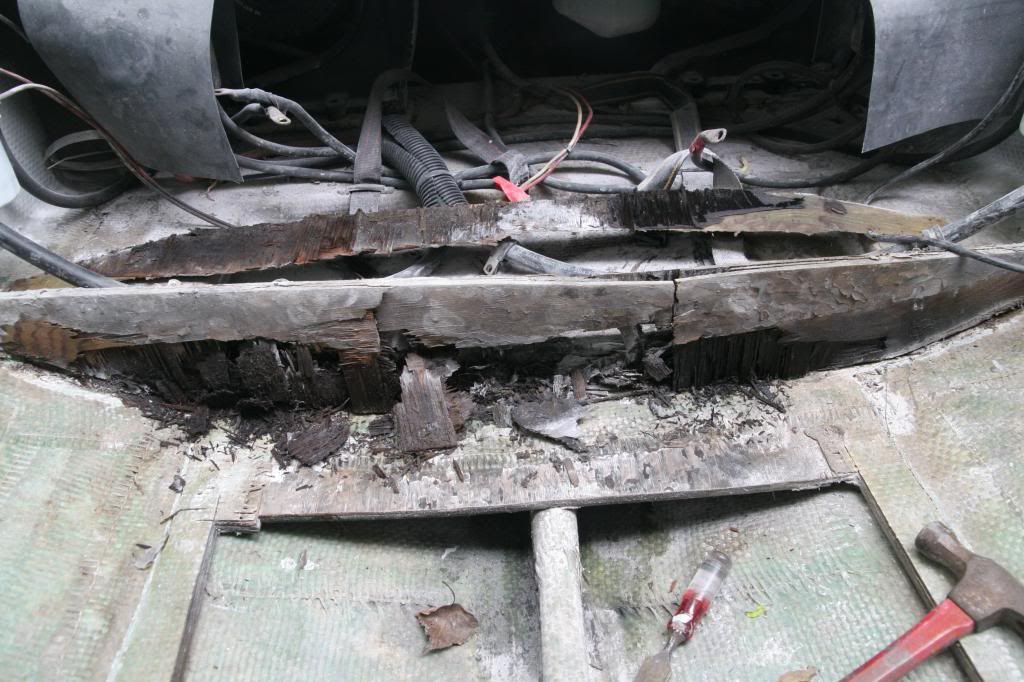
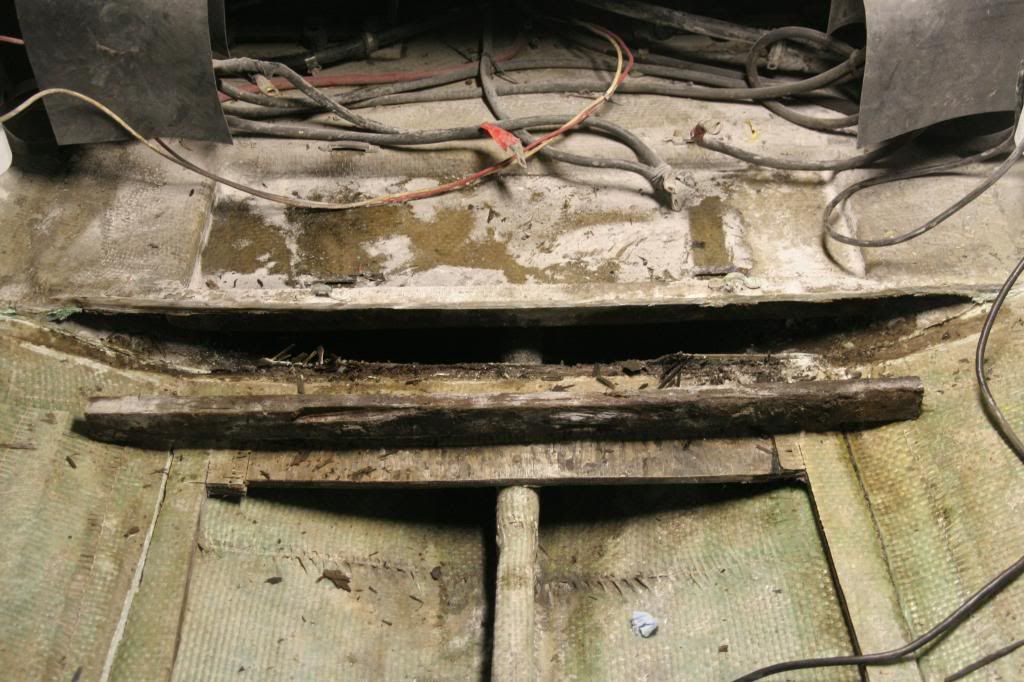
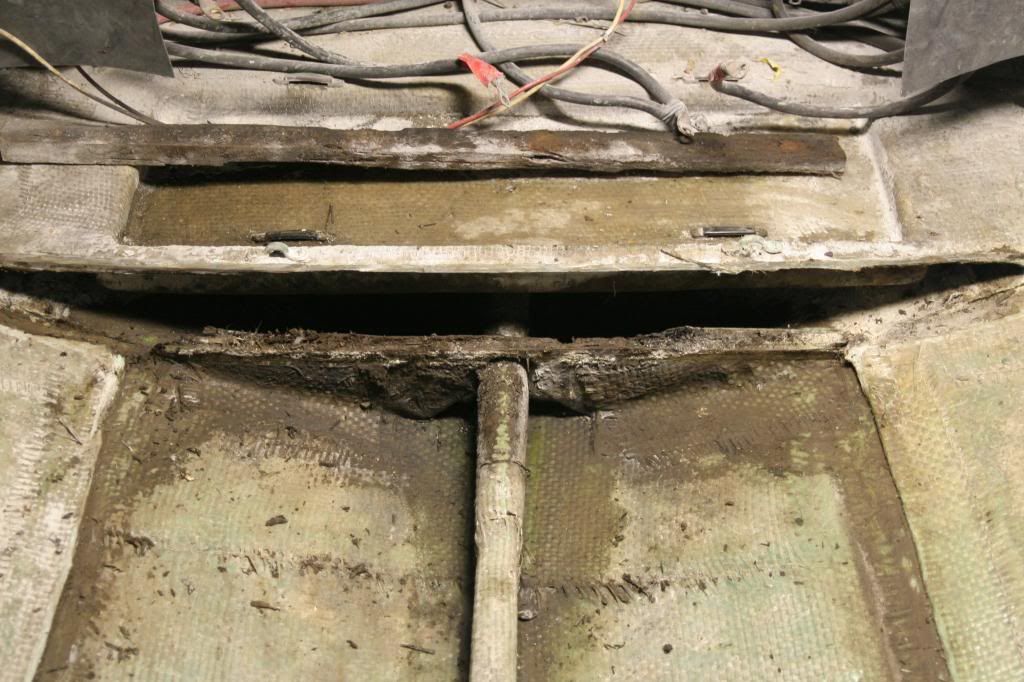
I am not happy at all with the way it was originally installed - as you can see from the photos that I will hopefully be able to post below. The plywood panel underneath the original tanks was apparently cut away, maybe because it was rotting. The tank was only supported at the sides where it rested on several soft rubber strips right on the hull. Plywood behind the tank was also uncoated, just painted. It did not appear too bad inspecting with the tank in place, but was actually rotting lower down where it was in close proximity to the rear of the tank. Probably trapped moisture against the tank and caused the corrosion. This wood has been pulled out along with other rotting pieces and replacement is planned to be done in the next week with epoxy coated marine plywood. The tank will be elevated off the hull and plywood underneath by 4 - 5 longitudinal strips of some type of pvc board - starboard, etc., with the strips glued to the bottom of the tank with 5200. Possibly with some rubber strips underneath board strips to provide some give. Not sure how I am going to hold it in place, certainly not in the same manner with 2x4s as used previously.
But there are some planning issues for improvements that need to be decided, especially as to how water drains through the boat and hopefully out. I want to relate how a 25 should be setup to the discussion on Poe’s 31 and how it should be setup for rough water.
Some issues re: how water drains through the boat.
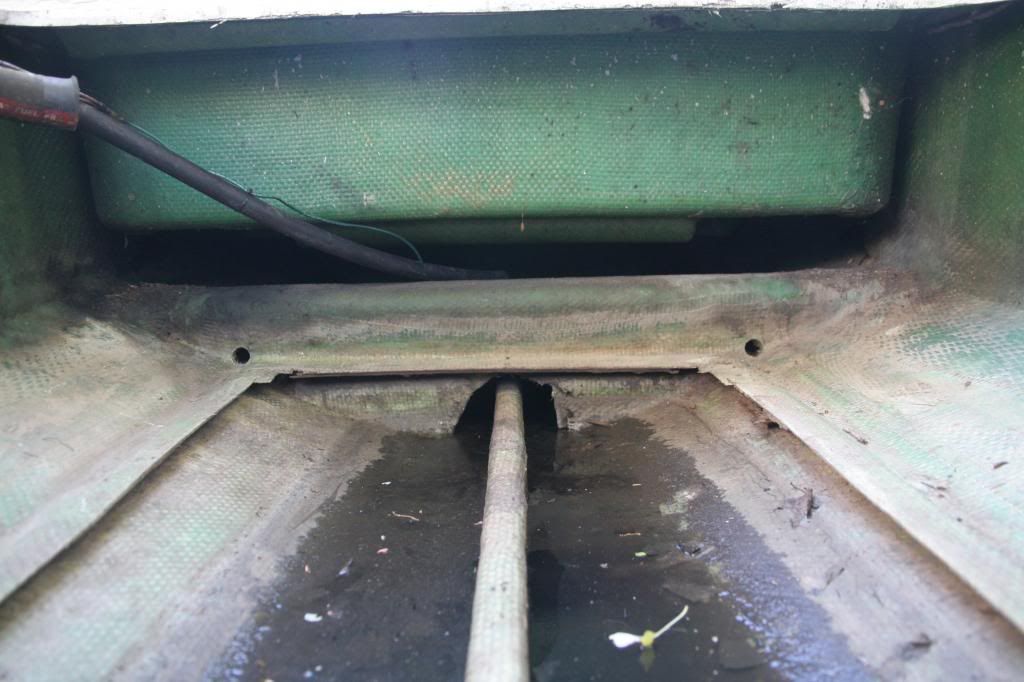
The foot well in the cockpit drains onto what was the uncoated plywood under the fuel tank, putting water right where you don’t want it - around the tank. I plan to redirect this to under the new panel under the tank which will be epoxy coated marine plywood.
The tank is under a two part hatch. The front half is sealed. The rear half is not and lifts out to provide access to fuel filters and batteries, but allows water to leak around the rear section of the tank.
Scupper drains - on the 25 these are just drain plugs. And with the heavy I/O engines all the way in the back, these drains are uncomfortably close to or under the water line. Stand in the back next to the engine and pull the plugs and water comes in, not out. And so close to the engine cover that the thought is that under the right conditions and the weight of additional water that water would drain in - not out - and into the engine compartment. Yes, two bilge pumps under the engines.
Take a look at the photos below and let me know what you think.


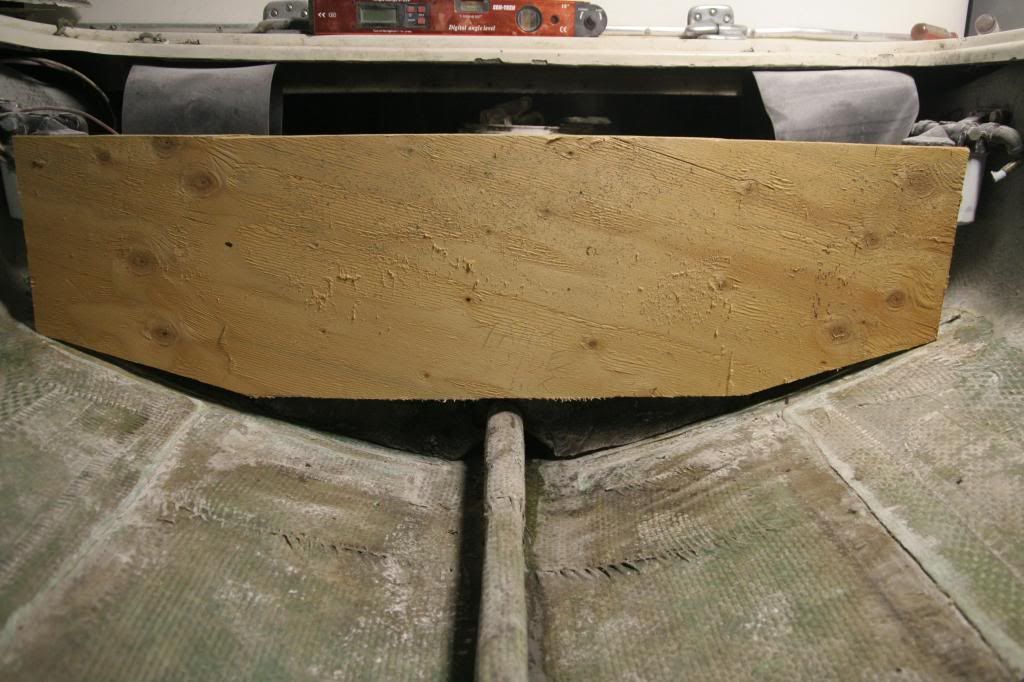
The last image above is a mockup of the tank profile.
I purchased the boat in August 2011 from a PO owner on Cape Cod who in theory had it professionally serviced and cared for each year - including replacement in 2006 of the original fiberglass tanks with an aluminum 90 gallon replacement. One of the reasons for purchasing the boat was the conclusion that the tank issue had been taken care of and it was otherwise in good shape. It was in the water, had been used every year, and so was in theory in good seaworthy condition - ready to use without a lot of work. At least it was in good enough condition to make it the 100 miles from Cape Cod to to Sag Harbor on Long Island in partly stormy conditions.
There have been some issues with the engines Mercruiser 3.7 L 4s and Alpha I sterndrives - but nothing serious. The props which appear to be the original ones that came with the engines and sterndrives when installed in the 80s were at least 4 inches off in pitch. The fact that two owners could run the boat for 25 years with props that far off started me looking for what else might be wrong
I started to find out last summer. I did some minor repairs. Figured out most of the electrical wiring with help from Walter K - and got the navigation lights and other electrics working after having not been used in many years. By the first day of my vacation in August I thought I was ready to take a trip. The tank was full, the weather was good. The dog and wife were on board, and then I found fuel in the bilge. So the rest of the vacation was taken up with getting the boat out of the water, draining and removing the tank and dropping it off for repairs. I had planned a quick fix and replace in order get it back in the water before the end of the boating season, until I discovered the amount of wood rot and poor design underneath. Not to mention having to let it air and dry out for a good bit before it was safe work on.
The tank was repaired in Greenport based on a recommendation by White Bear - and the new rear panel is 3/16 “ compared to the otherwise 1/8 “ tank. Probably should have followed Cam’s advice on the Bert 25 forum and done a whole new tank, but by the time I connected with him the repair process had already started. Its been etched and epoxy coated and is reported to be real clean on the inside.
I am not happy at all with the way it was originally installed - as you can see from the photos that I will hopefully be able to post below. The plywood panel underneath the original tanks was apparently cut away, maybe because it was rotting. The tank was only supported at the sides where it rested on several soft rubber strips right on the hull. Plywood behind the tank was also uncoated, just painted. It did not appear too bad inspecting with the tank in place, but was actually rotting lower down where it was in close proximity to the rear of the tank. Probably trapped moisture against the tank and caused the corrosion. This wood has been pulled out along with other rotting pieces and replacement is planned to be done in the next week with epoxy coated marine plywood. The tank will be elevated off the hull and plywood underneath by 4 - 5 longitudinal strips of some type of pvc board - starboard, etc., with the strips glued to the bottom of the tank with 5200. Possibly with some rubber strips underneath board strips to provide some give. Not sure how I am going to hold it in place, certainly not in the same manner with 2x4s as used previously.
But there are some planning issues for improvements that need to be decided, especially as to how water drains through the boat and hopefully out. I want to relate how a 25 should be setup to the discussion on Poe’s 31 and how it should be setup for rough water.
Some issues re: how water drains through the boat.
The foot well in the cockpit drains onto what was the uncoated plywood under the fuel tank, putting water right where you don’t want it - around the tank. I plan to redirect this to under the new panel under the tank which will be epoxy coated marine plywood.
The tank is under a two part hatch. The front half is sealed. The rear half is not and lifts out to provide access to fuel filters and batteries, but allows water to leak around the rear section of the tank.
Scupper drains - on the 25 these are just drain plugs. And with the heavy I/O engines all the way in the back, these drains are uncomfortably close to or under the water line. Stand in the back next to the engine and pull the plugs and water comes in, not out. And so close to the engine cover that the thought is that under the right conditions and the weight of additional water that water would drain in - not out - and into the engine compartment. Yes, two bilge pumps under the engines.
Take a look at the photos below and let me know what you think.
The last image above is a mockup of the tank profile.