Page 1 of 1
In water when replacing bulkheads?
Posted: Sep 30th, '10, 11:21
by Rocky
Am I thinking this too much or is it beneficial to tab in bulkheads with boat sitting in water, or just provide good keel support on the hard?
Posted: Sep 30th, '10, 19:27
by Marlin
In my humble opinion the best natural position the boat could be in is floating, I would stabilize the beam to eliminate any compression that could occur once u start up the sawzall, keel support and chine support on the beach cant compare to sitting in the bathtub
Posted: Sep 30th, '10, 19:53
by Bob H.
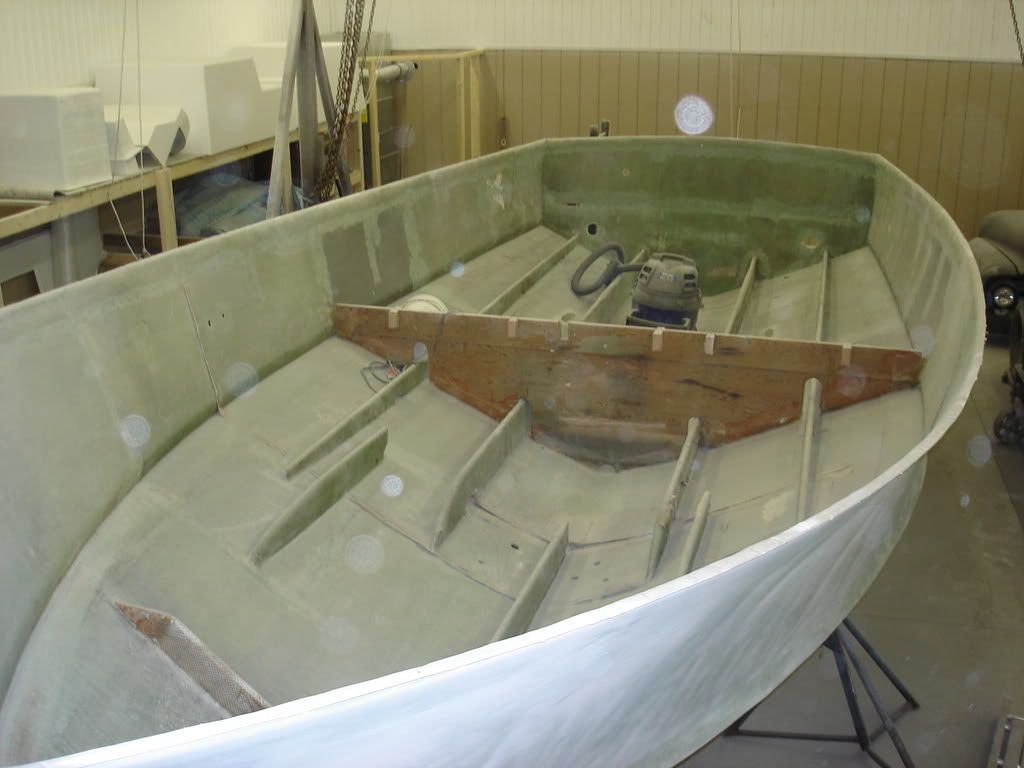
Rocky, I measured every bulkhead, took hundreds of measurements, propped n leveled the boat, and took it down to a canoe...including top cap removal....thought id have to brace cross brace and brace again...once apart...SHE DID NOT MOVE...66 model thicker hull. Leave a strong 1/4" gap along the side of the bulkheads, you dont want a hard T connection at the bulkhead tabbing..Radius Fillets are your friend the bigger the better...BH
Posted: Sep 30th, '10, 19:58
by Raybo Marine NY
bob gets the award for stripped down hull, cant say I have seen a B31 ever like that before, good luck to you .
Rocky- which bulkhead are you thinking?
Posted: Sep 30th, '10, 20:06
by Marlin
We did engine alignment on the beach and redid it when we rested the boat in the water, these boats are stiff but we had to move my boat several times over the winter season and I had originally set the boat with the cabin sole as my level point, every time we would have to crank on the leveling jacks sternm midship ahd forward to tweak the boat back to what we thought was where we set the boat initially, the water is the bestest location
Posted: Sep 30th, '10, 20:10
by Bob H.
Robbie, That was over four years ago...have made a "little" progress since then..should be back together by december...BH
Posted: Sep 30th, '10, 20:45
by Rocky
Thanks Bob and Marlin, Robbie, I am currently redoing front of engines bulkheads (sport fisherman) and rear of engines deck support, before I sister up my engine beds per Capt Pat's instructions, the boat actually sits on a 31 specific trailer so it does have support in many places bertram's haul-out support diagram dictates. Also, the boat as I own it will most of the time be on this trailer unless of course I'm using the boat...
So I guess it's "natural state" is on this trailer, not the water. I'm probably over thinking this, I don't know. I'd love to just tab'em in as she sits, sure would be easier to do so. Don't worry Marlin, I'm making it a point to follow Capt. Pat's instructions exactly!
Posted: Sep 30th, '10, 20:51
by Tony Meola
If you get her level and block her well, you should be able to do it on land with no problem.
I don't think Capt Pat has figured out a way yet to float one in his bath tub in order to get them in straight. But he has suprised us before.
Posted: Sep 30th, '10, 21:07
by Rocky
He'd be the one to make that happen I bet Tony! Thanks, I was leaning towards a level boat with good support.
Posted: Oct 1st, '10, 07:40
by Carl
They built'em on land...
Posted: Oct 1st, '10, 08:31
by Tommy
Bob H,
How 'bout posting more photos of your rebuild.......I learn everytime one of you guys shares either narratives or photos.
Tommy
Posted: Oct 1st, '10, 09:43
by CaptPatrick
Posted: Oct 1st, '10, 10:11
by Dug
Bob isn't restoring a boat. He's building a new one with an existing hull!!! ;)
Posted: Oct 1st, '10, 10:46
by CaptPatrick
Dug wrote:Bob isn't restoring a boat. He's building a new one with an existing hull!!! ;)
Yup, ya' got that right... I tried to hire him at Greenport. Merrit and Rybovich would be proud to have Bob as an employee too.
Posted: Oct 1st, '10, 18:01
by Bob H.
Pat, I dont know what to say...YOU showed me the way...Ill let my work speak for itself...Thank you isnt enough.
Dug,
Coudln't think of a better foundation TO start with.
Posted: Oct 1st, '10, 19:57
by bob lico
bob i finally saw the pictures of your creation as we discuss in our conversations with harry and i. nice very nice slow diliberate meticulous planning and exercution . incidently i notice the raccors in the bilge----very cool along with the exhaust quite familar. we will talk props as next business .
Posted: Oct 1st, '10, 20:48
by Tommy
Outstanding Bob; thanks for posting Patrick. Can't wait to see the finished project.
Tommy
Posted: Oct 3rd, '10, 08:32
by Capt.Frank
That is totaly amazing.
Posted: Oct 3rd, '10, 10:51
by Rocky
Always amazed Bob, how do you find the time!
Posted: Oct 3rd, '10, 18:29
by Bob H.
Thanks guys, its been a long road...every saturday, couple nights each week, many rainy days, five years later its getting very close...like Bruce once said...one system at a time..plan it, execute your plan..have a few do overs ( should have listened to you guys)..when its time for props I will call you for sure Bob Lico...BH
Posted: Oct 6th, '10, 19:44
by Rocky
Capt Pat and/or experienced, when I go to tab my bulkheads in(after 1708 on both sides my core) am I creating the same gap on BOTTOM of bulkhead to hull as I am to the sides of hull for no hull fatigue, or does the bottom have no gap? Looks like Bertram did have gap at the bottom as well as sides on my old bulkheads. Thanks.
Posted: Oct 6th, '10, 20:11
by CaptPatrick
Bottom gap isn't as critical because of the hull thickness, the rigidity of the hull, and because it's out of eyesight when in the water. But a little gap is fine.
Make sure that your tabbing creates a nice positive radius and doesn't get tucked into the gap or make a tight 90º turn. The radius allows the flex of the boat to transistion easily through the tabbing. Use two layers of 1708 lapping 4" onto both the hull and bulkhead for the first layer & 3" for the second layer. (8" total tab 1, 6" total tab 2...)
Posted: Oct 6th, '10, 20:46
by Richie Rich
WOW.....Bob, that is a great build......I would even try and register it as a new boat once you're done.....great work...God bless ya
Posted: Oct 6th, '10, 21:56
by Rocky
Thanks Capt Pat., will do with radius on tabbing. Anything to help acheive the best radius before setting wetted 1708 onto inside corners, like a piece of self adhesive sheetrock tape curved onto corner? I'm guessing this is were the experience part comes in, only one way to learn...
Posted: Oct 6th, '10, 22:16
by CaptPatrick
No big secret or special technique, just let the glass flow naturally across the angle change and don't tip the brush into the joint. Use a 1" roller and let the roller dictate the radius. If the radius gets too small, use the brush to pull the glass away from the joint, then roll in the radius.
You can also hold the roller in the joint and brush the glass out and away to form the radius. let the first layer cure out to point of leather hard and apply the second layer. The radius will already be established and you can concentrate on a good tight bubble free second layer.
Practice on a piece of scrap if you're unsure, but you'll get the hang of it pretty quickly...