Page 1 of 1
Rub Rail
Posted: Aug 26th, '10, 15:15
by Joe Vukan
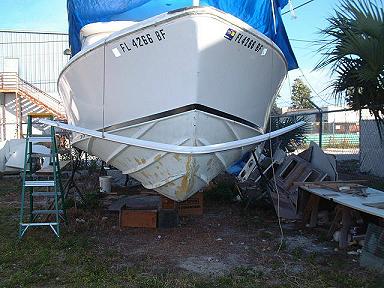
Finally installing a rub rail on my 31 this weekend. My question is: should any sealant be applied to the back of the rail or any of the mounting screws?
Posted: Aug 26th, '10, 17:12
by Charlie J
joe
definatly, i used a case of silfeflex, forget what #, lay it on top and bottom of flange, and in between
Posted: Aug 26th, '10, 18:28
by Charlie J
joe i think it was the 291 silkaflex, bought mine thru hamilton marine
http://store.hamiltonmarine.com/browse. ... ,8342.html
Posted: Aug 26th, '10, 21:35
by Marshall Mahoney
I just finished mine. A few comments to add to the instructions.
1) The job was harder than I anticipated -- had a helper and it took us 2 days.
2) I didn't trust the screws, so I ordered thru bolts/fender washers off of e-bay (more time consuming but more secure).
3) I was going to seal with 4200 but realized I would have a goopy mess. May look at running a thin bead later.
4) Important -- cut a 2" piece of rub rail (you will have excess) and slide it all around the seam that you'll be covering to check for high spots prior to installing the rail -- grind down as needed. I had several that hit the inside of the rail and would not have allowed the rail to lay flush.
5) A side grinder with a cutting disk worked better than a saw blade on the stainless.
6) When bending the stainless around the corners, don't try to apply pressure past the first bolt hole. Apply pressure to the sections between the bolt holes only. Screw the stainless down tightly just before the bend. You may need one person pushing and one in the boat pulling. After I learned that the hard way, the rest of the bends went nicely. The hole is the weak spot and will bend first! E-mail me back if you get stuck.
Good luck!
--Marshall
rub rail
Posted: Aug 26th, '10, 21:56
by Marlin
dry fit that mother,maybe a screw every 4th location, stand back, and behind and forward and look for dips ,waves and gaps on the bottom edge, near the bow, capt pat advised me 2 fair in under the rubrail near the bow to eliminate the 1/4" gap{ I was going to paint the boat},next dry fit the ss rubrail and reinspect the assembly fit to be pleasing to your eye, the vinyl is adjustable ,the ss doesn't bend, make sure the screw holes dont interfer, again the doctor from LLano Tx recommened a 3m product as the adhesive/caulk , I think #66, please check, I also taped with 2" tape above the rail and below the rail{within an 1/8 " } for easier clean up, lots of paper towers and a barrel to stash them in and adaquate thinner to clean everything, I made a plastic tool with a small radius to control the amount of fillet to remain, pull the tape as soon as possible away from the caulk to give u a clean line, I painted mine ,uv issues in the south , the painted rail looks like part of the hull
Posted: Aug 27th, '10, 02:20
by CaptPatrick
Posted: Aug 27th, '10, 07:46
by RussP
It's going to make your hands hurt and maybe a blister or two but resist useing a screw gun. You will shear the heads off some of the screws and on the SS rail you will bugger up every screw head. Turns a nice job into hammered dog shit.
RussP
Posted: Aug 27th, '10, 18:42
by Joe Vukan
Thanks for the help, I will dry fit the rub rail before applying any sealant. The old rub rail has already been removed and the holes are filled and cleaned, plan on taking my time.
rub rail
Posted: Sep 5th, '10, 18:48
by Marlin
Russ u mentioned the use of a screw gun and the trashing of the heads , a few years ago I bought an impact screw gun and once I learned how to drive it I dont think I have messed up a screw head since, especially removal of tough screws, I still use a hammer /impact device to start the loosening of rub rail screws