Page 1 of 1
Cummins impellers
Posted: Jun 2nd, '09, 20:36
by Terry Frank
I've got 70 hours, yes, 70 hours on a repower with Cummins 6bt 210's. Not one but both raw water impellers shredded last weekend. The boat spends it's days in the water at Beaufort, NC. Anyone got a clue as to how this happens? I've replaced with Sherwood's, got a pair from Tony Athens on order. Thanks in advance.
Posted: Jun 2nd, '09, 21:16
by Harry Babb
Terry
May be Doug will chime in here.....a similar thing happened to him.....did the pumps also have 70 hours since overhaul??....most folks here are in agreement that the Tony Athens impellers are the cats meow.
I have installed Tony Athens impellers in my pumps.
Hope you did not hurt your engines
Harry
Posted: Jun 2nd, '09, 21:19
by In Memory Walter K
Terry-Raw water pump failures are always unpredictible. Unless you have the Tony Athens impellers, it might be best to make fresh impeller changes as part of every spring startup. It's too early for you to have worn cams or other pump parts causing your failures. Sherwood's impellers aren't so great. Make sure you follow the output line from your pump to your oil cooler. Unscrew the clamp to the rubber elbow to the cooler and look/feel for impeller bits in the entry of the cooler. Flush out the pipe leading to it too. I have found that the easiest way to change them is via the removal of the whole pump via the two bolts holding the unit to the engine. Once you remove the hoses, the removal of the two bolts allows you to pull the whole pump so you could easily work on taking off the plate that covers the impeller cavity, etc. The pump being gear driven, once you have replaced the impeller, gaskets etc. and are ready to reassemble, it's just a simple matter of alligning the gear teeth on the engine with the teeth you have exposed behind the pump when you have removed it. You can do it by feel. Put back the two bolts, connect the hoses and go. Hint: Make sure the condition of the intake hose is good and tighten the clamps well. I just recently had several overheating situations on my port (harder to get to pump and hoses) engine and finally found I had some air seepage that lowered the volume of water going through to the engine. This in turn was cooking the impeller which then took a severe set and finally broke off a blade. After two impellers I removed the whole hose from the intake strainer to the pump to find I had another small break caused by the hose getting chafed over the years on a specific spot. Forewarned is forearmed. Walter
Posted: Jun 2nd, '09, 22:08
by CaptPatrick
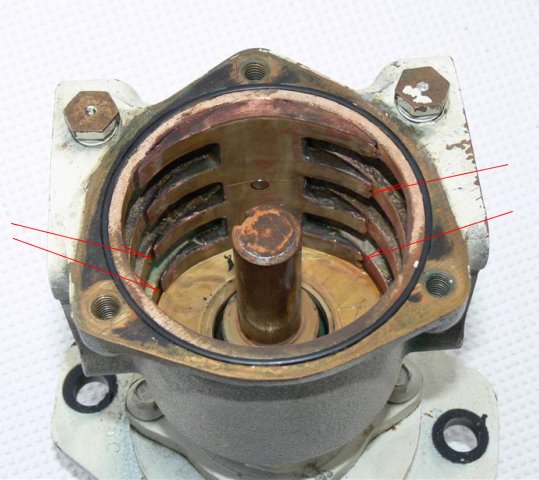
A common and major source of impeller damage is the pump cam.

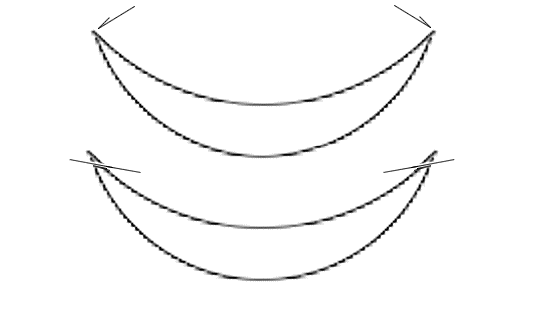
The tips must be flush with the chamber walls and any sharp elevation of them will eat the impeller blades up.

One simple modification is to file the sharp tips down by about 1/16" & then round over the top slightly, making a tiny bit of a smooth ramp.
Sand, shell, and other grit wears the cam edges down causing them to get paper thin at the tips. These thin tips will easily get caught by the impeller lobes and turn them upward, leading to impeller failure.
By modifying the cam as described, you add life to the impellers...

Posted: Jun 2nd, '09, 22:32
by IRGuy
Walter and Capt Pat are right on the money with their comments.. I bought a couple of spare impellors from Tony Athens and have also had his shop rebuild one of my pumps, plus I bought a rebuilt pump from him to keep as a spare. Removing a pump is not as simple as it sounds.. on the 6Bs you must also remove the fwd port engine mount bracket to get to one of the raw water pump mounting bolts.. which means you have to support that corner of the engine somehow.. I carry some 2x4 blocks and a small hydraulic jack for this purpose.. Tony calls this design an example of "couch engineering".. something designed by someone who never had to use what he designed in the real world!
BTW.. be sure to find the broken off pieces of rubber.. they will restrict flow somewhere.. I found several old pieces in the transmission cooler.
Posted: Jun 3rd, '09, 07:08
by Terry Frank
Thanks guys.
Posted: Jun 3rd, '09, 09:49
by Ironman
I found the hoses directly after the pump.. balloon ,because the blockage of impeller pieces downstream at the aftercooler etc.. check & replace too.. I have the fuel cooler .
Im changing Tonys every 400hrs..
Wayne
Posted: Jun 4th, '09, 15:33
by In Memory of Vicroy
The Sherwood impellers went from okay to horrible over a period about 10 years.....resulting in Tony Athens designing the aftermarket pumps and parts that he has made in Korea. In addition to the impellers he also sells the cam and wear plate. His cams are made of naval brass that wears at the same rate as the bore of the pump vs. the stock Sherwood cam that is harder and wears less than the bore leaving a knife edge to shred impellers...I know.
Anyway, Tony solved the only real problem with the Cummins 6Bs with his aftermarket stuff. I don't think he is making a complete SeaMaxx pump (15000 series) for the 210, 250, and 270 yet as he does for the higher hp models that use the 17000 series..
The 210 does not have an aftercooler. The 250 and 270 aftercoolers are fresh water cooled so no pump parts can get to them.....on the 210, 250, and 270 the first place they hang up is the gear cooler.
UV
Posted: Jun 6th, '09, 21:22
by DRIFTER31
Note: To remove the whole pump on the Cummins 6bt with factory mounts just shim the mount between the block 1/2 in. and add longer bolts. Its easy if you do it before initial install but many of you may have the 3/8-1/2in needed in the slot for the shim. I just cut the palet shipping mounts and used it for a shim since the bolt pattern was already there.
Posted: Jun 7th, '09, 08:40
by IRGuy
Drifter31...
Thanks for the tip! Once again I learn something here that is so simple I ask myself why I didn't think of that on my own!


