Page 1 of 1
winshield installation
Posted: May 6th, '09, 17:39
by bob lico
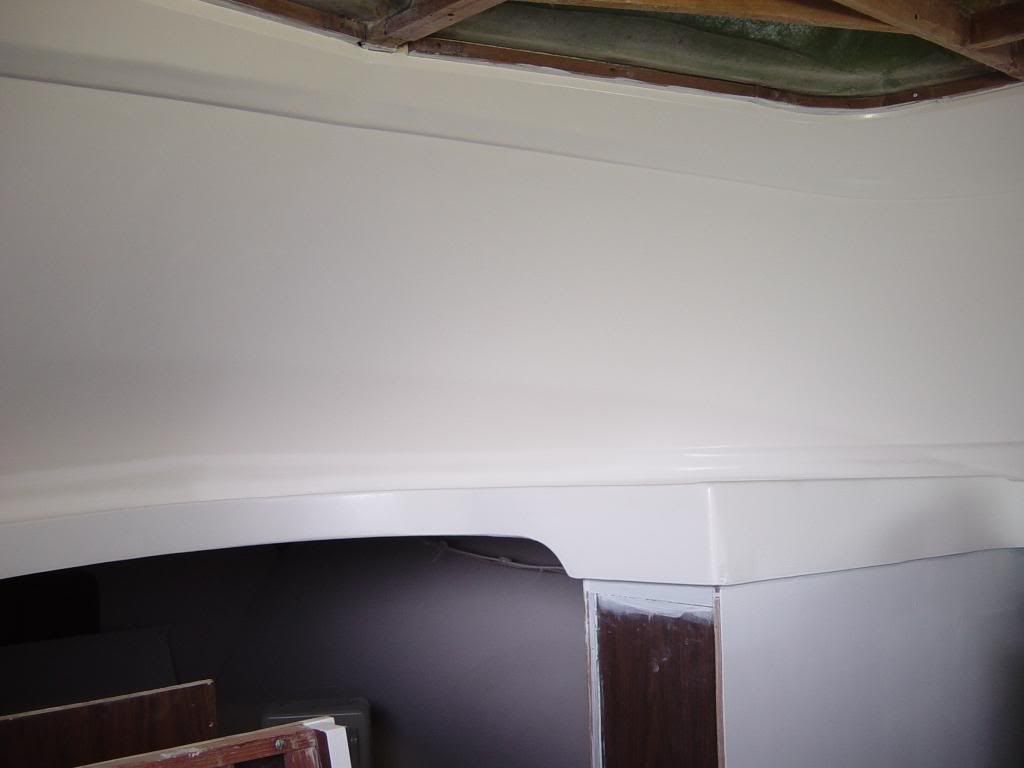
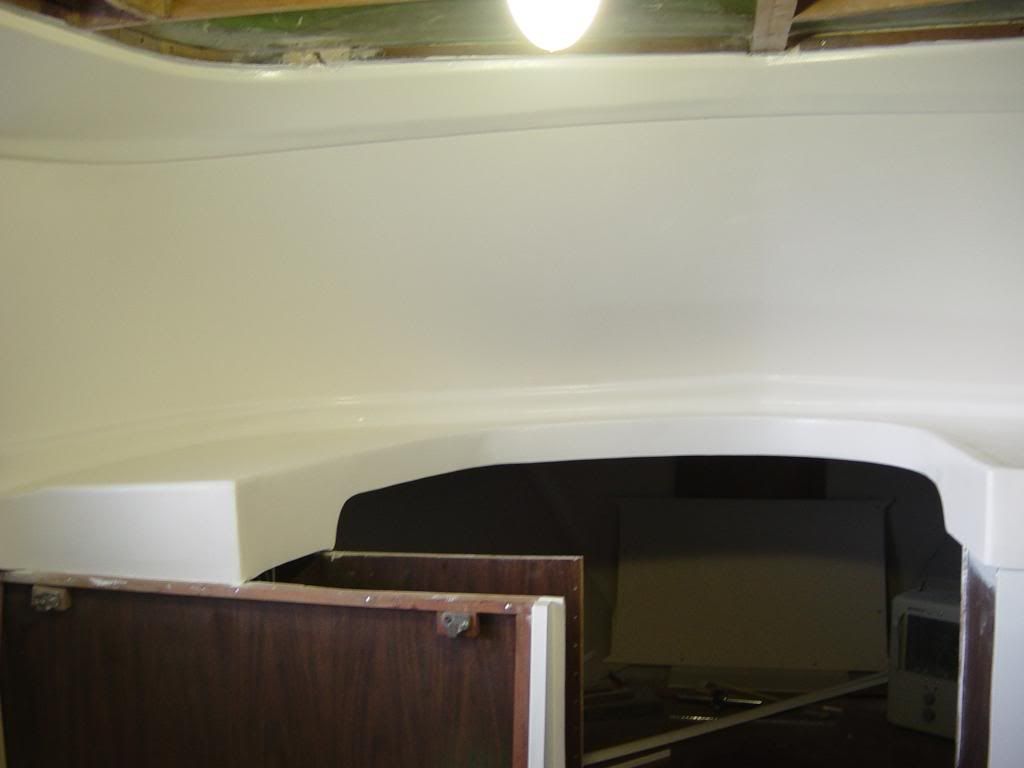
i resume work on the boat now that i can climb about. the windshield is complete and while i try to find color match of corian in head i will finish the window frames/window installation
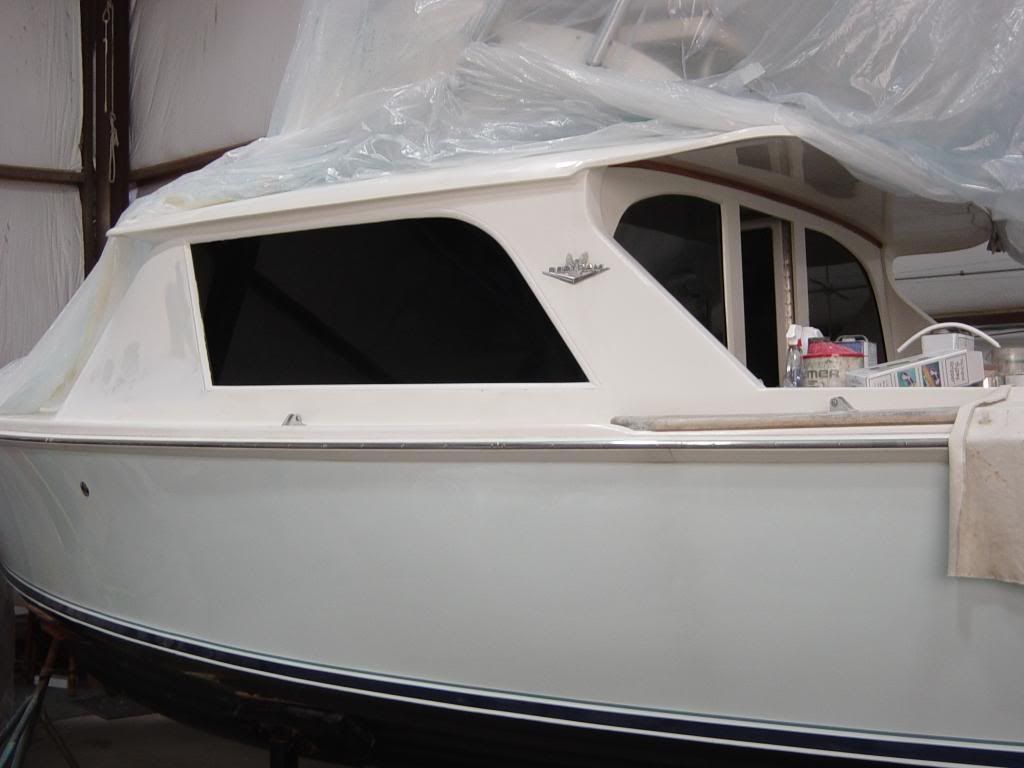
Posted: May 6th, '09, 17:41
by bob lico
another view
Posted: May 6th, '09, 17:42
by Charlie J
looking good bob
Posted: May 6th, '09, 19:09
by Tony Meola
Bob
Nice job. Looks real clean and like it was always there.
Posted: May 6th, '09, 19:30
by bob lico
charlie, tony, that was the first time i ever did a freehand contour in epoxy. i freehand sketch the cut to coinside with windshield . then cut with jigsaw. now i had to resupport the deck surports.i took a tab measure and work it around the cut out wherever there was a curve i wrote it on paper, then i cut coosa board to size and scarf the back where it would have to be bent. i screw the coosa into the deck supports then fill in all the scarfing with epoxy. epoxy a layer of cloth all around and faired.did the gel -cote thing but no polishing.i will cut corian or teak for that hanger locker top.push the refrigerator back 16" and will make raised panel teak draws from top to bottom on left of refrigerator and one cabinet and one bottom draw on refrigerator panel.gain alot of floor space and loss no cabinet space. actually gain quite a bit of organization to galley.flat screen tv will drop down in v-berth with controls in new cabinet with micro/coffee pot in it ,built into area behind windshield.
Posted: May 6th, '09, 20:48
by Tony Meola
Bob
Would love to see the pics when that job is done.
Posted: May 6th, '09, 23:13
by Rocky
Great job Bob, would you happen to not be using those seat "hooks" that hold the back of the seat on? I am missing one and if your not going to use them, could I buy one? Thank you.
Rocky.
Posted: May 7th, '09, 17:00
by bob lico
i consider all designs for seating in the salon . the stock "ice cream parlor"layout is by far the best especially with the grandchildren . they eat there lunch there when i take them to fire island . i don`t like the new concept of couch and coffee table, very diffecult to eat on or read charts.i redone the seats in coordinating fabrics with v- berth . i will be using the "j" hooks.
Posted: May 8th, '09, 14:03
by Rocky
O.K Bob, just thought to ask anyway. I'll have to find something from the Perko line of garbage I guess!
Rocky.
Posted: May 8th, '09, 20:31
by bob lico
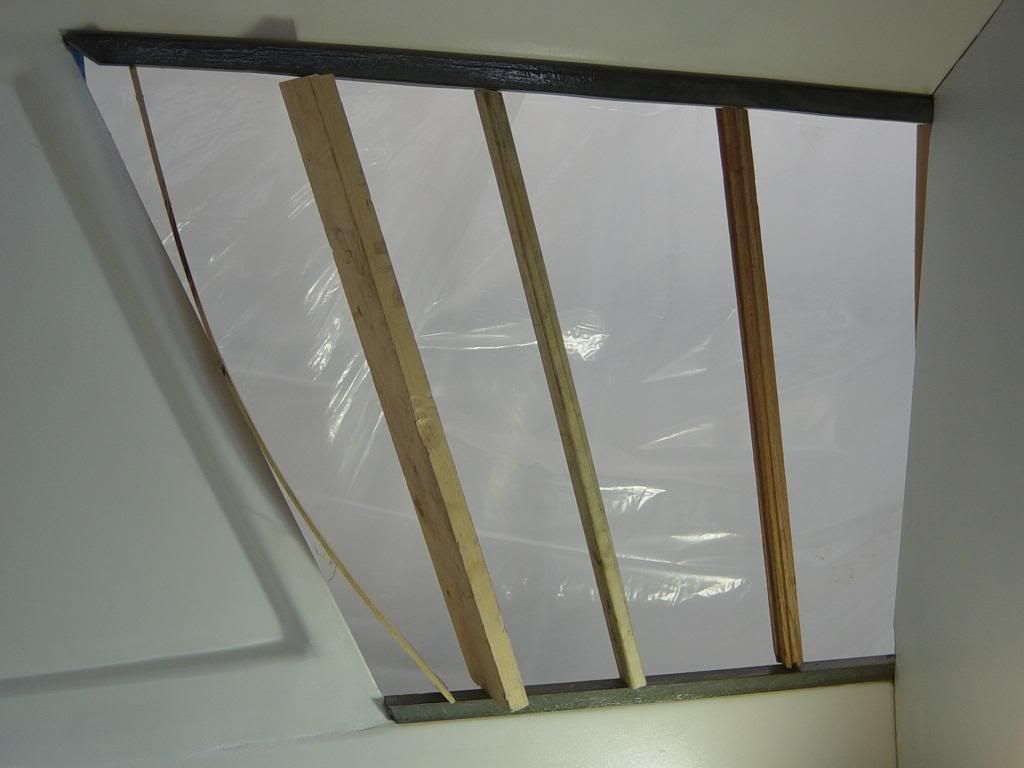
i am on to the window installation and my wallet is crying.wow those side windows in # 14 blackout tempered glass is quite expensive.i am building the inside frames first . the out side frames are 3/4" quarter round azak brand pvc with structual flex added to the miters.the inside frame will be courtour to the interior just blended into existing glass.
Posted: May 8th, '09, 20:32
by bob lico
front starboard
Posted: May 8th, '09, 21:27
by Tony Meola
Bob
Is that coosa board held in by the wood shims? Looks like it.
Posted: May 9th, '09, 07:27
by bob lico
yes i made the entire frame of coosa and epoxy in place the wood holds it in place while setting up.there is nothing for clamps to hold on to so the series of wooden braces hold it in place overnight. drys like stone coosa board loves epoxy .becomes like" structual steel " together.
Posted: May 10th, '09, 21:23
by Tony Meola
Bob
Looking Good
Posted: May 10th, '09, 22:44
by bob lico
thanks guys for the pat on the back. i guess thats why i go thru the bother of taking photo`s and posting . i figure maybe just maybe i might be helpful to somebody a little reluntant to take on a project like this. i am not a fiberglass person or god forbid----painter i just try my best.i work on trial and error!! belive me i was quite nervous putting a radius on the points of the tempered glass every body telling me it`s going to shatter.i used a diamon file and soapy water with the glass well surpported.
Posted: May 17th, '09, 19:45
by bob lico
i installed the 1/4" tempered safety glass using Sikaflex -296 and aktivator with rubber pads along perimeter .next step was to install a frame so i purchase azak brand 1/4 round by 3/4" .i use one 16' at
$10.43 ,it will do both sides. i put down a bed of 3m- 4000 uv and mitered joints . installed ss screws every 10" and used Bond and fill at the joints and to cover screw holes.the miters were help with electric hot knife.

Posted: May 17th, '09, 19:47
by bob lico
side trim install . good for a 1000 years of no maint.
Posted: May 17th, '09, 20:47
by Tony Meola
Bob,
As usuall a work of art. You are going to give the Capt. a run for his money.