Page 1 of 1
Removing heavy build from teak boards.
Posted: Nov 6th, '08, 09:41
by Buju
I need to remove the equivalent of 25-30 coats of varnish (about a 1/4" thick- actually acrylic urethane) off of some nice covering boards. The boat is in the water.
First thought was to tape off the gunnels at the rubrail with long mask and visqueen, and suspend the visqueen vertically (to contain the particulate) and hit it hard with 36 grit on the RO sander... but after trying it, at that rate, I'll be there until '09.
SO I'm playing with the idea of a pad on my 7" grinder, and using the gold (mirka?- with the bulldog on the back) abrasive sheets... Problem is, in the past, under any significant load, the grinder shoots the discs off at a high rate of speed...To remedy this, I was thinking of using 3M 77 spray adhesive on the pad and paper.
Then there is also the inherient danger of using a 7" grinder, if it "gets away" from me, for even a second, can easily remove too much and gouge. Allthough I can use, say 80grit to lessen that risk, and can rapidly "feather" the trigger on the grinder to avoid full rpm's.
Annnnd I do plan on following up with 60,80,120,then 220 on the RO sander to smoooooooove it out before re-coating
So, question is:
Is there a simpler method I'm missing? I want to stay away from meth.chlor. alltogether- too much danger of splatter on adjacent surfaces.
Has anyone had success with the mirka sheets on a 7" grinder in the past? A variable speed grinder would be great in this case, but that aint what I've got.
Posted: Nov 6th, '08, 10:31
by lobsta1
I think the heat will just load up the 7" Mirka discs. Have you thought of trying to use a cabinet scraper?
Al
http://www.leevalley.com/wood/page.aspx ... ,310,41069
If unfamiliar with scrapers, this holder will help.
http://www.leevalley.com/wood/page.aspx ... &cat=1,310
Posted: Nov 6th, '08, 10:32
by Rawleigh
I use Mirka Bulldog 5" pads on my DA down to 80 grit on metal all the time without trouble. Maybe if you went to a hook and loop pad it would stay on better. There are a number of non-methel based strippers out there that you may want to try. The main thing is to avoid staining the wood with them. How about getting the bulk of it off away from any painted surfaces with a heat gun and then sanding near the painted surfaces?
Posted: Nov 6th, '08, 11:15
by Dug
Buju,
I was thinking a Fein multitool with the scraper to get under it and peel it off.
Are you familiar with the gizmo?
Dug
Posted: Nov 6th, '08, 15:15
by Rawleigh
That is a good idea dug!
Posted: Nov 6th, '08, 16:09
by Dug
Thanks!
Here is a link!
http://www.fein.de/fein-multimaster/us/en/main/
With the tool I was thinking...
http://www.fein.de/fein-multimaster/us/ ... rings.html
With the Rigid stopping knife.
I have found many, many uses for mine...
Posted: Nov 6th, '08, 21:18
by Buju
Thanks guys, I went ahead with the 7"grinder and it worked out great.
Took a llittle over two hours, and only went through 5 mirka discs.
The 3M spray adhesive made a huge difference, didn't shoot off a single disc. I was a little concerned about it being hard to get ea. disc off- but the friction from grinding kept the adhesive tacky, and changing them was easy.
Also wouldn't recommend anyone just taking a 7" grinder to their covering boards without practicing... could get ugly real quick.
Immediatley after beginning this thread, I went out into my yard to "practice" on some scrap teak, mildewed patio furniture, and a old swim platform...Once you get dialed in with working the heavy grinder delicatley it works great. I did end up with one small gouge on the transom- which already sanded out during the 60grit with the RO.
The visqueen "containment" worked great also. I'd estimate that 95% of the dust remained in the cockpit area for me to vacuum up.
testing it out
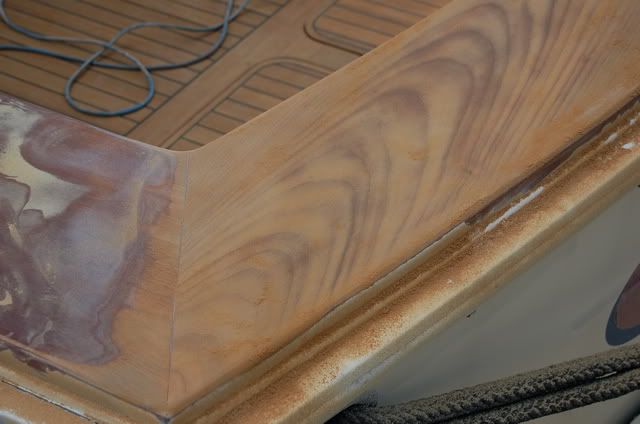
ripping it up
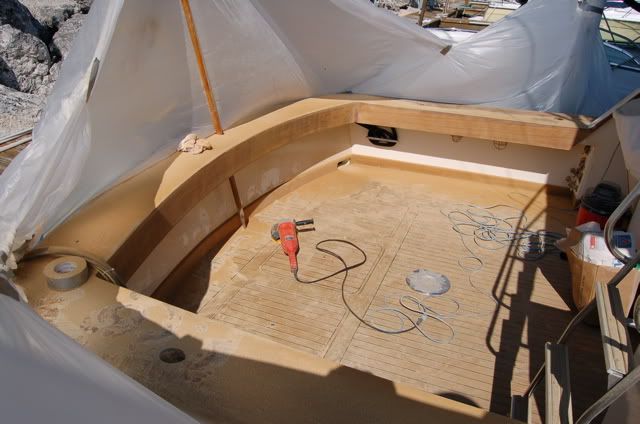
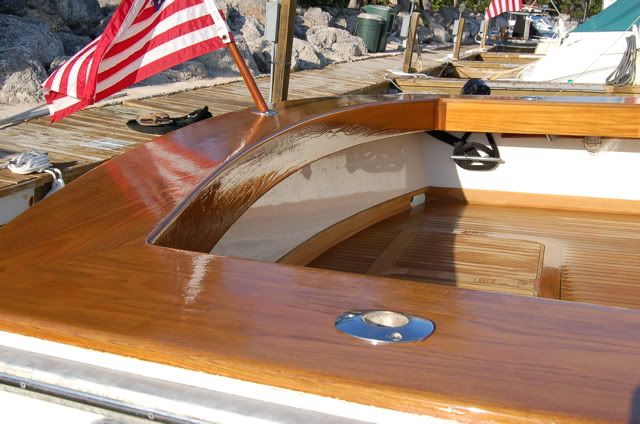
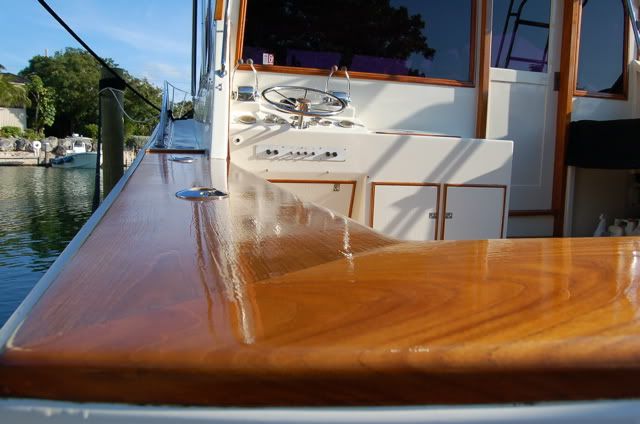
all cleaned up, until tomorrow...
Posted: Nov 6th, '08, 21:28
by Buju
Dug,
Yep, I'm familiar with the fein. Very cool infintly adaptable tool. But I don't have one... and I kinda wanted to stay away from scraping on this one, as the teak is a bit softer than the material being removed.
Lobsta,
I haven't ever seen, or used one of those. And beleive me, I've done my share of scraping- might have to look into that for future applications.
Thanks again...
Posted: Nov 6th, '08, 22:51
by bob lico
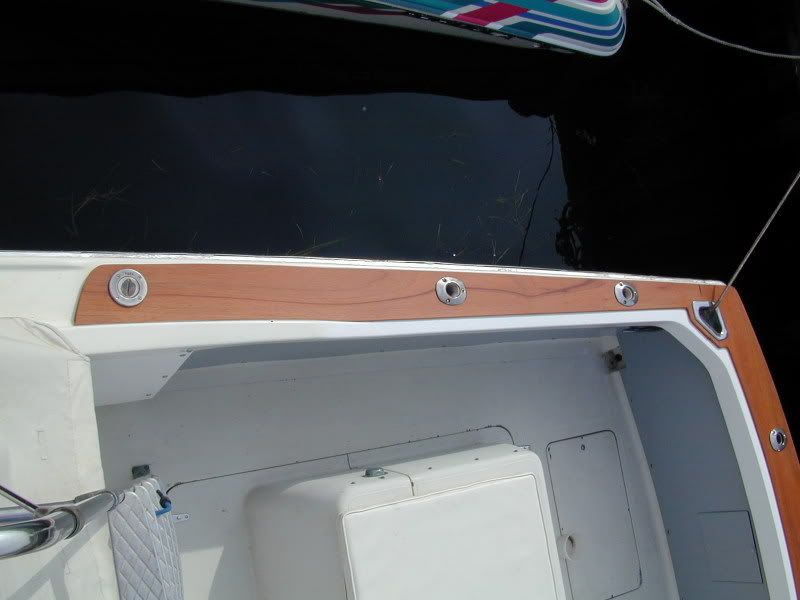
the problem i encountered is when i built my covering boards i should have done more homework.i wanted to do the job with no bungs so i used 316ss screws and fender washers from under the gunnels after laying the covering boards in wet epoxy.if i was to removed the finish with 60grit somehow i am sure one of the screw tip will come thru so i only use teak oil instead of varnish to prevent a disaster.my covering board are full thick 5/4" or 11/4" as others refer to it.how were those covering boards attach to the gunnels?? i don`t see bungs

Posted: Nov 7th, '08, 08:32
by randall
i would have used a planer......as to covering boards....the port and starboard on mine are held on with the rod holders and screws under the hawspipes.....thats it...the transom hav to be epoxied on one edge because of the compound curve....but no screws.
Posted: Nov 7th, '08, 09:15
by Buju
Randall,
Planer is a great idea... I don't have one, but would've considered buying one for the job. I was pretty apprehensive(rightfully so) about taking the big grinder to it. Allthough, there are a lot of subtle curves and angles where the planer wouldn't work as well. But for the majority of it- great idea... next time.
Bob,
Love your boat.
I'm not sure how the boards are attached on this boat. I'm thinking they're just epoxied, because I couldn't seem to find any screws under the gunnels. Personally, I think that oiling your boards is the only way to go.
This is the second time this year I'm refinishing the boards on this boat. First time was this spring, when I scuffed up the existing finish and added four coats on top. Then over the coarse of one of the tropical storms this summer, his canvas top kinda came loose and the snaps scraped the crap outta the transom board. Only way to make it look acceptable again was to take it down to bare teak and start over...expensive... if he had oiled boards at that point, it would've been as simple as lightly sand & re-oil. I keep on trying to persuade the owner to let me oil them- but he's in love with the high gloss look... oh well, job security.
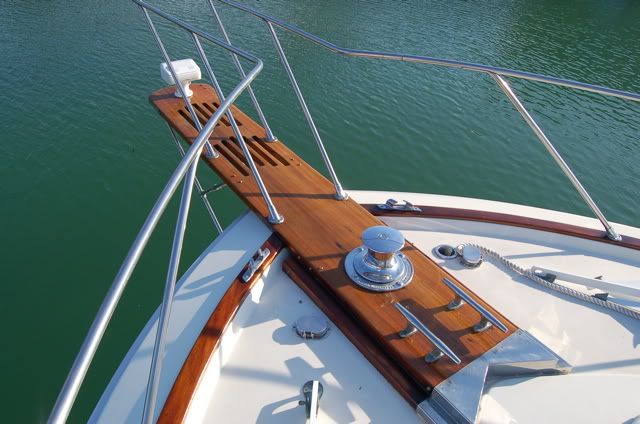
Now, I've gotta get over there and do the toe rail, 9' pulpit, dinghy & epirb stands, window frames, and the entire helm/flybrige area- whew... fun in the sun.
Posted: Nov 7th, '08, 09:22
by randall
the problem i find with gloss on cover boards......its a bad place to slip. plus matte is far more forgiving. i dont think there is any surface curve so radical a planer wouldnt just glide over.....its how they shape surfboards. plus you can control the depth of cut . i am however just making this up as ive never tried to remove a quarter inch of finish.
nice work
Posted: Nov 7th, '08, 09:31
by Buju
Thanks Randall, means alot coming from you.
Yep, me dismissing the planer on curved surfaces is really just my inexperience with planers speaking...
The right tool in the right hands can work wonders...shit- even the wrong tool in the right hands can get the desired results.
Posted: Nov 7th, '08, 09:43
by randall
you would love my shop ...its full of "wrong" tools for the job. im trying to get a dentist little right angle hand piece....if anyone has one laying around.
my new favorite tool....paint sticks and sticky back sandpaper. you can cut the sticks to a variety of shapes and away tou go.
Posted: Nov 7th, '08, 18:22
by bob lico
buju thank you for the compliment on the boat. when i built the covering boards i copy the double splice on the stern courners from a buddy davis but i had know idea what i was getting into trust me it looks alot easier then it is due to the coupound miters.the transon has a angle to it in addition to the miter angle.i used pine 1"x12" until i got it right.also i wanted the covering boards to completely cover the gunnels so i had to make strips of wood encased in epoxy to built up the gunnels to the height of the inside lip on the gunnels.i use a entire lenth teak spline instead of biscuits to put pieces together.alot of labor but i love the results i have never touch them with sandpaper just use walter k method to clean.
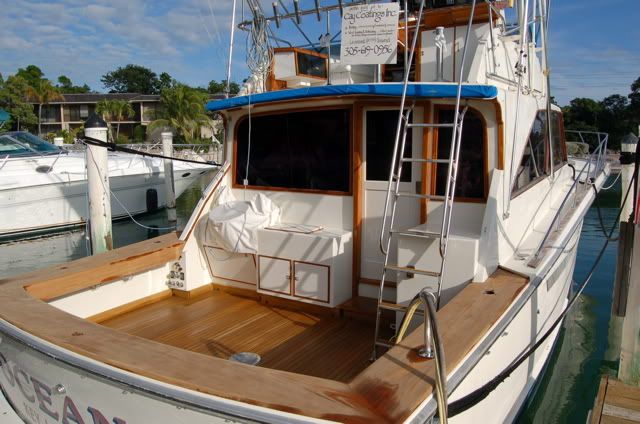
Posted: Nov 24th, '08, 07:04
by Buju
Posted: Nov 24th, '08, 10:47
by Rawleigh
If the owner is happy with it, you should be happy with it too!!! It looks great. All of your hard work shows! No dips and divits on a glossy finish like that shows how careful you were with the grinder!! Next year's coat will get the final grain out of it.
Posted: Nov 24th, '08, 11:28
by Buju
Thanks Rawleigh...
Posted: Nov 24th, '08, 20:27
by Tony Meola
If I were the owner I would be more than happy with it. Really nice looking.
Posted: Nov 24th, '08, 21:00
by randall
looks good!!
Posted: Nov 25th, '08, 07:54
by Buju
Thanks guys, impressing a couple of the faithful is a reward in itself....