Page 1 of 1
New Deck
Posted: Feb 18th, '08, 14:19
by Ironman
Gentlemen:
Thought a new thread would get more info...
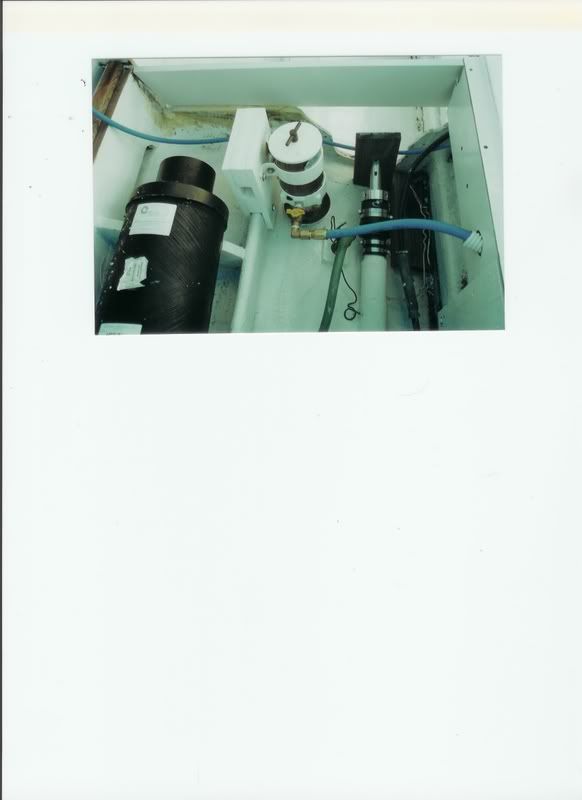
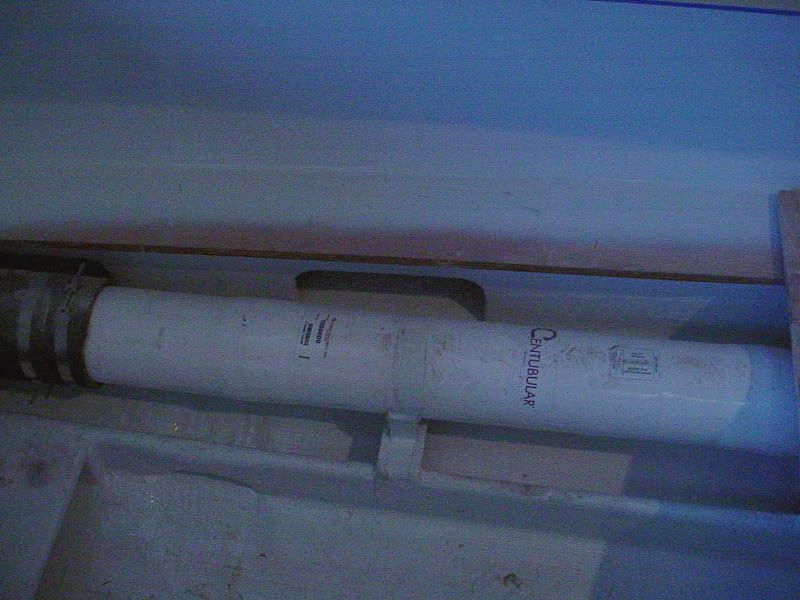
I Took off my panels &ripped my deck up(wood had a small rotted area where some clown foamed in side tanks ) as Im doing a new ALUMINUM frame deck along with moving the Cummins 5' exhaust over to the outboard sides...putting fish holds down the old exhaust areas.
Gonna gelcoat the bilge & inside sides of the hull & maybe just leave off the panels? (I Like the space for gaffs ETC.)
Maybe glue a panel right to the inside of the hull & paint it.
Got rod holders showing ...But adds sooo much space
http://i130.photobucket.com/albums/p245 ... ork001.jpg
Any thoughts???
Wayne
Posted: Feb 18th, '08, 19:59
by Vince Luciani
Hello Wayne,
Your pics bring back memories. Aluminum sounds pretty heavy duty! I guess you have you considered the structural fiberglass framing? I went with the 2"x2"x1/4" fiberglass sections. The stuff is easy to work with and very strong. I made both mechanical connections and epoxied connections. My deck is way strong! I take out some real heavyweights and my deck doesn't give at all. I'm happy with it.
I re-installed my cockpit panels, but may get rid of them some day like you plan to do. It does open up the cockpit. I've seen others who have done it.
Good luck with everything. Don't forget to post some pics. I'd like to see the aluminum framing!
Vince
Posted: Feb 18th, '08, 20:30
by scot
Vince,
What did you use for the deck plates? (cockpit sole...to not offend the nautical PC fellows)
Posted: Feb 18th, '08, 20:42
by Tony Meola
Wayne
If the mahogony deck stringers are in good shape, you can always epoxy them and sitck them back in. Otherwise you can order the fiberglass structural support material from McMaster Carr. Probably way lighter than aluminum and will give you plenty of strength. Tony
Posted: Feb 18th, '08, 20:54
by John Jackson
Posted: Feb 18th, '08, 21:09
by Vince Luciani
Scot,
I went with marine plywood encapsulated (top and bottom) with 1708 biaxial fabric and epoxy. It's held up well for the first season. Debated about using the Coosa, but decided on the marine ply. Time will tell if it was a good decision.
I still toy around with putting back my teak deck. I have all the solid teak boards from my original deck. They look about 5/8" thick. I figure I could run each board thru a bandsaw and get two 1/4" thick board. I could then laminate them (with epoxy) to my deck. Maybe someday?
I'm enjoying my new motors for awhile.
Posted: Feb 18th, '08, 21:19
by Tony Meola
John,
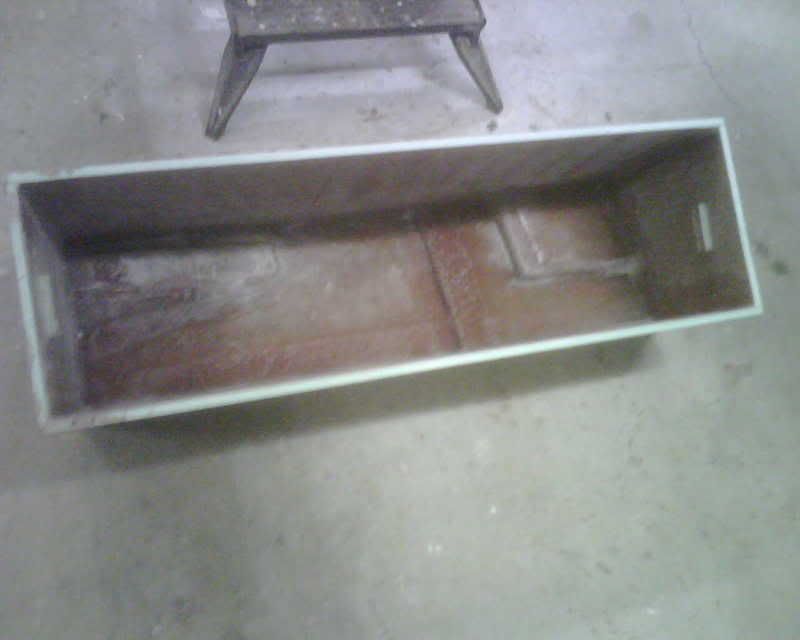
Fish box's look pretty nice. What did you use for a mold? Tony
Posted: Feb 18th, '08, 21:39
by bob lico
wayne you will not be sorry elliminating those side panels.gain almost a foot more of cockpit space but most of all you have a safe place to plant your feat while you are leaning over the gunnels sinking a gaff.really wayne a no brainer and a simple job look at sea nile or jp`s 31 beautiful and maint. free.use azek for the stern panel and the short wrap around for the rear cleat post.the cavity left after putting the exhaust on the outside is enormous as you can see by the size of the kill boxes john is building just remember to put the mufflers as far foward as possible to get the clearance under the cockpit floor i have 6" mufflers and pipe all the way but thats another story.
Posted: Feb 18th, '08, 21:46
by John Jackson
Tony, how’s your boat coming along?
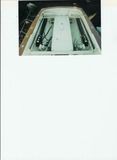
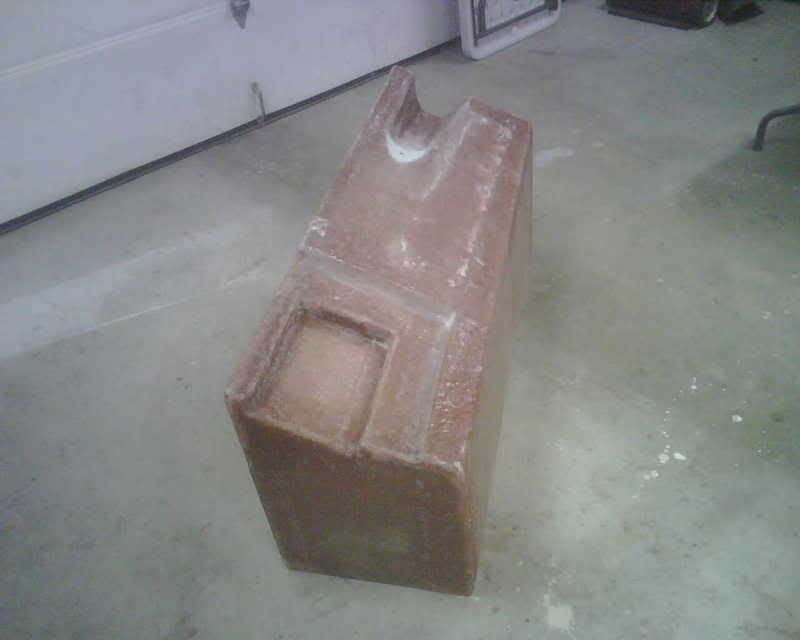
To answer your question, I had Darrel Harris vacuum bag me two 4 X 8 1/2" sheets of Divinicell, front and back . This is the basic building block.
For a pattern, I did trial and error on the boat with some luan that I made into a mock-up. With those parts as a pattern I cut the Divinicell like it was plywood and glued it together with Clawplast. Just worked it with the sander and jig saw and trial and error until it fit the bilge, the opening and the hatch.
Next we filled the corners with Clawplast then tabbed it over with 6†chopstrand and Boat Resin. To flare the top I wrapped three layers of chopped strand to give it a flared top so it could come in and out but still lock inside the hatch opening without movement.
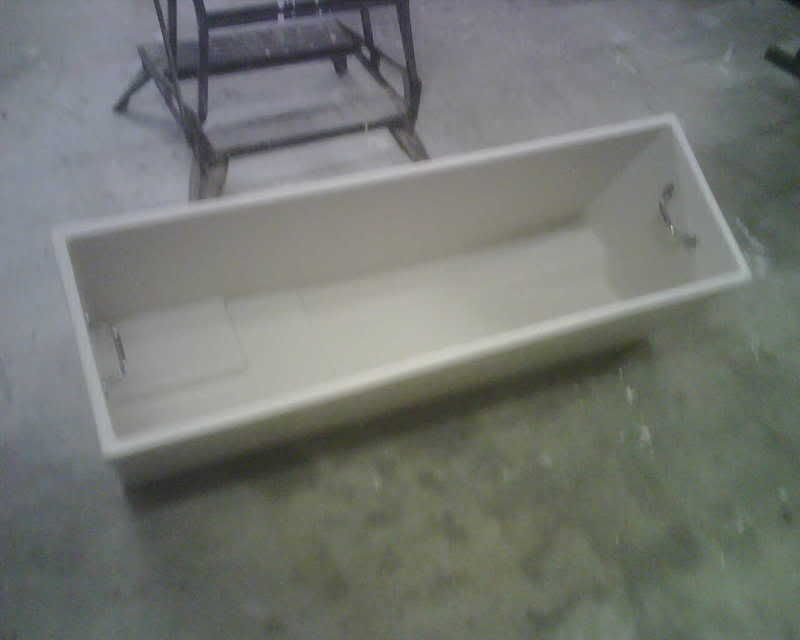
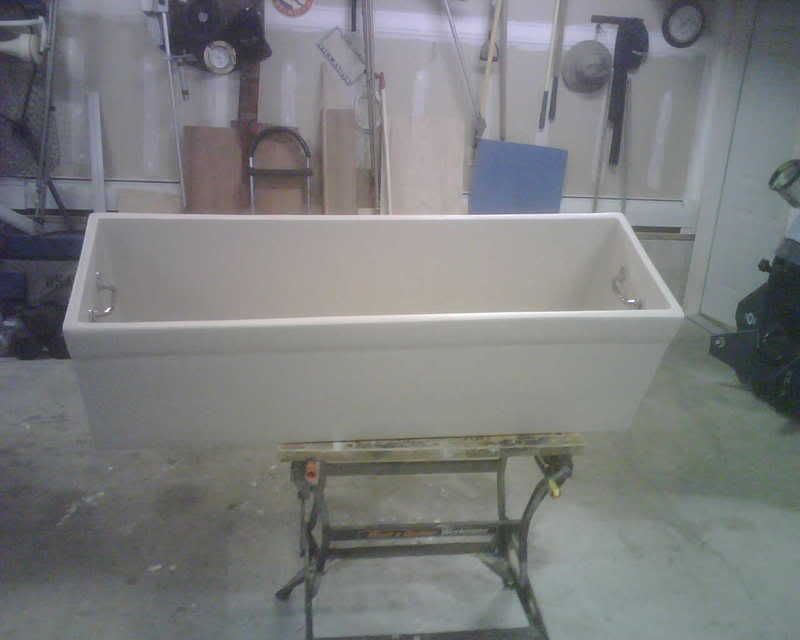
Faired it all in with the Clawplast. The white one in the picture has three rolled coats of Awlgrip high-build primer. When I get the other one to this point I will paint them both with Awlgrip.
It lays on the floor of the bilge and on the oversize strut pad. I will put thin foam tool box liner as a cushion. I figure they should be able to hold about three or four good sized collared tunas each if I ever figure out how to catch that many at once. They are 51 inches long and 20†deep toward the center
Posted: Feb 18th, '08, 21:52
by Harry Babb
Wayne.......I had to do a double take at your pic..........for a minute I thought it was a shot of DeNada.
The Tabbing that attaches the outboard framing to the hull has broken loose on DeNada. When I get to that point I have a good bit of glass work to start with.
John,
I like the fish boxes. How do they fit and attach into the deck?
Harry
Posted: Feb 18th, '08, 22:08
by John Jackson
Thanks, Harry. They drop straight in and lift straight out. I worked the bottoms so they wrap around the strut pads, and the deadrise kind of locks it in. The tops fit snug to the supports for the hatches so they really have no room to move. The top of the box is about a 1/4 inch below the top of the hatch support.
If test pounding proves otherwise, I have room below to put stringers along the bilge to further lock it in, and/or along the deck stringers so it can't shift in toward the inboard main stringer. I figure also that a spacer between the stringer and box will lock it in further. I can also put a sleeve for a bolt though so it can be bolted into the deck stringer, and taken in and out.
My plan is to only use these things when going off shore. So far it is all theory.
Posted: Feb 18th, '08, 22:08
by Harry Babb
My old deck was not attached to the sides of the boat, in fact the deck stopped a couple of inches from the side of the boat.
Is it a good practice to attach the new replacment deck to the sides of the boat or is that not a good idea???
Harry
Posted: Feb 18th, '08, 23:19
by nic
Eliminate the side panels. Works great, lets you get your knees under, (OK crouching down a bit), opens up the cockpit and looks good.
Harry,
The gap between the teak deck and the hull side forms a neat gutter for cleaning up.
Nic
Posted: Feb 18th, '08, 23:23
by Ironman
Thanks for the replies...
Very useful.
Im really getting into this....
Got some used Cabo boxes from the yard owner.
At first I thought they were way too big.. But hey lotta room down there, fit just right.
Also I noticed the gunnels are flexing without the panels... can I beef them without panels somehow?
<a href="
http://s130.photobucket.com/albums/p245 ... xes002.jpg" target="_blank"><img></a>


Posted: Feb 19th, '08, 00:31
by nic
Wayne,
A couple more thoughts....on ours the supports for the side bollards are tied into the side-decks, our side-decks and the cockpt coaming are stiff and firm and the transom coaming is supported by a molded channel taking the air down from the transom air-vent...it doesn't look like they added more glass when they did it before we got her...though some gussetts under the side decks/coamings would be easy and a good place to start to hang gaffs and boat-hooks.
You can get molded collars for the bottom of the rod-holders...I've got them but haven't fitted them yet and have got the scar to prove it.
Love those fish-boxes, we ran our exhausts inboard.....next re-fit.
Nic
Posted: Feb 19th, '08, 09:59
by Brewster Minton
How do you get the water out of those boxes in bad conditions? I would be concerned about having shipped a great deal of water and now those boxes have filled somehow and need to drain or be pumped out. Maybe I dont understand.
Posted: Feb 19th, '08, 14:42
by wmachovina
I got one of Alex Whittaker charter boat deck sets with fishboxes, Glassed it to foam cleats on hullside and transom, glassed the three pieces together, then we built side boxes for storage, about 5 feet, but put a toekick in under the boxes where they glass to the hull for a little at sea security. Not in the water yet but it seems very sturdy, Bill
Posted: Feb 19th, '08, 20:04
by Tony Meola
John
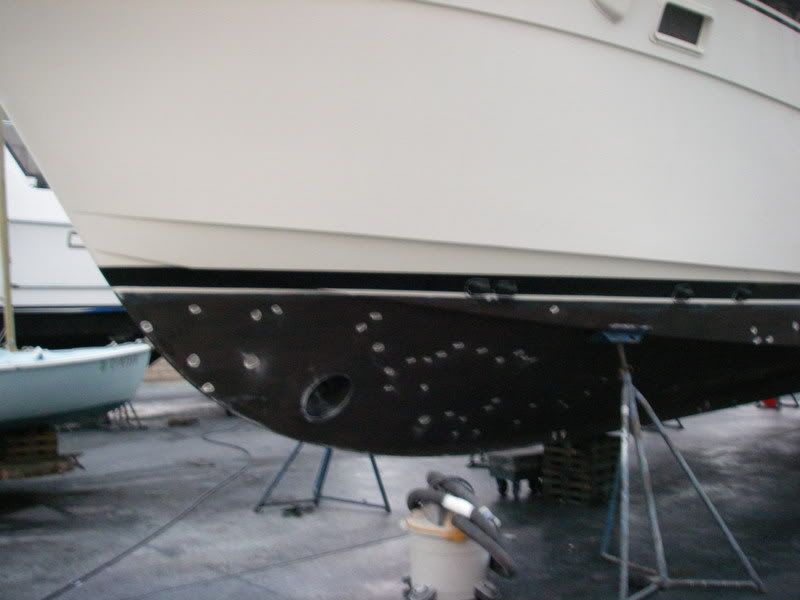
The new rudder shelf is done and the bulkhead is in. When I was at the AC show, the Cummins guy said my engines would coming in two weeks. I asked them to push them off a couple of weeks as I am not quite ready for them yet. So I think the ones meant for me are heading to Carvers for a job they are redoing then mine will be coming in next. Stuck with the 270's, and I am feeling pretty good about them.
Will uncover the boat about the middle of March. The Cummins dealer wants to use aluminium caps for the engine beds so that's the route we will go. Ordered my hydrlic steering and I am trying to now consider what's next.
It's amazing how fast the dollars run up. Tony
Posted: Feb 19th, '08, 20:43
by Kingfish
Wayne those boxes are huge ! They look great.
Fit alot of Albies, YFT and BFT in those.
Are you going to use a macerator pump out on those?
Posted: Feb 19th, '08, 20:45
by bob lico
john those boxes are very nicely done.you took full advantage of the bottom contour including the shaftlog and struct backing forming a indenture in the box,i made mine straight using rigid foam about 11/2" thick.the contruction is coosa board and i have 3/4" nipples on the rear bottom of box.this is connected with quick release to a "Y" both boxes into one than a mecerator (fish scales and debri ) and out 11/2" hose to thruhole.i can empty box with the flick of the switch.the top is now fitted with 3/4" nipple for auto chip ice maker,problem is i carry only 18gal water not even close so i am going the saltwater ice maker route this fit under the compartment hatch cover to rear of starboard engine .i can fit 125lbs class yellowfins in box as well as 150lbs swordfish that was cleaned.maybe i can get lucky and try to fit a huge eyeball in the box i will have to follow brewster to his secret spot!!!!!!
Posted: Feb 19th, '08, 21:13
by John Jackson
Harry:
JP laminated cut and fit fiberglass to his sides and then put installed magnificent teak coverboards. The gunnels are as strong and flex free as you can get. Most decks don’t attach to the sides as the weight is carried down to the stringers. JP built his deck right out to the side and it came out fantastic with nice gutters along the edge.
Tony,
Glad to hear you are coming along! It is like building a house- costs more and takes longer than your wildest over-estimate. That’s good because none of us would have ever gotten started if we really knew what we were in for.
Brewster-
I did think about the water coming in the boxes through the hatches. I tapered the sides toward the middle so most of the water from the deck hatch cracks will run down the sides, into the bilge, and pumped out. I am going to leave a half inch drain plug open in the bottom of each box so they can drain out as water comes in. I know that on some days it is like a waterfall back there, but I generally avoid the Hudson when it’s that crappy. For the times it happens hopefully not too much water will make its way in there and the ice will hold up. As for blood in the bilge, as it is my bilge looks like a slaughterhouse floor when I get back and has to be scrubbed out. I figure I’ll have to empty the boxes by hand and take them out each time to clean up the bilge and the boxes themselves.
Bob,
Sounds like a great system and a great solution. I’m going to try the trickle down theory to stay as simple as possible. Maybe next year I’ll try and retro fit some type of pumping system.
Posted: Feb 19th, '08, 21:14
by bob lico
i should have explained myself on the ice maker; it is a ice chip maker that has a spiral screw that auto feeds the ice into the box (like a ice maker in a refrigerator door).
just to change the subject in the interest of safety.i recently drove a 1995 30' bertram open taken in on trade.one of the details i notice was the floor hatch cover recessed handle had the bertram eagle on the tee handle ----beautiful but most inportant they turned and locked the hatch cover.i am sorry i did not do this to mine.this is the weak spot of our bertram cockpit compare to the new boats (everglades) wayne and others who have rebuilt the cockpit with the removal of the side panels and the 18" wide inside scupper opening have in the sense of the word a self bailing cockpit EXCEPT the hatch covers will just lift up and float allowing the water will pour in ------bad feature if you take a wave over the side or stern.i think brewster was hinting this in his post .it can and does happen often on way bigger boats it is the second wave that puts you under. for a little insurance it would be a smart add on!!!!
Posted: Feb 19th, '08, 21:48
by Ironman
John ,those boxes look great...
Hatch cover locks .. Good point,Bob.
... also,Im going to add some big raycor 900s instead of my 500s... (where to put them?Im thinking behind the tank.. Big space back there... (I dont really want them in the engine area.(Had my 500s under the step.)
Mike, Where you put your 900s?
Wayne
Posted: Feb 20th, '08, 10:27
by bob lico
wayne the racor 900ma mount on the stringer with azek contruction in center of hatch behind engine cover
Posted: Feb 20th, '08, 13:16
by Ironman
Bob: Thats what I need to do .. Perfect place.
Maybe Ill put both on the same side though
Wayne
Posted: Feb 20th, '08, 18:55
by JP Dalik
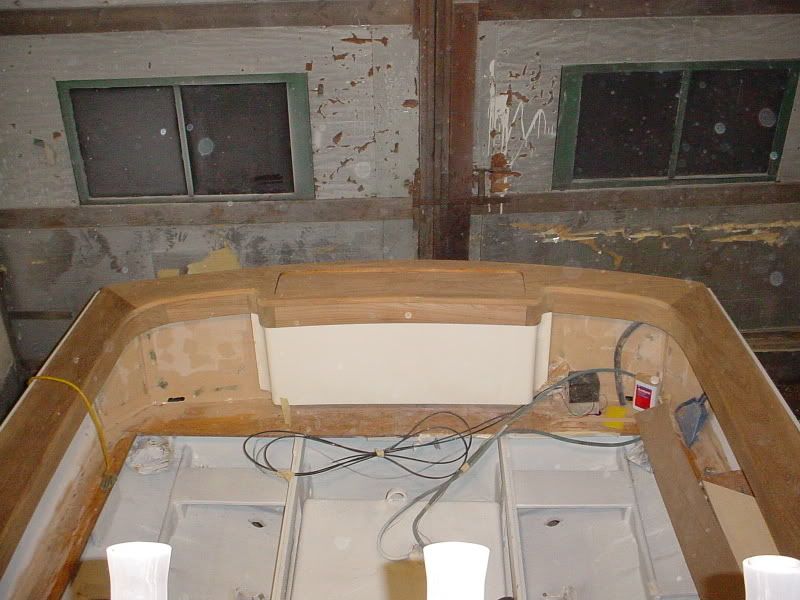
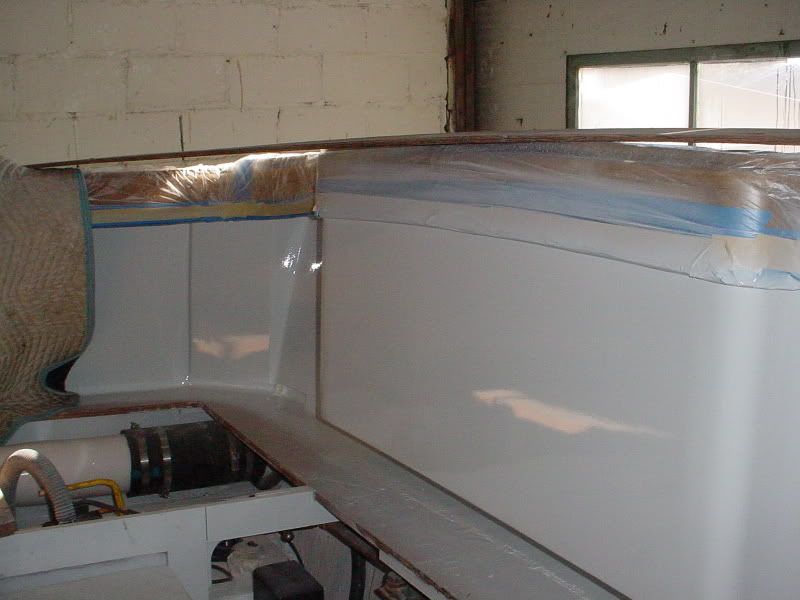
Gonna post some shots of the deck with the instant fairing installed. Also not that we boxed the bottom of the gunnels in to stiffen them up. This worked amazingly well. Then the teak was added which made the boat battleship tight.
Maybe this will help some one down the road.
The last picture is for my buddy TIMMMMMMY!!!!!!
What do you think; " She about 40" Hear she's a history teacher in Amesbury. Go get em Thudd (maybe Lasik is a good idea)


Posted: Feb 20th, '08, 19:11
by thuddddddd
Thats funny. Didn't know you took pics of your "conquest" from the last time you were here.
And the deck don't look bad, if your a 1 eyed guy with myopia, hack.LOL
Posted: Feb 24th, '08, 01:25
by Ironman
JP: That is one fine looking job...
What kind of wood did you box the gunnels with for strength?
Ive been side tracked with work but I strategerized today.
Lotta good stuff here.
Yup a macerator pump sounds good too.Bob
Hey saw this Unifright... andddd.. Oh wait its a HATT?