Prepping Engine Beds
Posted: Feb 21st, '22, 20:17
Hey Guys,
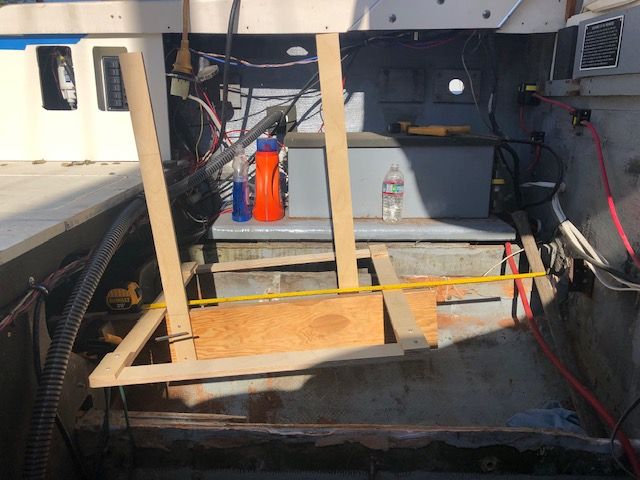
Bit of a change of plans on my engine beds. I made my best Bob Lico engine mount location template to see where my engine mounts were going to line up. I'm sure it is considerably underbuilt versus Bob's, but it did the trick. Thanks for the idea Bob!

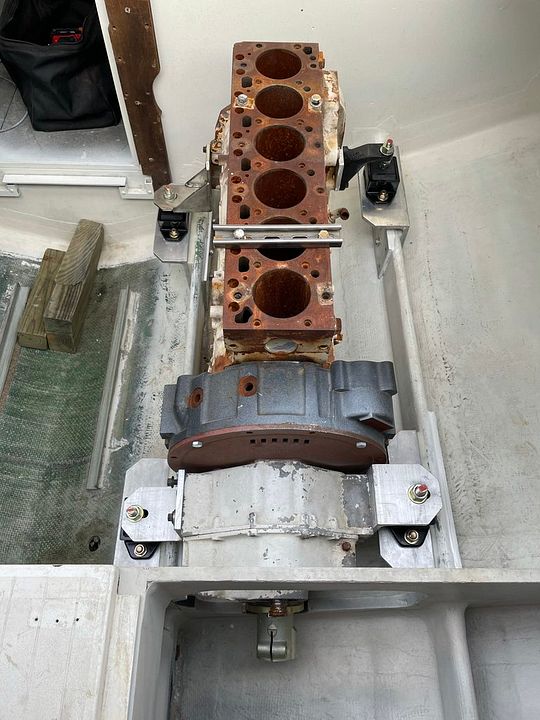
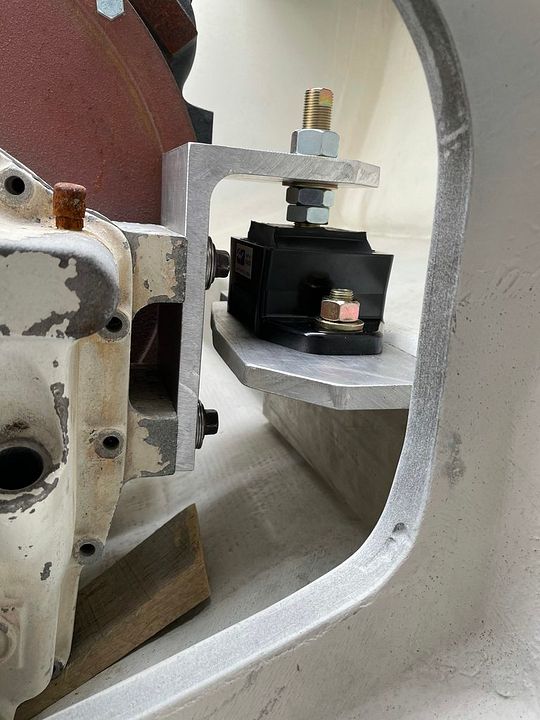
That led me to realize my engine mounts are going to line up differently than I expected as the mounts will be inboard of the current outboard stringers. It would be considerably easier to do engine mounts similar to these that I believe are from "Snipe" as opposed to cutting down the outboard stringers and adding sisters.


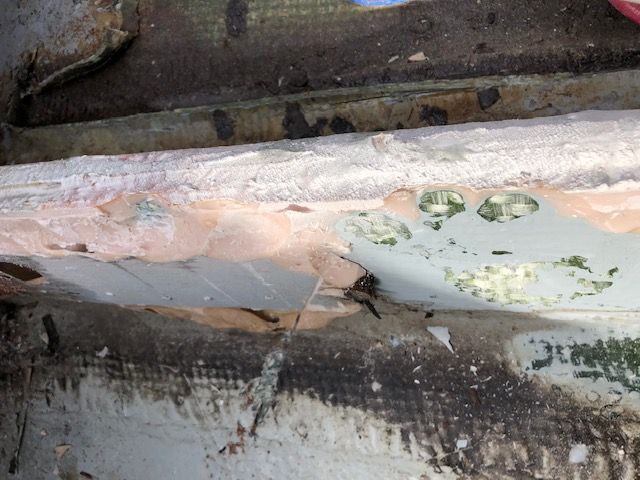
I was a little surprised at the amount of epoxy & cabosil used on my engine beds. I filled up one and half 5 gallon buckets with just bedding compound. You can see here where I was using a chisel to to knock off what was generally 1/2 - 5/8" thick bedding compound.

Another surprise was that there was bilge paint under the bedding compound. Clearly, that was part of the reason it was so easy to chisel off. I still have to sand some remaining bedding compound and bilge paint off the stringers.
My question is what to do to prep the stringers for engine mounts like those above. I have bolt holes that need to be filled. I did put in two limber holes on the outboard stringers (which worked great when I rinsed everything off). My preference is to clean up the stringers and add some glass to them. Question is should I use 1708 with some wide margins inboard and outboard of the stingers to add additional strength/stiffness to the stringers... OR should I just be concerned about sanding, fileting/fairing the imperfections & sealing the stringers with lighter glass mat and epoxy?
Any feedback would be greatly appreciated.
Thanks,
JohnV8r
Bit of a change of plans on my engine beds. I made my best Bob Lico engine mount location template to see where my engine mounts were going to line up. I'm sure it is considerably underbuilt versus Bob's, but it did the trick. Thanks for the idea Bob!

That led me to realize my engine mounts are going to line up differently than I expected as the mounts will be inboard of the current outboard stringers. It would be considerably easier to do engine mounts similar to these that I believe are from "Snipe" as opposed to cutting down the outboard stringers and adding sisters.


I was a little surprised at the amount of epoxy & cabosil used on my engine beds. I filled up one and half 5 gallon buckets with just bedding compound. You can see here where I was using a chisel to to knock off what was generally 1/2 - 5/8" thick bedding compound.

Another surprise was that there was bilge paint under the bedding compound. Clearly, that was part of the reason it was so easy to chisel off. I still have to sand some remaining bedding compound and bilge paint off the stringers.
My question is what to do to prep the stringers for engine mounts like those above. I have bolt holes that need to be filled. I did put in two limber holes on the outboard stringers (which worked great when I rinsed everything off). My preference is to clean up the stringers and add some glass to them. Question is should I use 1708 with some wide margins inboard and outboard of the stingers to add additional strength/stiffness to the stringers... OR should I just be concerned about sanding, fileting/fairing the imperfections & sealing the stringers with lighter glass mat and epoxy?
Any feedback would be greatly appreciated.
Thanks,
JohnV8r