Page 1 of 1
Fish Box Piano Hinge Installation Question
Posted: Aug 10th, '18, 23:34
by JohnV8r
Guys,
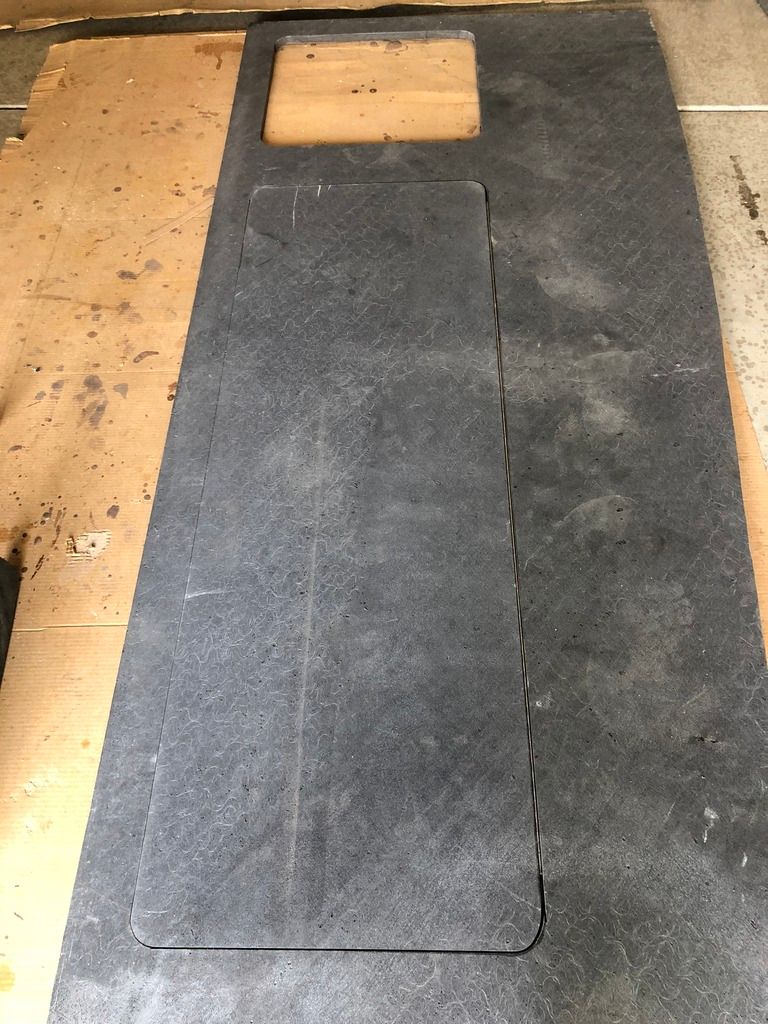
Below is a picture of the starboard cockpit deck section and fish box lid. If you look closely, you can see that I have wedged the 52" long piano hinge to try to visualize how best to install the piano hinge. Without going into all the detail of what I expect to do to account for the fiberglass that will be on the edges of the deck/fish box lids, I am curious about the best way to account for the width of the piano hinge during installation.
Is the normal install protocol to route a length on the lid side AND the deck side equal to the length of the piano hinge? So in this instance, route 1/16" off the deck side and 1/16" off the lid side for 52"? Or will I need to route the same dimension the entire length of the fish box to prevent the lid from pinching on the deck when opened?
Any help would be greatly appreciated.
JohnV8r
Re: Fish Box Piano Hinge Installation Question
Posted: Aug 11th, '18, 19:27
by neil
I will ask jr to take pics of the one he made they are split in the middle ,he did a beatuful job
Re: Fish Box Piano Hinge Installation Question
Posted: Aug 12th, '18, 08:45
by bob lico
i did not route any material for the piano hinge, i made the hinge the longest possible length by ending at both ends as close to the beginning of the radius as possible. put first and last screw in than dill every hole in the piano hinge as a guide larger than the # 6 body size of SS screws. remove hinge and fill every hole with 50/50 mix of cabosil and high-density filler with epoxy. let it set up than pilot drill for SS screws and dip each screw in epoxy and drive home. incredible strength with 44 screws in epoxy instead of 6 screws in a conventional SS hinge. incidentally, your going to love the feature of the new hatches when opening clear the bottom part of the gunnel inside overhang by a 1-inch clearance, fantastic no need for hydraulic pistons or anything else mechanical because of the fact that the hatches stay in open position leaning against interior hull side and you just grab either end and drop with slam hatch locks securing the hatch. normal procedure on my boat bottom fishing over structure is to hold hatch cover with one hand a slide your foot over fish and push the fish into the fish box than drop the hatch all day long hatch gets drop and the fish are in the fish box on salt-ice.hatche cover looks like the day in installed with 1000 drops!!!!
Re: Fish Box Piano Hinge Installation Question
Posted: Aug 12th, '18, 09:04
by CamB25
Lesson imn learning with all my hatches is to leave plenty of gap around the edge. After glass, fairing, primer, and paint they don't fit! Too tight!
Re: Fish Box Piano Hinge Installation Question
Posted: Aug 12th, '18, 13:25
by bob lico
YEP leave room!!! at least 1/4" all around hatches are 1/2" smaller than opening/ obviously using a 1/4" plunge router bit to cut the hatch out of precut Coosa port middle and starboard. port and starboard use fly cutter or rabbit cutter 3/4 " no screw in port and starboard center is SS screwed every 6" for maximum strength to support chair. with 2' by 2' aluminum or titanium backing plate. cut out centerboard rear hatch first install then work with port and starboard afterward to actually get the biggest possible kill box.
Re: Fish Box Piano Hinge Installation Question
Posted: Aug 13th, '18, 09:54
by Rawleigh
I made mine out of plywood, but I used a plunge router bit with a guide to rout around a Masonite template and used the drop as the hatch. Simple with the right tools.
Re: Fish Box Piano Hinge Installation Question
Posted: Aug 13th, '18, 20:38
by bob lico
after cutting out hatch out of port or starboard side of the cockpit then building with two layers of biax the 1/4" space is cut down to 3/16". this is a photo of the assemble hatch in open position to show how hatch leans against the hull when open.incidentally you can clearly see the gutter made with 1/2 round 3/4" router bit with roller guide,a simple 3-minute job just hold router tight to coosa edge because there is 0 resistance with a carbide bit on coosa board.


