Gert's brush painting is so darn good he doesn't need help.
But for the rest of us, particularly in the USA where VOC rules are changing our paint formulations, finding a good primer is no simple task.
I hve been trying out various primers, mostly not marine. With the new low VOC formulas my biggest complaint is that they don't "lay down.".... In other words the brush strokes, no matter how carefullyexecuted, never disappear.
That is the part where Gert and his crew excell to the point of amazing. Every brush leaves marks until the paint settles. Good paint and good crafstmen work it so that the paint settles just before it drys.... and right before it sags. When Gert's crew gets done the brush marks don't exist anymore! Beyond awsome!
Anyway the latest primers are all solids and not much solvents. They either dry too fast and leave brush marks, or if you add stuff (thinner Naptha etc) to them they don't cover.
I just tried West Marine's primer 5437140. It isn't even listed on their web site, you have to search by that number to find it.
It is a one part urethane. It dries very fast but it lays down nicely. Temperature might be an issue as I am in my cool basement right now and it still drys prety fast. but it goes on nicely as long as you keep a wet edge and lays down like old fashioned oil primers used to.
If you are woking on your boat or house and are frustrated (as I am) about getting a really nice finish this is good stuff.
Peter
Suprisingly good primer... Gert need't look
Moderators: CaptPatrick, mike ohlstein, Bruce
-
CaptPatrick

- Founder/Admin
- Posts: 4161
- Joined: Jun 7th, '06, 14:25
- Location: 834 Scott Dr., LLANO, TX 78643 - 325.248.0809 bertram31@bertram31.com
-
Preston Burrows
- Senior Member
- Posts: 264
- Joined: Jun 29th, '06, 13:30
- Location: Nassau,Bahamas
- Contact:
Just yesterday I was lamenting with a friend who is in the marine fibreglass repair/painting field that there seemed to be no 'general' primer such as Peter is commenting on that can be used as a 'universal' primer under 2 part marine coatings.........that is to say a non proprietary primer used over existing paint or gel coat that would be compatible with systems such as Awlgrip.Sterling etc. instead of having to follow their recommended system and all its products.
For Awlgrip I've surmised that you can use gelcoat,either polyseter or better vinylester, as a primer...........or an epoxy.............but as Peter alludes to, and in his case appears he is hoping will work, what can you use as a 'universal' primer straight out of a can?
I'm interested in this as for the average boat owner like myself who is capable of doing much of their own work buying into entire proprietary systems such as Awlgrip to do small repairs or upgrades is often the difference between doing a job or leaving it as is until other works come along that would make it worthwhile! Or not at all.
Case in point right now for me being a dive platform I would like to paint / non skid with Awlgrip........without having to entirely strip,prime,fair.paint by way of Awlgrip's system verbatim!
On my present haulout I have sanded down the dive platform to its solidly adhering paint and will use Pettit's Easypoxy to repaint with for the time being......
Preston Burrows
1976 B28 FBC
BERF1398M76J-285
1976 B28 FBC
BERF1398M76J-285
I believe the best solution is to use gel-coat as your primer. They are making gel-coat that is more user-friendly, these days, and you don't need to apply a spray wax for curing.
I generally use Awlgrip 545 as a primer, but recognize that there are several problems with it, especially when painting over wood & epoxy. The 545 is an epoxy, and will shrink over time with heat. Awlgrip and most other marine topcoats are linear urithanes, and will not shrink with the epoxy base primers. This often results in print-through's. The best looking paint jobs are usually built up of several layers of topcoat. This is the way Corvetts are painted.
I think that the gel-coat is a good alternative to epoxy primers, and have had good luck with it, in the past. I am curious if some of the experts would agree with this method.
Brian

Brian y that method is exactly what I am going to do on my brand new cockpit floor. I built from scratch coosa -26 --3 /4" with cloth then biax on bottom then cloth and vail finish.i will go with gel cote no primer then follow up with gel cote/ non skid second cote.this cockpit is exposed to a lot of traffic so I will follow up with endura top dress up which I found to be much more durable then imron or awlgrip on a heavy traffic area.i used two cotes of 545 primer and two cotes of awlgrip top cote in the bilge under the huge hatches .paint did not hold up two years. Then try bilge cote and that chip away with daly used.
capt.bob lico
bero13010473
bero13010473

Primers aren't generally supposed leave a nice finish... Thats what sanding blocks are for.
It is fact that VOC compliency dictates they have a higher solids to solvent ratio, or less volitale solvents.
But I've seen many folks get caught up in the maddening act of wrestling with trying to make their prime coat look like a million bucks. Don't sweat it, all that matters is that you get sufficient film build to enable you to block it down without going through the primer and exposing your substrate.
As far as an all purpose primer... there are just too many scenarios, variables, substrates, topcoats, etc to have a good "all purpose" primer.
I'm not crazy about selling folks on the idea of using gelcoat as a go-to primer. The main danger I see in doing that is that many folks use epoxy fairing compounds, and epoxy resins in their repair/restorations... and we know that polyester will not bond well to epoxy.
Then there are the scenarios where you are working on the boat, sanding down the existing paint/ boarding & blocking the hull out and you expose whatever is under the paint. Pretty good chance it's a epoxy primer- but who knows... feelin' lucky?
But having said all that, I have used it as primer, and it does a decent job. It shines in the aspect of supplying really hi-build- but given the opportunity I'd rather use Awlgrip's Hi-Build or Ultra-build epoxy primers to acheive those desired film build charecteristics.
I have a go-to primer which fits the bill for the vast majority of substrates and topcoats. It's a hi-solids 2 component polyamide epoxy made by good 'ol Sherwin Williams- Macropoxy 646.

Very good product, and not marketed to the marine industry, so a bit more affordable than the marine epoxy primers. A two gallon kit will set you back about $130, reducer is another $20. I have sprayed it, brused it, and rolled it, it applies quite nice and lays down pretty good- of course proper reduction dictates how that goes. It's a bit difficult to sand, much harder than Awlgrip545- more similar to an epoxy barrier coat really. But, like I said, it applies and lays down pretty good off the bat.
Preston- that Petit Easypoxy... got to be the slowest drying urethane topcoat I've ever used. When I used it, it remained tacky for over 24hrs if I remember correctly. Could have been an issue with ambient conditions, I'm not sure.
Gonna check into that West Marine primer Peter. My go-to single component primer for years has been Interlux Prekote. This one sounds similar... lay it on thick, then smoooov it out.
It is fact that VOC compliency dictates they have a higher solids to solvent ratio, or less volitale solvents.
But I've seen many folks get caught up in the maddening act of wrestling with trying to make their prime coat look like a million bucks. Don't sweat it, all that matters is that you get sufficient film build to enable you to block it down without going through the primer and exposing your substrate.
As far as an all purpose primer... there are just too many scenarios, variables, substrates, topcoats, etc to have a good "all purpose" primer.
I'm not crazy about selling folks on the idea of using gelcoat as a go-to primer. The main danger I see in doing that is that many folks use epoxy fairing compounds, and epoxy resins in their repair/restorations... and we know that polyester will not bond well to epoxy.
Then there are the scenarios where you are working on the boat, sanding down the existing paint/ boarding & blocking the hull out and you expose whatever is under the paint. Pretty good chance it's a epoxy primer- but who knows... feelin' lucky?
But having said all that, I have used it as primer, and it does a decent job. It shines in the aspect of supplying really hi-build- but given the opportunity I'd rather use Awlgrip's Hi-Build or Ultra-build epoxy primers to acheive those desired film build charecteristics.
I have a go-to primer which fits the bill for the vast majority of substrates and topcoats. It's a hi-solids 2 component polyamide epoxy made by good 'ol Sherwin Williams- Macropoxy 646.
Very good product, and not marketed to the marine industry, so a bit more affordable than the marine epoxy primers. A two gallon kit will set you back about $130, reducer is another $20. I have sprayed it, brused it, and rolled it, it applies quite nice and lays down pretty good- of course proper reduction dictates how that goes. It's a bit difficult to sand, much harder than Awlgrip545- more similar to an epoxy barrier coat really. But, like I said, it applies and lays down pretty good off the bat.
Preston- that Petit Easypoxy... got to be the slowest drying urethane topcoat I've ever used. When I used it, it remained tacky for over 24hrs if I remember correctly. Could have been an issue with ambient conditions, I'm not sure.
Gonna check into that West Marine primer Peter. My go-to single component primer for years has been Interlux Prekote. This one sounds similar... lay it on thick, then smoooov it out.
I don't know what the world may want,
But a good stiff drink it surely dont,
Think I'll go and fix myself...a tall one.
But a good stiff drink it surely dont,
Think I'll go and fix myself...a tall one.
Buju due the fact I was dealing will a very large area that is very well supported under deck I saw no need to spent the bucks on epoxy so the entire layup is polyester finish smooth byway of vail and resin final layup on topside . How would you take it from here .smooth finish on borders and around hatches is really not important to me .ability to hold up to scuffing,butt of rods and every day traffics.i was think combine course and find non skid rolled on and years from now I could always refresh with endura.
capt.bob lico
bero13010473
bero13010473
What you proposed sounds alright Bob...
But instead of 2 app's of gelcoat with nonskid in the gel, then topcoated with the Endura...
I'd recommend 1 app of gelcoat at about 15 to 20 mils wft. Let the gel kick, and sand it down with 120/220 on the DA- vacumm clean, solvent wash, then tape out your nonskid areas. Put the grit in your 1st coat of Endura and apply it to the nonskid areas of the sole. Once dry, peel your tape and apply a coat of Endura with no grit over the entire cockpit sole. Then stick a big 'ol fork in it.
My reasoning is that you should really sand the gelcoat before applying the urethane, and if you put the grit in the 2nd coat of gel... it'll be a little counter productive.
I don't know what the world may want,
But a good stiff drink it surely dont,
Think I'll go and fix myself...a tall one.
But a good stiff drink it surely dont,
Think I'll go and fix myself...a tall one.
-
Raybo Marine NY
- Senior Member
- Posts: 895
- Joined: Jan 3rd, '07, 00:28
- Location: Lindenhurst, NY
- Contact:
bob- if you are rolling that gelcoat im sure you know it needs to be sanded, and sanding rolled gelcoat is a terrible, terrible job. Rolling a single coat usually does not give you the build you need to achieve a good finish either, rolling multiple coats without sanding in between you have to get creative to avoid sticking to the surface as you are trying to navigate across it.
Let me know how you enjoy it, and how you like rolling the gelcoat with non-skid, its also a bit tricky.
Let me know how you enjoy it, and how you like rolling the gelcoat with non-skid, its also a bit tricky.
buju, robbie thank you for the info. robbie what i was going to do is follow buju advise and roll the gel cote one cote only then sand and put the non skid in the endure top cote not the gel cote.do you feel i should try to thin the gel cote and apply two coat because you indicate i cannot cover with one cote? sorry to question the hell out of you guys but the labor was intensive to built this cockpit sole mainly the hatch supports .i don`t want to screw it up on the finish. i am sure this will not look like the gel-cote inron you spray but i have gallons of top cote awl grip and endura . mine as well use it, but want the gel cote as a base to seal everything .
capt.bob lico
bero13010473
bero13010473
-
Preston Burrows
- Senior Member
- Posts: 264
- Joined: Jun 29th, '06, 13:30
- Location: Nassau,Bahamas
- Contact:
Buju: That's some useful information,thanks for posting up.As to the Pettit Easypoxy it dried to the touch in less than 2 hours for me today, I was able to get 2 coats on my dive platform between early this morning and late this afternoon - forgive the pieces of hose covering the bolt heads and washers, I hate taping unless I have to...... and surprised myself with this idea early this morning:
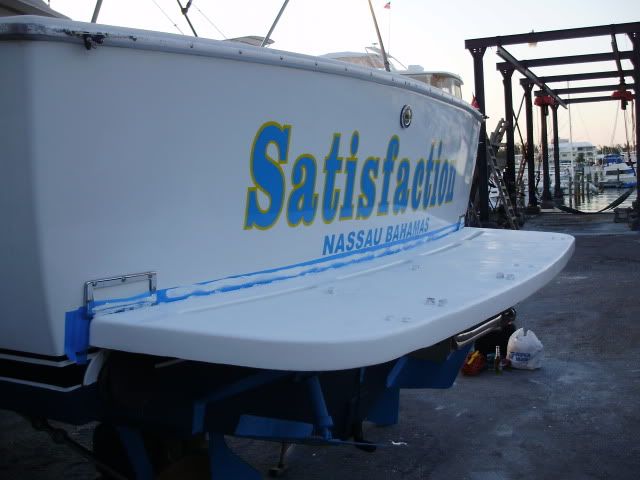
Then treated the hull sides with some Awlcare and an electric buffer in the cool of the evening:
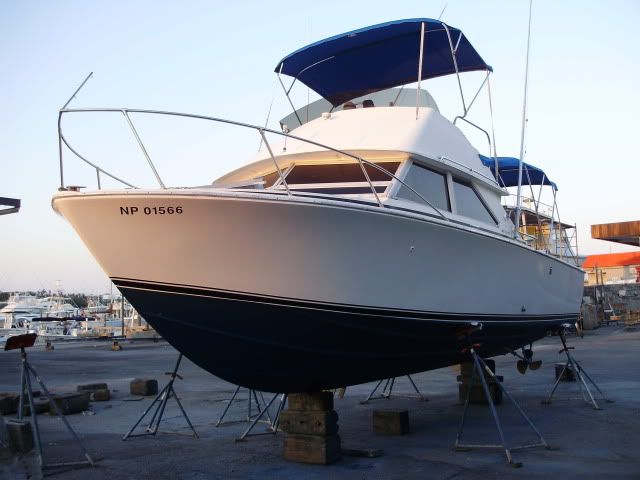
Then treated the hull sides with some Awlcare and an electric buffer in the cool of the evening:
Preston Burrows
1976 B28 FBC
BERF1398M76J-285
1976 B28 FBC
BERF1398M76J-285
Bob, like Robbie said- rolling gelcoat is.... interesting.
I thought you had the capabilites to shoot it in a basic conventional gun.
If not, I'd choose to brush it as opposed to rolling. But use a big Turkish or Italian white china bristle stainer brush like this

The benefits of this brush are:
It has two or three times the bristle as normal varnish/stain brushes- so it carries and lays down a lot of product- and the bristle is soft, so the brush marks are minimal.
The handle is removable, it srews into the ferrule. So you can remove the handle and attach the buisness end of the brush to an extension pole/broom handle and work while standing... brushing gel on yer hands and knees gets old quick.
Yes, you can and should reduce the gelcoat- but only slightly- say 5% max.
The danger in too much reduction is that the acetone will cause thousands of tiny bubbles in the gelcoat as it polymerizes, which will result in visable porosity in the dry gel, and it will be throughout- not just on the surface. And that will throw the "sealed up" aspect out da door.
Preston, the old gal is looking good. I like the garden hose masking. Wondering what the deal was with my easypoxy... it was applied during the summer- same climate as you- maybe bad paint... I dunno.
I thought you had the capabilites to shoot it in a basic conventional gun.
If not, I'd choose to brush it as opposed to rolling. But use a big Turkish or Italian white china bristle stainer brush like this
The benefits of this brush are:
It has two or three times the bristle as normal varnish/stain brushes- so it carries and lays down a lot of product- and the bristle is soft, so the brush marks are minimal.
The handle is removable, it srews into the ferrule. So you can remove the handle and attach the buisness end of the brush to an extension pole/broom handle and work while standing... brushing gel on yer hands and knees gets old quick.
Yes, you can and should reduce the gelcoat- but only slightly- say 5% max.
The danger in too much reduction is that the acetone will cause thousands of tiny bubbles in the gelcoat as it polymerizes, which will result in visable porosity in the dry gel, and it will be throughout- not just on the surface. And that will throw the "sealed up" aspect out da door.
Preston, the old gal is looking good. I like the garden hose masking. Wondering what the deal was with my easypoxy... it was applied during the summer- same climate as you- maybe bad paint... I dunno.
I don't know what the world may want,
But a good stiff drink it surely dont,
Think I'll go and fix myself...a tall one.
But a good stiff drink it surely dont,
Think I'll go and fix myself...a tall one.
-
Raybo Marine NY
- Senior Member
- Posts: 895
- Joined: Jan 3rd, '07, 00:28
- Location: Lindenhurst, NY
- Contact:
Amen. x2.Bob- now you are talking about spraying gelcoat for purpose of a primer, if thats the case spray something else like a epoxy primer
Really is no benefit of using gel on this.
And it's more labor intensive than a primer.
I don't know what the world may want,
But a good stiff drink it surely dont,
Think I'll go and fix myself...a tall one.
But a good stiff drink it surely dont,
Think I'll go and fix myself...a tall one.
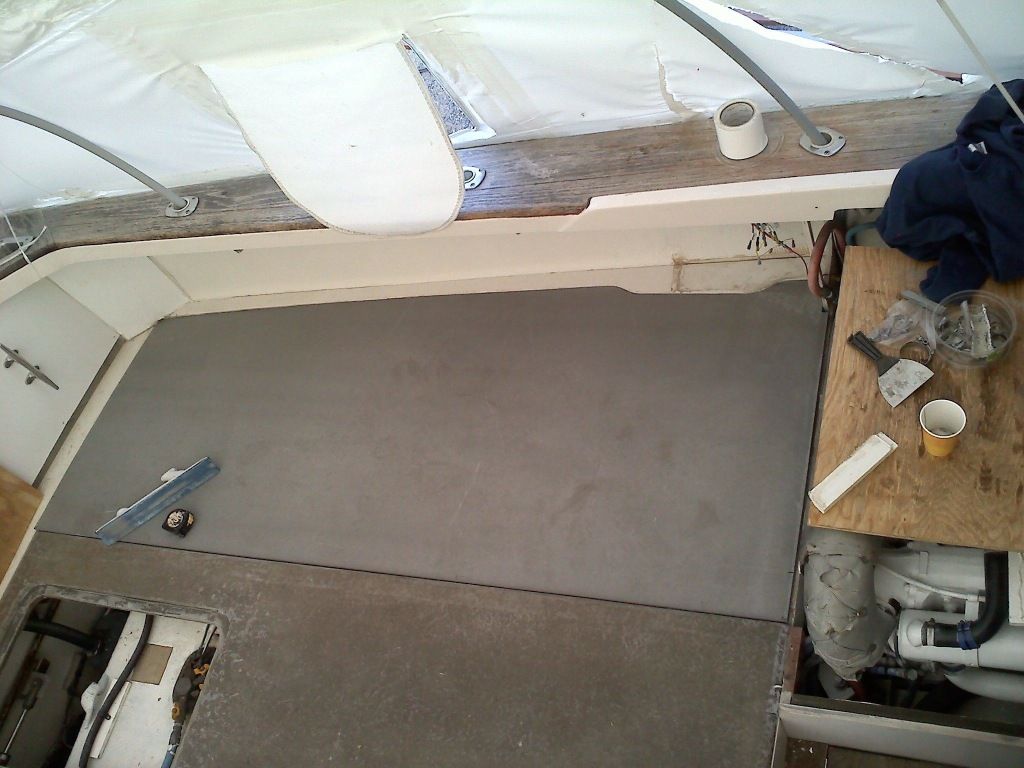
i trial fitted the three coos f/b lay up pcs . now i will lay out port and starboard hatches to fall exactly between stringers to get maximum space for kill boxes . the entire port and starboard bilge area will be accessible. very important for maintaining propeller coupling correct tolerance. then i will pause and try to figure how to prime/non skid paint. i have a full gallon of awl grip top cote so that will be the the non skid top cote.
capt.bob lico
bero13010473
bero13010473
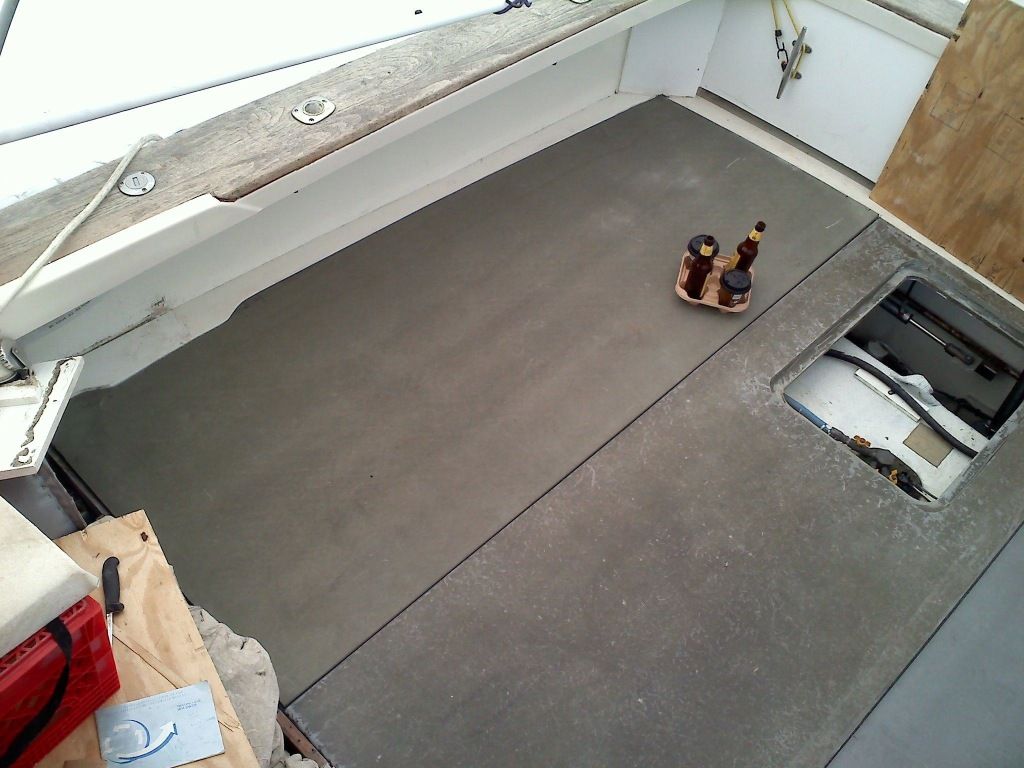
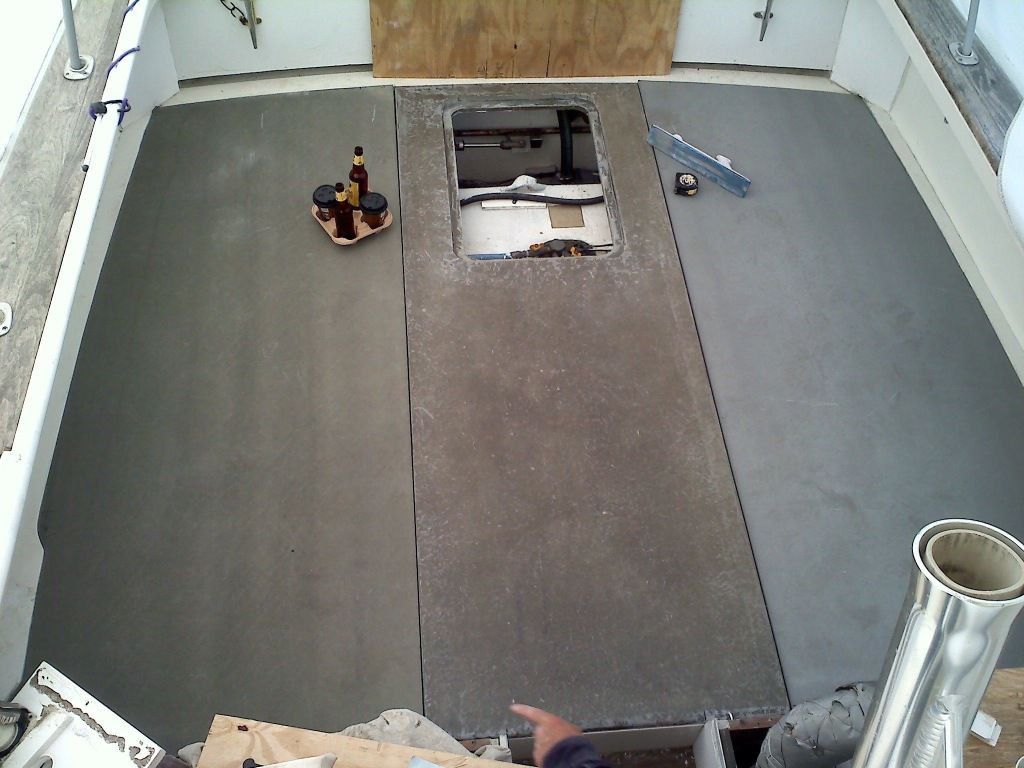
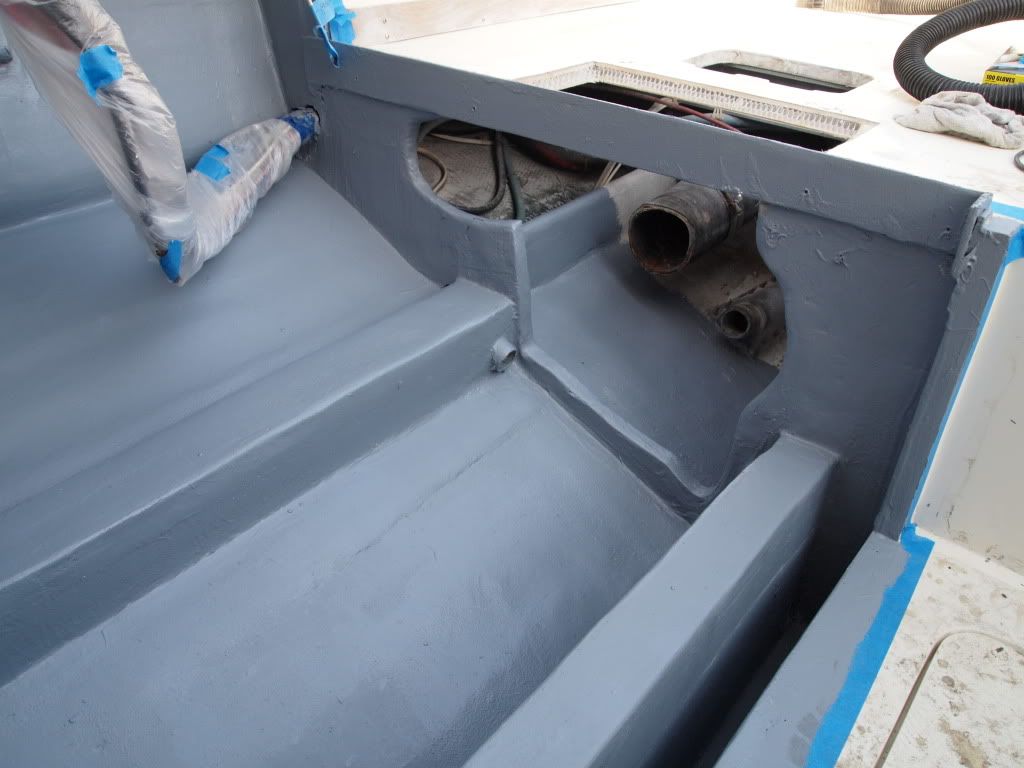
Looking good Bob! Especially to cold beer! I was wondering what your plans are, for building a partition to keep water from flowing into the engine beds. This is one of the projects that I am currently working on, and I would love to see what others have done. My main concern is keeping wash-down water from draining into the engine beds, shafts, transmissions, etc...
Thanks,
Brian
[/img]http://i1060.photobucket.com/albums/t44 ... G_1359.jpg
Thanks,
Brian
[/img]http://i1060.photobucket.com/albums/t44 ... G_1359.jpg
One more question: I see that you have routered an edge for the aft hatch. Will you be attempting to make this water-tight, with drains and gutters? I am going to be cutting some hatches, this week, and I am still contemplating installing drains and hoses. Please let me know your thoughts.
Thanks,
Brian
Thanks,
Brian
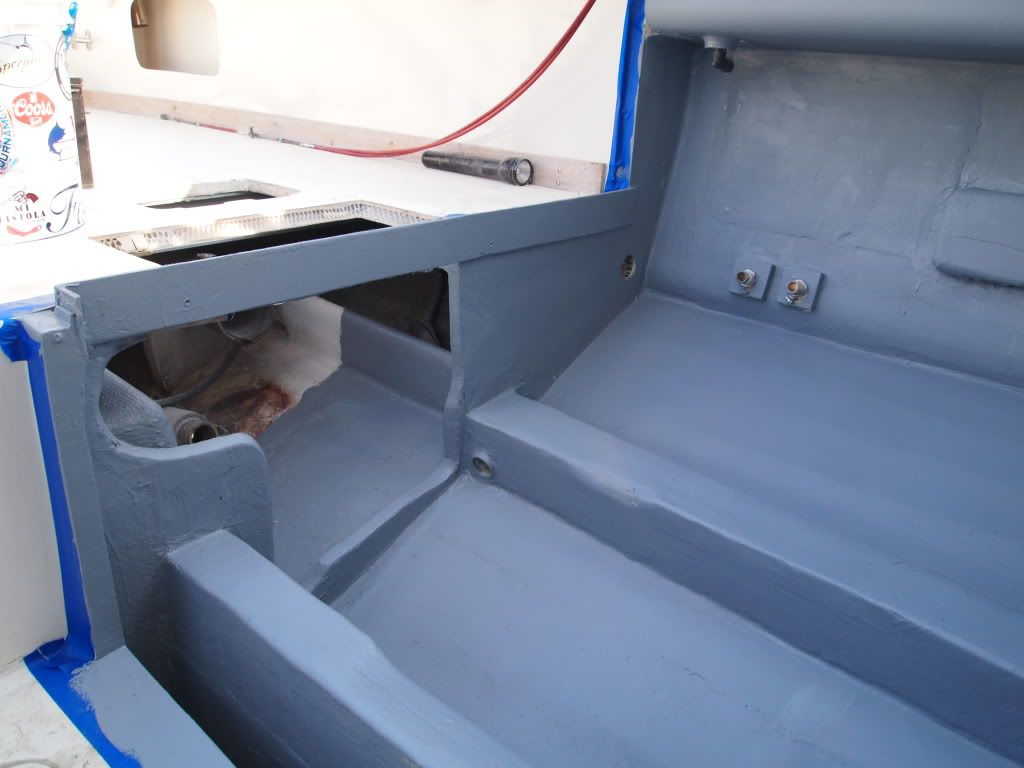
As far as a waterproof dam or barrier along the engine hatch I will take t he original engine hatch put it in place and then cut. The rear perimeter about 2" high and permanently attach the cockpit sole.iwill put one leaf of hinge on small built up area of sole and the other epoxy layed up to to rear bottom edge of engine hatch .hinge will be not seen like I have now.two hatch go from 3" from rear of engine hatch to within 2". Of the existing azek perimeter which is 1/2" lower then sole and collect water and directs to scupper.
capt.bob lico
bero13010473
bero13010473
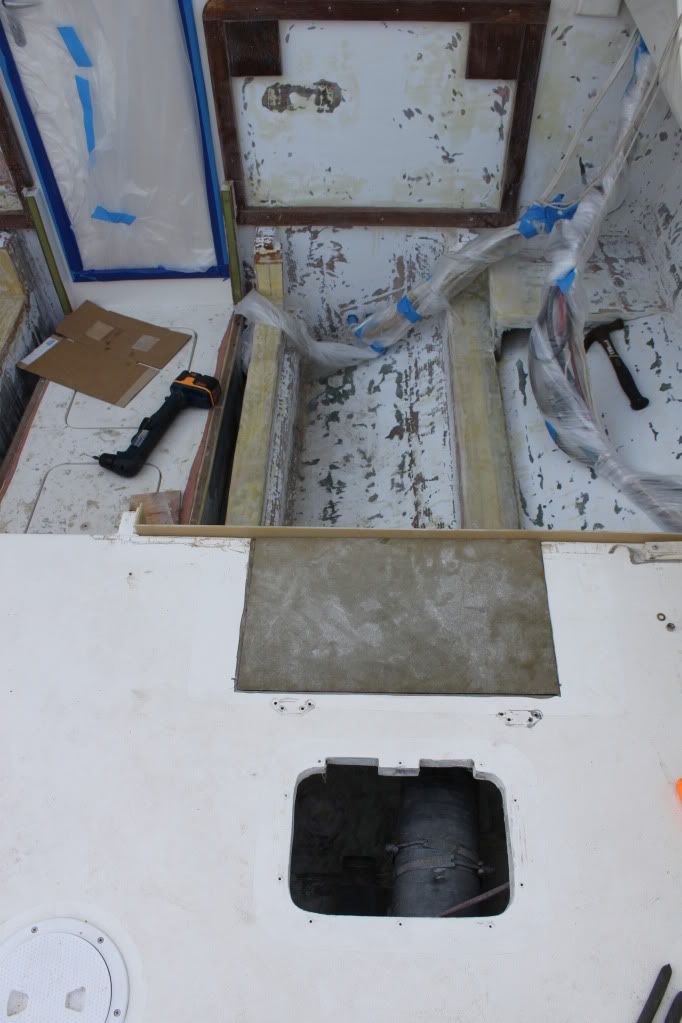
The rear hatch as shown will be the method used to support the other hatches.i scribed hatch opening on sole then put router guide in place and plunge router with 1/4" route bit , no waste of coosa board you must be careful with router and use square off 2" x4" plank as guide so you can plunge router directly into cut line.of the 1/4" removed material 1/8" is added with glass lay up in both edges that is hatch edge and cut out area of sole edge.i used a coffee can as a radius tool for hatch corner . I ran off 3" and 5" strips off coosa on table saw and layer up on bottom side off hatch leaving 11/2" in the hatch opening then apply cloth and biax to strip of coosa to bottom of coosa sole .center board is X braced to add strength to entire length of centerboard and double braced in fighting chair area.this boat goes into " the deep " that is the continental shelf 120 miles offshore .some day I may land a 750 lbs fish this cockpit sole is built for that occasion .
capt.bob lico
bero13010473
bero13010473
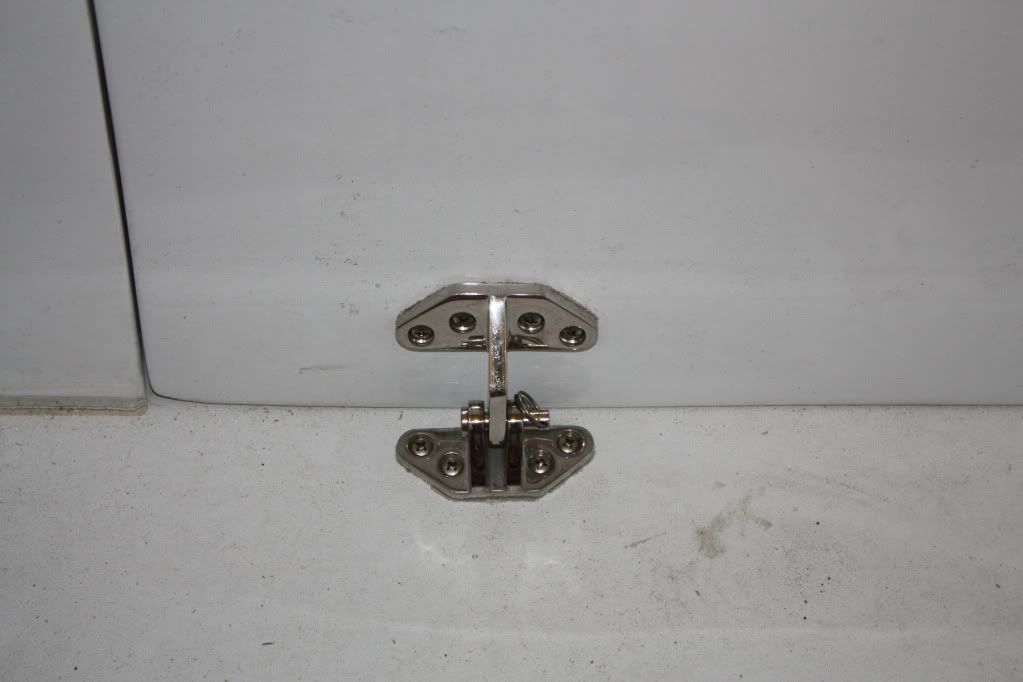
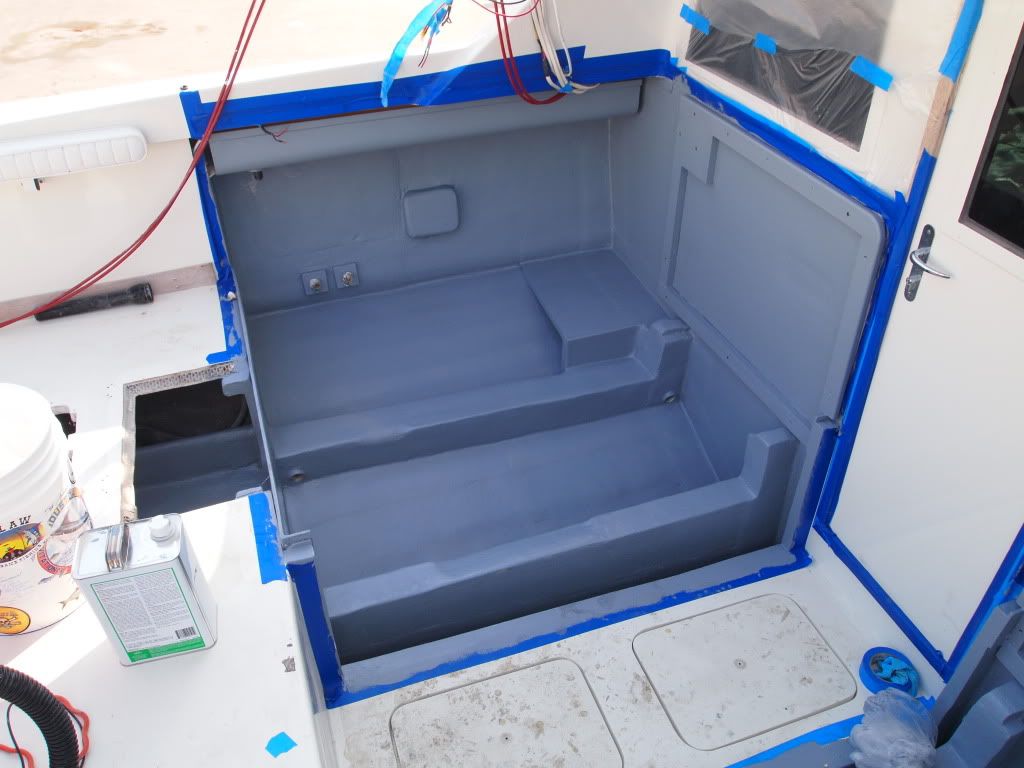
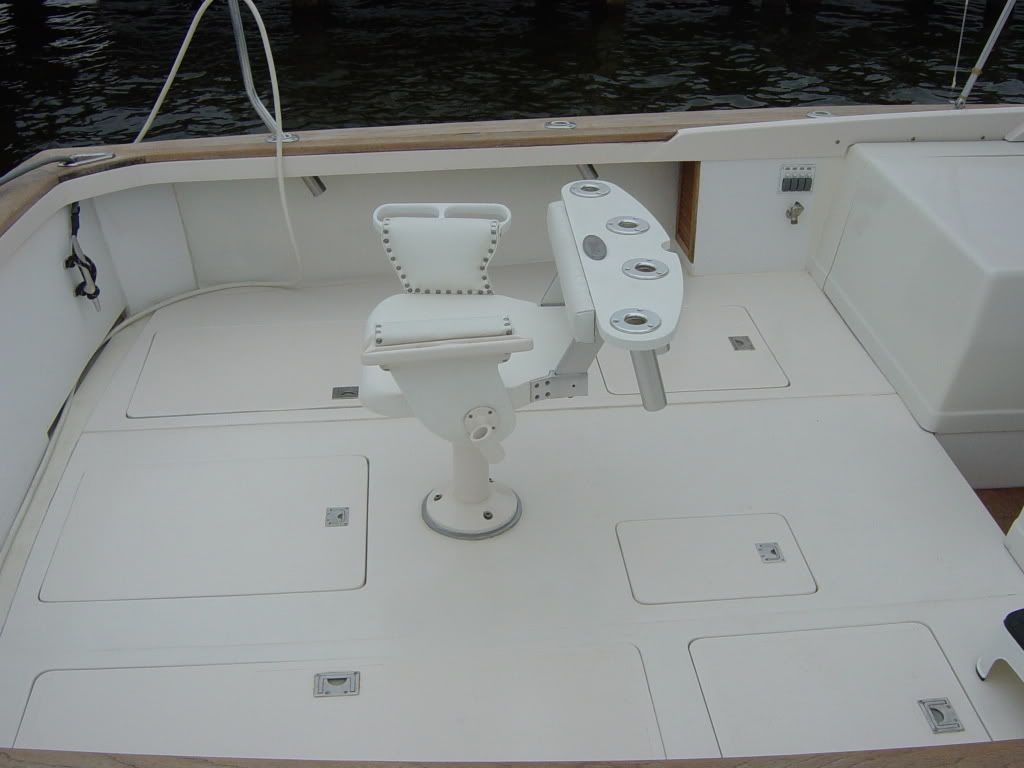
brian those are the exact hatch hinges i purchase but did not use. i wanted a clean look so i took a ordinary 31/2" ss hinge then took one leaf and rough it up on grinder . used a 8" piece of cloth and export then bias and epoxy . this seal that leaf to the inside of hatch cover the other side of leaf attach to bulkhead. the handle on hatch was removed then a plastic small bowl was inserted were handle was . glass over remove bowl (mold) and put thru bolt as internal handle.this is old cockpit sole but the clean look on hatch will be used on new cockpit sole.
capt.bob lico
bero13010473
bero13010473
-
PeterPalmieri

- Senior Member
- Posts: 2575
- Joined: Nov 12th, '10, 11:26
- Location: Babylon, NY
Looks like its coming along nicely bob. Can't wait to see the final product. You planning on hinging the lids and using gas assisted to hold them open? Are you making new bigger boxes or sticking with what you have?
In reference to kill boxes not engine covers.
Hope you get it done in time to bloody the decks with some spring fish.
In reference to kill boxes not engine covers.
Hope you get it done in time to bloody the decks with some spring fish.
1969 31 Bertram FBC "East Wind" hull #315939
Bob,
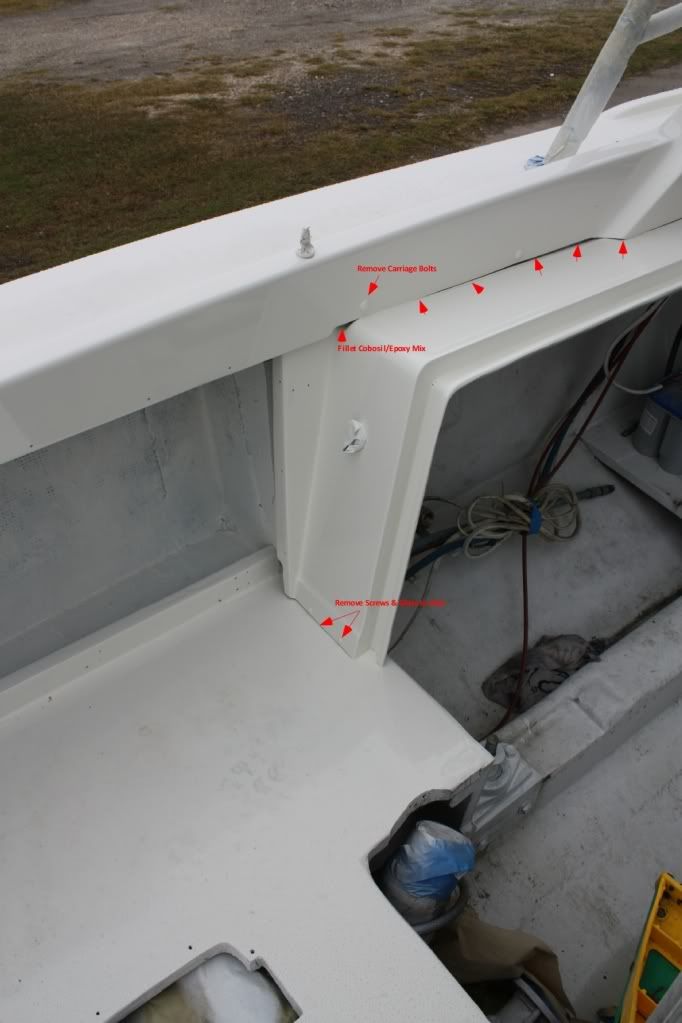
I think I understand your plan for the hatch, with glassing the 2" cutt-off piece to the deck and raising the hinges up. Will you also be glassing the perimeter piece (outboard of the hatch, to the deck. If so, will you also be removing the carriage bolts on the top of this piece and glassing to the side of the house. This is something that I am considering, as I can't stand to look at the carriage bolts, and they provide resistance and chaffing on the wire-chase from the bridge. I'm just curious as to any reasons not to make this area one-piece.
Thanks,
much bigger, the two hatches on port and starboard will open the entire bilge cavity from stern to rear of transmission. the hatches are design from the 45' cabo i pilot . with a piano hinge facing hull sides and turn and lift handles facing in.the smaller access hatches open from front all hatches sit on gasket for a waterproof cockpit sole. there is a two foot box by 1" high recess in both port and starboard scupper area to collect water and drain along with " trench along perimeter of cockpit .
capt.bob lico
bero13010473
bero13010473
-
PeterPalmieri
- Senior Member
- Posts: 2575
- Joined: Nov 12th, '10, 11:26
- Location: Babylon, NY
That's a good plan bob and how I've thought it out. Gives you acess from shafts to rudder shelf with box in the middle.
I've got nice flush SS latches on my flats boat that lock the lid down and provide a nice lift handle. I can provide a link if your interested.
I don't think this is the exact model on my boat but it's similar...
http://www.westmarine.com/webapp/wcs/st ... sNum=50704
I've got nice flush SS latches on my flats boat that lock the lid down and provide a nice lift handle. I can provide a link if your interested.
I don't think this is the exact model on my boat but it's similar...
http://www.westmarine.com/webapp/wcs/st ... sNum=50704
1969 31 Bertram FBC "East Wind" hull #315939
Wow I cannot believe it ,what a million to one shot. Of all the thousands of hatch devices you pick the same one by the same manufacture .i am buying 5 of them mainly due to o screws showing and they do not have to be router in instead they use a thru hole I am buying the big ones (21/2")
". Birds of a feather etc."
". Birds of a feather etc."
capt.bob lico
bero13010473
bero13010473
-
PeterPalmieri
- Senior Member
- Posts: 2575
- Joined: Nov 12th, '10, 11:26
- Location: Babylon, NY
I use the ones that lock with a key on the flats boat, so if I trailer long distance I can lock up when in a restaurant or hotel. Not sure you need or want that option if you do make sure you buy them with matching keys. Been on the boat 7 years and they look like new still.
There is a version that just pulls up and another that requires a 1/4 turn. I have both and prefer the one that you don't need to turn. Either one only requires a hole saw for installation.
There is a version that just pulls up and another that requires a 1/4 turn. I have both and prefer the one that you don't need to turn. Either one only requires a hole saw for installation.
1969 31 Bertram FBC "East Wind" hull #315939
-
Raybo Marine NY
- Senior Member
- Posts: 895
- Joined: Jan 3rd, '07, 00:28
- Location: Lindenhurst, NY
- Contact:
Where have i heard that before?bob lico wrote:As far as a waterproof dam or barrier along the engine hatch I will take t he original engine hatch put it in place and then cut. The rear perimeter about 2" high and permanently attach the cockpit sole.
Now to get you off this rolling gelcoat as a primer idea
Robbie I threw a couple of ideas into the pie and wanted to use gel cote as a filler now I have the proe saying basically I don't think so . That is what this board is all about . I spray at last resort like imron about the 2" cut off from bottom of hatch your idea but it. Really is the easier way no matching already done.
capt.bob lico
bero13010473
bero13010473
Who is online
Users browsing this forum: Bing [Bot] and 304 guests