
i am here on long island NY. practicing social distance so i go to the boat- yard and work on my boat every day. never realize there were so many filters to be changed or cleaned, my 31 BERTRAM has 6 fuel filters for engine and generator,two gear oil filters,A/C water filter,four water pump filter( all water pumps have pre filters) . generator has raw water filter. one very differcult job is to replace the two pistons at the end of main shaft and pump drive shaft in ZF gears ,be very carefull putting pump drive back in .final maintenace project is by far the most differcult and that is replacing the bellows on the PYI dripless shaft log seals.removing the shaft from the shaft coupling without pounding on prop. with a hammer and slide hammer on the shaft end thread will not work because the rudder is in the a
way SOOOOOOOO you take bolt and nuts from gear flange to shaft coupling then replace with 4" bolts and put a 1" sockett between flange and shaft coupling and tighten evenly like a harmonic removal tool for a automotive type engine . the shaft with pop out with penatraing oil and even tightning of flange bolts then remove stainless and carbon piece and rubber bellows . you are suppose to replace these bellows every 6 to 8 years i went 15 years so they are dried out and starting to leak water.engines still perfect after 15 years a tribute to Volvoline Blue A Cummins approved oil.
complete maintenance
Moderators: CaptPatrick, mike ohlstein, Bruce
complete maintenance
capt.bob lico
bero13010473
bero13010473

Re: complete maintenance
Bob,
Replace solid coupling with a Split coupling, I'm partial to Walters couplings. Go one step further and have shaft fit to the coupling.
Assembly or disassembly is as easy as loosening the set screw, loosen clamp bolts and insert two wedges in slots to open split aka- 2 flat screwdrivers- now with a light tap coupling goes on or comes off. if putting on...split part slides easy...align to keyway and insert key, the push on and "tap" to home. Snug clamp bolts and snug set screw.
Like your oil change system, this makes life so much easier, quicker and just less of a hassle. And never a worry about bending flanges with stubborn fitting shafts.
For the Captain with a heavy hand on backing down install split ring keepers...
.
Re: complete maintenance
SORRY i did not mention the fact that i have a split coupling and yes i sent two " molding removal bars" into the two splits. the wood molding tool is made of tool steel and made to hit with a hammer.i cannot stress how important this project is because neglect will sink the boat.i love the PYI SHAFT SEAL but you have to replace the bellows every eight years maximum.oh and yes i thru away the stock shaft coupling 7/16" bolts and replaced with grade 10 1/2" NF aircraft bolts along with the two bolts from split coupling.
capt.bob lico
bero13010473
bero13010473

Re: complete maintenance
Thanks Bob and Carl. The bellows in Crows Nest have been in for a good while, so its time. I didn't know about split couplings. Split couplings will be used when I reinstall.
1968 B20 Moppie - Hull # 201-937
1969 B31 FBC - Hull # 315-881 (sold)
1977 B31 FBC - Hull # BERG1652M77J
1969 B31 FBC - Hull # 315-881 (sold)
1977 B31 FBC - Hull # BERG1652M77J
Re: complete maintenance
When I started digging into my stuffing boxes (traditional type) I discovered that the previous owner’ mechanic had used a section of exhaust hose, clearly labeled as such, instead the proper stuffing box type hose on the starboard side.
Peter Schauss
Water-Lou
1978 B31 SF (BERG 1727M781-314)
Water-Lou
1978 B31 SF (BERG 1727M781-314)
Re: complete maintenance
pschauss wrote:When I started digging into my stuffing boxes (traditional type) I discovered that the previous owner’ mechanic had used a section of exhaust hose, clearly labeled as such, instead the proper stuffing box type hose on the starboard side.
Yeah...that's not good.
While there "should" not be much twisting action pressure on the hose..."should" doesn't mean there won't, and if there is, you will want the right double heavy reinforced hose.
People not familiar don't know and then you get the automobile mechanics that come along and help a bud or take on marine work as a side and All Hose is the same...yeah...most cars don't have high suction on their raw water intakes. Without wire they collapses...not always right away. All alternators and starters are the same...why pay more for a marine carb.... can you say Ka Boom.
Interesting what you see when you buy a new to you boat OR give someone a hand on theirs.
Re: complete maintenance
And have your shaft fit to the coupling.John F. wrote:Thanks Bob and Carl. The bellows in Crows Nest have been in for a good while, so its time. I didn't know about split couplings. Split couplings will be used when I reinstall.
Re: complete maintenance
Can that be done without pulling the shaft out of the boat?Carl wrote:
And have your shaft fit to the coupling.
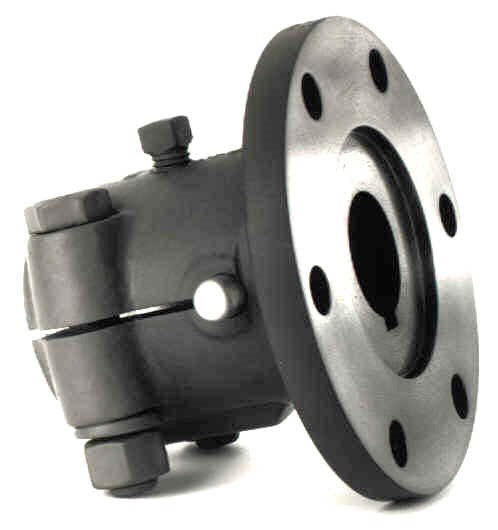
Also, the attached photo shows what the starboard side stuffing box hose looked like after I remove the four hose clams and cleaned it up a bit. It is clearly marked "wet exhaust".
http://www.ipernity.com/doc/307687/49864090
Peter Schauss
Water-Lou
1978 B31 SF (BERG 1727M781-314)
Water-Lou
1978 B31 SF (BERG 1727M781-314)
Re: complete maintenance
Technically, yes...but it's much better done either on a pair of rollers with an unbacked portable belt sander that mimics a centerless grinder or indicated in a lathe and take a light cut.pschauss wrote: Can that be done without pulling the shaft out of the boat?
In a boat, without shaft spinning you can expect to get uneven cutting and flat spots even in the best hands...so while I said yes...it's more of a no, not really a good idea.
Be happy you had four hose clamps...using just two goes along with, what's the difference if I use exhaust hose.pschauss wrote: Also, the attached photo shows what the starboard side stuffing box hose looked like after I remove the four hose clams and cleaned it up a bit. It is clearly marked "wet exhaust".
Re: complete maintenance
And that goes along with the way someone had wired the VHF on the flying bridge to the hot terminal of the navigation light switch and the fish finder to the hot terminal of the blower switch.Carl wrote:
Be happy you had four hose clamps...using just two goes along with, what's the difference if I use exhaust hose.
Peter Schauss
Water-Lou
1978 B31 SF (BERG 1727M781-314)
Water-Lou
1978 B31 SF (BERG 1727M781-314)
Re: complete maintenance
LOL...ya just gotta love ol' boats and peoples ingenuity.
I bought my boat from a good friend of my fathers...I knew him and the boat for years and he'd stop by the shop on his fishing days if weather was bad. One day we got to talking a bit and he saw a SS fitting on the table...his eyes all aglow he asked if I had extra and if he could buy one. Told him I had a barrel full and he could help himself. He took one and said something about connecting hoses on the boat...and I told him be careful its thin crap with a crappier fused weld.
Some years later I bought his boat. Going through hoses one day checking to see there condition I grab the 1-1/4 intake hose from way under the motor and it separates like it was never together and out comes all the water one would expect to see come out an 1-1/4" hose. Lift it up above eh waterline so it stops...there it is, right inside the hose 1/2 of that crappy fitting I gave him. He used it to splice the intake hose...a hose that ran underneath the motor.
That there is a scary thought as I had been out on the boat a good amount before going through the hoses. And I tend not to shut the seacocks when I leave.
That gave me the goosebumps almost as bad as the day I hauled the boat to change my wheels and replace the thru hull transducer. I had smacked something and dinged a wheel a little also the depthfinder went out. I played wit it a bit inside the boat...no luck getting it to work. So I ordered a new transducer. I continued to use the boat all week till it came in...took out a friend and his kids fishing, had in laws out. I get hauled and start with transducer so silicone has a few minutes to set before putting back in. I can't find the transducer, then there it is...just the plastic stem flush with the hole. It sheared off...then the scary part I touch it and it just slide into the hull. I have no idea how it stayed in all week. Luckily the replacement transducer was a big ol bronze thru hole and not the crappy plastic one that was there.
Re: complete maintenance
When I bought my boat, they gave me a pile of maintenance receipts going back ten years or so, including some from the mechanic who had done most of the work. Late in my first season, I called him up with a few questions. His reaction when I identified the boat: "Oh, that old rotten thing? I was just trying to keep the old man's dream alive."
It is a tribute to how well made these boats are that this guy did not have to make many ad hoc modifications.
It is a tribute to how well made these boats are that this guy did not have to make many ad hoc modifications.
Peter Schauss
Water-Lou
1978 B31 SF (BERG 1727M781-314)
Water-Lou
1978 B31 SF (BERG 1727M781-314)
Re: complete maintenance
pschauss wrote: His reaction when I identified the boat: "Oh, that old rotten thing?
See right there you should have known the guy doesn't know boats from his arse. A Bertram is never an "old rotten thing". They can be old for sure, they can be in disrepair without a doubt...but they are and always will be a Bertram.
That's why he was just fine with exhaust hose for the stuffing box hose...it "looked good"...it wasn't good, but it looked and played the part just fine in his eyes.

Re: complete maintenance
Carl,
Met a bunch of marine mechanics thru dealership training and seminars and a good portion of em didn't give a rats ass about boats or boating it was just a job.
Met a bunch of marine mechanics thru dealership training and seminars and a good portion of em didn't give a rats ass about boats or boating it was just a job.
Re: complete maintenance
100% agree you got to do what you got to do to support those children
capt.bob lico
bero13010473
bero13010473
Re: complete maintenance
Bruce wrote:Carl,
Met a bunch of marine mechanics thru dealership training and seminars and a good portion of em didn't give a rats ass about boats or boating it was just a job.
Your right Bruce.
Re: complete maintenance
like i said i have created a new method to a major maintenance problem. well well after an hour of inserting 7/16" x 4" bolts thru shaft coupling into transmission output flange and using a multitude of sockets as shims to go between the end of the shaft and output flange bolt to use as a driver with bolts on the flange as a means of compression the shaft came out of the shaft coupling then remove SS collar and carbon ring and finally PSS bellows ---------wow a split 180 degrees around !!!!!!!! the seal was spraying sal water but any longer and those bellows would have split in half and down she goes!!!!!! brothers this is not an 8 -year interval job to let got till next year.
capt.bob lico
bero13010473
bero13010473
Re: complete maintenance
Buck-Algonquin sells a flange puller which makes the task of removing the coupling somewhat easier.
Peter Schauss
Water-Lou
1978 B31 SF (BERG 1727M781-314)
Water-Lou
1978 B31 SF (BERG 1727M781-314)
Re: complete maintenance
do to a changed shaft angle and kevlar shaft log there is only a one
inch space to remove the shaft from the spilt -coupling, there is no way in hell you can install shaft removal tool i have10 THOUSAND PSI air impact removal tool at my deposal but does not fit.
inch space to remove the shaft from the spilt -coupling, there is no way in hell you can install shaft removal tool i have10 THOUSAND PSI air impact removal tool at my deposal but does not fit.
capt.bob lico
bero13010473
bero13010473
Re: complete maintenance
bob lico wrote:do to a changed shaft angle and kevlar shaft log there is only a one
inch space to remove the shaft from the spilt -coupling, there is no way in hell you can install shaft removal tool i have10 THOUSAND PSI air impact removal tool at my deposal but does not fit.
It would sure be nice if that shaft was fitted to the coupling and just tapped off with ease. Run it past B&S...
Re: complete maintenance
carl you know the gears and shaft are installed as one piece in my installation. the coupling was machined on the face to bore within .001 as well as output flange of the ZF-IRM-220a so the bore was also a nice slide fit but over a 15 year period rust enter the area between shaft and coupling. i removed rust and coated the bore with nuclear grade anti-seize lubricant (copper instead of nickel). using the propeller and weight of shaft as a ram from under the boat i just push forward with gentle back and forth action and shaft slip right in with no problem. needless to say the marine mechanic observed from outside of boat but said nothing so i bought him lunch.he know i don`t want his opinion and a slegehammer.
capt.bob lico
bero13010473
bero13010473

Re: complete maintenance
This is hilarious. It reminds me of the days when I hired union crews in rail yards to "help" (union boss lingo) with setting up a custom test vehicle. I would find something safe for them to do while we took care of business. Everyone was happy, but my crew were the only ones tired and dirty.bob lico wrote:he know i don`t want his opinion and a slegehammer.
1963 Bertram 25
1973 Boston Whaler 13 - sold!
1998 Scout 172 SF - beach taxi
1973 Boston Whaler 13 - sold!
1998 Scout 172 SF - beach taxi
Re: complete maintenance
Bob-bob lico wrote: coated the bore with nuclear grade anti-seize lubricant
First, I think you're great and you and your wife remain in my prayers.
Second, I don't have a spare nuke lying around to prove it to you but I am confident I could get sumthun' good and seized even with that lube.
Having done just what you described with one of my shafts you may wish to check the runout of the transmission output flange after this. Turns out I was able to put a 'lil wander in it. - It's still there of course but I measured it. Harry Babb was incredibly patient with me and fortunately just far enough from Rhode Island to tolerate my (mis)execution of his directions.
God bless,
Stephan

Possunt quia posse videntur
Re: complete maintenance
One piece ???bob lico wrote: carl you know the gears and shaft are installed as one piece in my installation.
I count 3 pieces.bob lico wrote: the coupling (1 piece ) was machined on the face to bore within .001 as well as output flange (2 piece) of the ZF-IRM-220a so the bore was also a nice slide fit but over a 15 year period rust enter the area between shaft (3 piece) and coupling.
But I see you had the coupling fit to the shaft and coupling was faced true to the shaft. Yup, even with a nice coat of neversieze I imagine a coupling can become a pain to remove after 15 years.
Yes, I am not one to pound on the shaft to get it into or out of the coupling...nothing good can come from that. That said we make nice big shaft knockers to pull shaft from coupling...I won't use, I won't recommend...but they do get the job done quick for some mechanics. One of the first boat shafts I made the guy came back as he couldn't get the nut on...coupling was tight, alignment was off and he used a sledge to get shaft in...the 2" thread and extension was shortened to under 1-3/4". What a mess... Wonder what the condition of the trans gears and bearing were...
Re: complete maintenance
carl the post should read gears,coupling,shaft installed as one unit. the shaft coupling is the split type that the machine shop installed a short section of 1 1/2" tool steel bar stock then tighten bolts and put in a Hardige lathe and made a cut across the face of coupling until dead square .001 runout. i did not use anti-seize I use light oil that came back to bite me14 years later.the marine mechanic said during lunch he would hit the coupling off with sledgehammer and if that don`t work turn shaft until keyway faces up then cut coupling with 'WIZER WHEEL" down to keyway and split in two then buy split coupling and charge double for coupling plus labor. this is the marine world today ,just does not pay to be a technician boat owners expect and will pay ridiculous bills because their boat is at that marina unlike your car that can be taken someplace else.
capt.bob lico
bero13010473
bero13010473
Re: complete maintenance
Understood on the installed as one piece.bob lico wrote:carl the post should read gears,coupling,shaft installed as one unit.
Unfortunately doing that takes a coupling that was dead on and introduces runout. When the couplings are made the bore and face are machined in the same setup perfect true and concentric. When you chuck up a piece of stock in a lathe...or hold in a collet it rarely runs zero. Even in my Hardinge lathe with 6 jaw Buck it takes some finessing and tweaking to get it right and its never as good as it comes from the factory. But its something we do on occasion to save a coupling that has been beaten or owner applied too much pressure trying to use as a puller to push shaft out...when the owner does not want to bring us the shaft.bob lico wrote: the shaft coupling is the split type that the machine shop installed a short section of 1 1/2" tool steel bar stock then tighten bolts and put in a Hardige lathe and made a cut across the face of coupling until dead square .001 runout.
Facing couplings should be done on your shaft after the shaft has been indicated in the lathe. The idea is that the slight bend in your shaft throws out the face of your coupling. So we mate and machined together as a set.
I have cut a couple couplings..its not fun.bob lico wrote: if that don`t work turn shaft until keyway faces up then cut coupling with 'WIZER WHEEL" down to keyway and split in two then buy split coupling and charge double for coupling plus labor. this is the marine world today ,just does not pay to be a technician boat owners expect and will pay ridiculous bills because their boat is at that marina unlike your car that can be taken someplace else.
Around here we have:
- some that do the socket press/puller trick.
- some that use a big slap hammer puller or whack the wheel hub.
- some that cut the coupling
- some that take a sawzall to the shaft and its out in 10 minutes flat.
Re: complete maintenance
carl this is my checking procedure; set up a .0001 increment drop indicator to check run out of output flange of ZF-IRM-220 next after shop surfaced the shaft coupling i place it on a granite micro flat with dial -indicator - dead nuts perfect so i assembled . Stephan i wish the hell i could find two products from the Shoreham Nuclear power house. the first is that anti-seize lube and the second was a product called SURFACE PREP. which has to be the best vinyl cleaner i have ever used. they had pipe from 1/16" ID to 4' id . exotic metals like Everdor up to 10" id . money no object inventory of metal stock.
capt.bob lico
bero13010473
bero13010473
Re: complete maintenance
bob lico wrote:carl this is my checking procedure; set up a .0001 increment drop indicator to check run out of output flange of ZF-IRM-220 next after shop surfaced the shaft coupling i place it on a granite micro flat with dial -indicator - dead nuts perfect so i assembled .
Indicator on output flange, perfect!
I chased a vibration on my last boat for way too long before figuring out it was a slight bend in the output shaft that had the output flange runout. The output coupling was dead on, but shaft was out. Surface grinding, fitting and lapping faces of flange to offset the shaft to near zero is not something I'd want to do again. But the boat finally ran without a vibration...they drive me crazy. The right thing to do would have been to pull motor and trans then replace the shaft...but boat was in the water, funds limited and pulling motor from that boat at that time a bit outside my level. Besides I like when two wrongs make a right...make two out of phase components 180 degrees gave near perfect results.
That brings me back to the shaft coupling...making it perfectly flat and 90deg is only half the equation. The other half is that the coupling be perfectly flat, concentric and perpendicular when assembled on your shaft. That is why we put our customers shaft in the lathe, indicate, assemble coupling with key on shaft, tighten clamping bolts and set screw and check that the face is true.
If not, we then give a skim cut to the face.
That being said, our shafts with slow reving diesels AND reduction turn so slow this extra step is really noticed if at all. When I had the 440 gas with 1:1 trans, 96" long shafts at 1-1/4" and no intermidiate struts...any component that was out a hair had me feeling vibrations. Usually a shaft like mine the .005 permissible runout was good, mine had to be .003 or under.
Re: complete maintenance
Carl and Bob,
After reading this thread from start to finish, I think that I have a clearer understanding of the process of fitting a coupling. Thanks for the clearly written, detailed explanation.
After reading this thread from start to finish, I think that I have a clearer understanding of the process of fitting a coupling. Thanks for the clearly written, detailed explanation.
Peter Schauss
Water-Lou
1978 B31 SF (BERG 1727M781-314)
Water-Lou
1978 B31 SF (BERG 1727M781-314)
Re: complete maintenance
glad we could share a little mechanical knowledge with you peter i want you to. think of the huge mechanical advantage a 20 ton house jack has by simply turning a little collar,unbelievable when you think of it. this is the same theory i use with three 4" bolts placed in the coupling with a socket for a spacer between the shaft (inside the split coupling and the large bolt in the center of the output flange of the gears). just tighten the three bolts evenly and the shaft will inch out of the coupling using the same theory as the house jack.like the old days college courses( Law of Levers ).
capt.bob lico
bero13010473
bero13010473
Re: complete maintenance
Just need to remember all that leverage from tightening the bolts is being placed on fairly thin, malleable cast iron flanges. Flanges that have holes poked through them. So if using the standard grade 8 fine thread bolts ( fine thread increase the leverage)...remember to use as many bolts as you can and tighten evenly using a criss cross pattern to disperse the load.
If you start reaching for a cheater bar...check and make sure your socket is sitting centered, on the shaft and not the counterbore of the coupling. Make sure set screw(s) ares loose and backed out of dimple, if yo have them, make sure clamping bolts are loosened...as your definitely at the point or bending the flanges. So when done...check them for flatness.
If you start reaching for a cheater bar...check and make sure your socket is sitting centered, on the shaft and not the counterbore of the coupling. Make sure set screw(s) ares loose and backed out of dimple, if yo have them, make sure clamping bolts are loosened...as your definitely at the point or bending the flanges. So when done...check them for flatness.
Re: complete maintenance
A very dear friend had told me I could tap some flat head screwdrivers in to the slots on the sides of the coupler to relieve the pressure on the shaft as I was driving it out.
I also have confirmed never to use stainless bolts for this process the weld themselves together quite readily.
I also have confirmed never to use stainless bolts for this process the weld themselves together quite readily.
Possunt quia posse videntur
Re: complete maintenance
Stephan- your friend would be 100% correct. A pair of screwdrivers get tapped into slots to install and remove. When I fit coupling, that slotted area will slide on and off easily. But the slots only go so far, then it's an interference the rest of the way. I strive for size to size to a few tengths clearance so with key it's a light tap on or off.Stephan wrote:A very dear friend had told me I could tap some flat head screwdrivers in to the slots on the sides of the coupler to relieve the pressure on the shaft as I was driving it out.
But as Bob mentioned if your light coating of marine grease or never seize washes away...a little moisture between coupling and shaft will cause rust...rust expands and makes for a tight fit. So coat the two surfaces and consider pulling once every few years just to keep free of rust and checking alignment is good from time to time. It takes me more time to find the tools then to remove the couplings.
Once again you are correct, SS of SS can be a bad idea, especially when both are the same grade(alloy). They seize together like nobodies business, in the machinist world the term is galling. Metal starts ripping and pulling away from both sides and gets picked till you can't go forward or backward.Stephan wrote:I also have confirmed never to use stainless bolts for this process the weld themselves together quite readily.
But you shouldn't be using SS anyway as most commercial grades are not as strong as a grade 8 bolt. It's nice they won't rust as easily, but loses if they shear.
-
scot

- Senior Member
- Posts: 1470
- Joined: Oct 3rd, '06, 09:47
- Location: Hurricane Alley, Texas
- Contact:
Re: complete maintenance
An old boat mechanic told me to install a 1/8” thick washer inside the coupling, between the shaft end and the transmission companion flange. The logic behind this is that the end of the shaft end flares slightly at the flange connection from the thrust loads. This slight (thousandths) flare is what locks up the shaft in the coupling. I did this on my last boat, when I removed the coupling it came right off after a few years of use, it was not a split coupling.. I will do this again when my current shaft and coupling is installed. The washer should be slightly less in diameter than the shaft and fit into the coupling bore and of course be stainless.
Made sense to me, and it worked for me.
Made sense to me, and it worked for me.
Scot
1969 Bertram 25 "Roly Poly"
she'll float one of these days.. no really it will :-0
1969 Bertram 25 "Roly Poly"
she'll float one of these days.. no really it will :-0
Re: complete maintenance
Scott- If your shaft is moving around in the coupling enough to flare the end of the shaft...you have a whole lot problems. Not to mention I usually setup end of shaft flush with couplings counterbore.
Re: complete maintenance
That was you on March 5, 2013. Thanks again....your friend would be 100% correct.
http://bertram31.com/newbb/viewtopic.ph ... t=+coupler
Kind Regards,
Stephan
Possunt quia posse videntur
Re: complete maintenance
...your friend would be 100% correct.
Stephan wrote: That was you on March 5, 2013. Thanks again.
http://bertram31.com/newbb/viewtopic.ph ... t=+coupler
Kind Regards,
Stephan
LOL...well then I guess you know I stick to my story.
That was awhile ago...huh...2013 sheesh, where does time go.
Who is online
Users browsing this forum: Bing [Bot], Google [Bot] and 312 guests